
Since it is Sunday today, I decided to take things a little easy, so the first task was one that I could carry out sitting at the kitchen table.
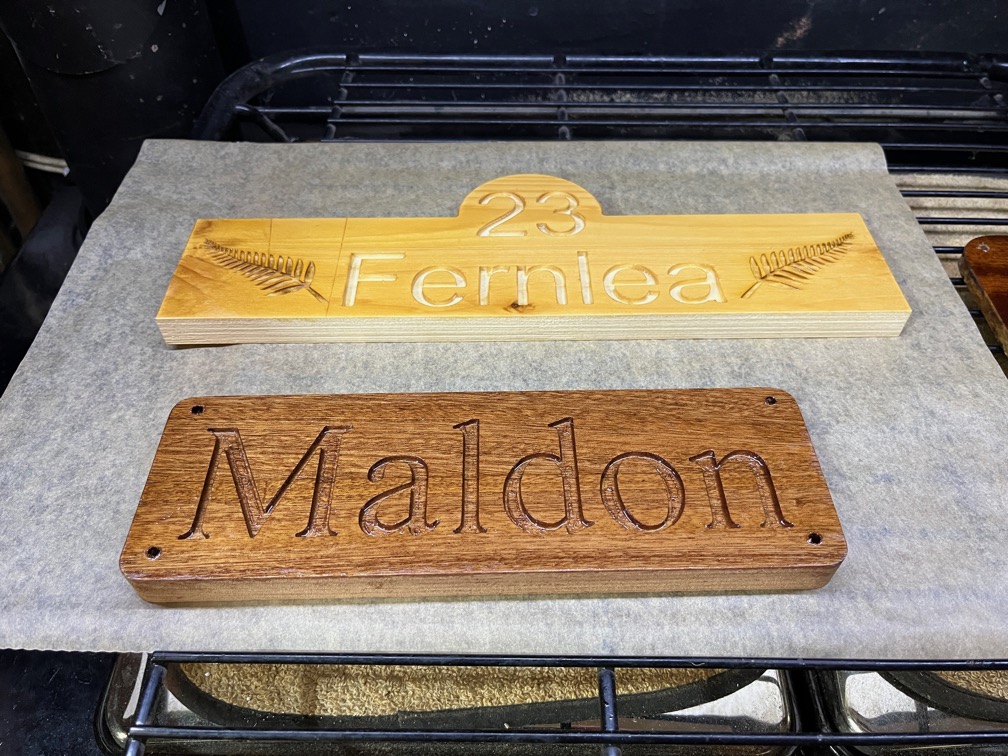
I had two signs that needed to be coated with epoxy to prevent pigmented epoxy bleeding into the grain later, so that was the first task. One of the signs is the Maldon name plate and the other is a house sign commissioned by a customer.
It is also the First of March and time for a little thought about the upcoming tasks. Despite having cracked on with many jobs including the major task of getting the centerplate case repaired, there are still quite a number of tasks that need to be done by the end of the month if at all possible. In no particular order, these include:
- Finish and mount the name plates.
- Finish the aft deck repair.
- Fit the transom rubbing strake.
- Rebuild all the bulkheads and lockers dismantled in order to work on the centerplate case.
- Refit the sole boards in the cabin.
- Refit the bottom boards in the cockpit
- Paint the new wood inside.
- Refit the bunks and thwarts in the cabin.
- Refasten the ballast battens.
- Sand and paint the coachroof.
- Sand and paint the deck.
- Sand and paint the topsides.
- Scrape off all the old cracking antifoul.
- Apply new antifoul.
- Build a gantry crane.
- Fit battery into its locker.
- Move Naiad onto the working trailer and Shoal Waters onto the travelling trailer.
- Carry out a leak test.
- Add cleat to boom for luff reefing lines.
- Stow the new anchor chain.
These are the main tasks, each of which may be made up of several sub-tasks. Like I said, still a lot to do. The most important of these is the leak test and for that I need the gantry crane.
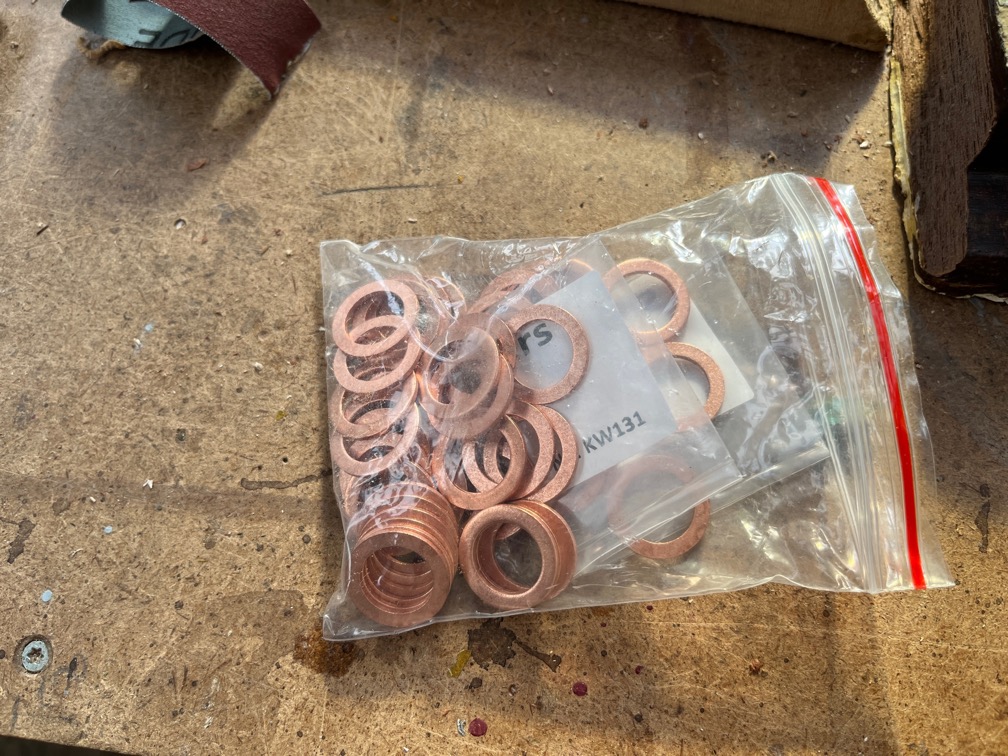
These arrived yesterday, the copper washers for the rudder fittings.
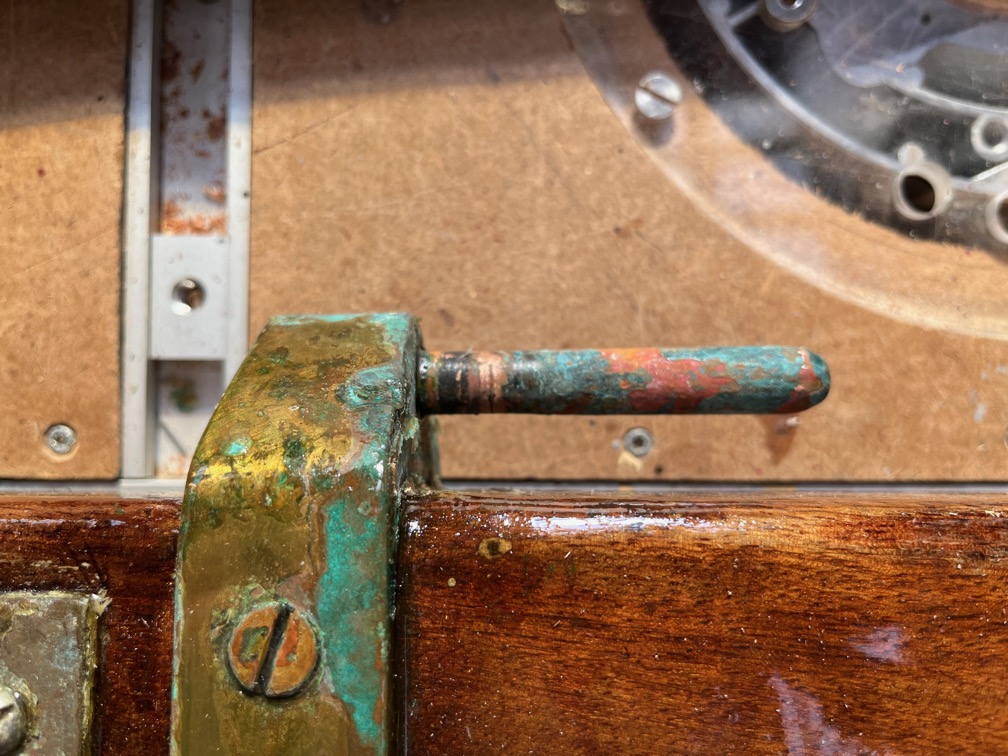
It turns out that what I thought was old copper put on to make the pintle fit in the gudgeon, was, in fact, nothing more than thin string wound around the pintle and glued applied to keep it in place.
The problem is that it made the diameter of the pintle too large. I took it off and measured the pin and hole diameters and found that there is a 1mm difference which makes the pintle rock and click in the gudgeon when in use. I decided to try something else. I ordered a small piece of copper sheet a mere 0.5mm thick and from this I will make a small cylinder that fits around the pintle. You can see that the pintle is narrowed a little at the top (the left hand end in the photo) and the gudgeon is worn as well.
Now I could try putting string & glue on again, but getting the fit correct that way is not easy. With the copper sheet, if it is too thick, then I can hammer it with a soft mallet to thin it down a little. I will use a little glue to stop the cylinder from falling off and some on the washers for the same reason. I could have bought a bronze sheet and cut washers and made a cylinder out of that, but I chose the copper for two reasons. Firstly, it is softer than the bronze fitting and so it will wear away instead of the fitting. Secondly, it is so very much cheaper.
Once the copper has worn away and needs replacing, well, I have the washers and the sheet to make the repair easy.
The next task was the graving piece for the aft deck.
The rubbing strake was removed and all the exposed plywood edges on the deck and the graving piece were coated with neat epoxy. Some of the remaining epoxy was used to coat the small soft area on the port bow and also the worn areas on the rudder blade. The rest of the epoxy was thickened with wood fibres and spread on to the edges of the aft deck.
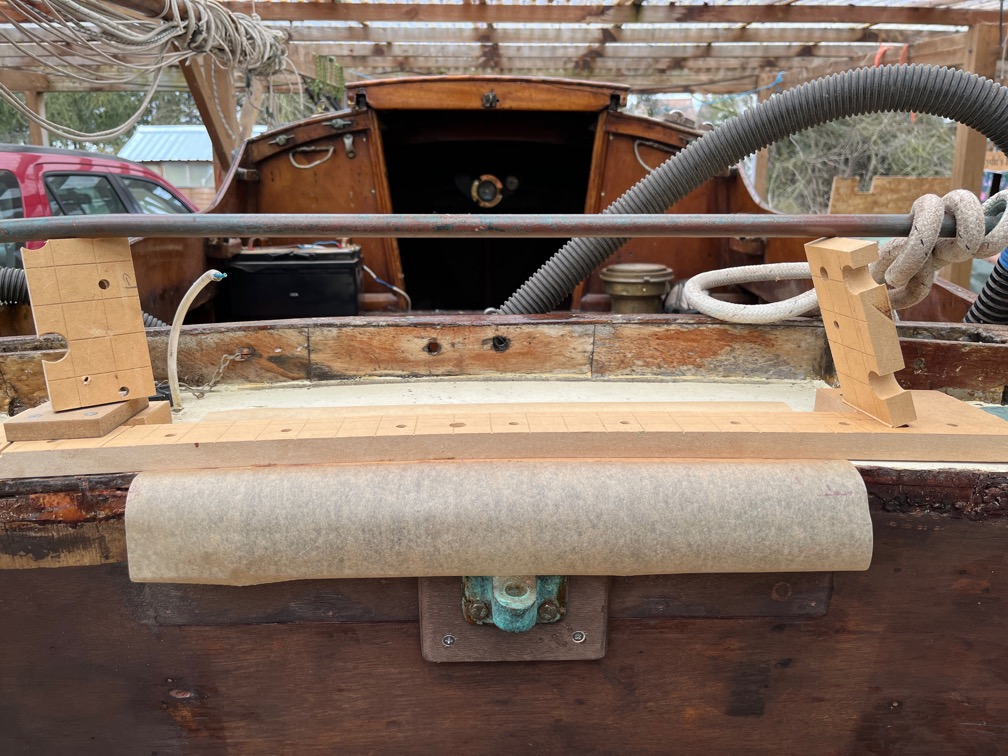
The graving piece was put into position, epoxy used to fill the semicircular cut out in the aft deck, the area covered with greaseproof paper and the whole lot pressed down using the router template from before.
I used the fast hardener since I want this to kick off before the temperature drops too much, it was 12º C at the time, so that should be sufficient. I’ll see tomorrow when I take the clamp off and inspect the result.
That was all the tasks I planned for the day, anything else done today will be a bonus. I will let the SikaFlex on the centerplate case sit for another day or two, the spec sheets says that it should be fully cured in a couple of days, but that also means not being able to work on anything in the cabin.
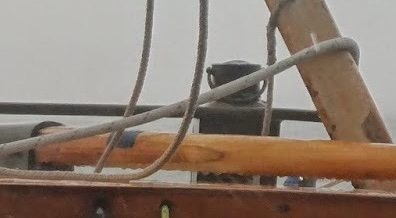
There are a few small tasks that need to be carried out and the mount for the aft navigation light is one.

Here are the old (left) and the new mounts. The large base for the original mount was large because the original aft light was also large. A huge copper navigation light that must have been six to eight inches tall.
Here is a clip from an older photo showing the huge light on the aft deck.
However, a few years ago this was replaced by a small and more modern stern navigation light that you can see between the two mounts but the existing mount was only changed enough to suit the new light.
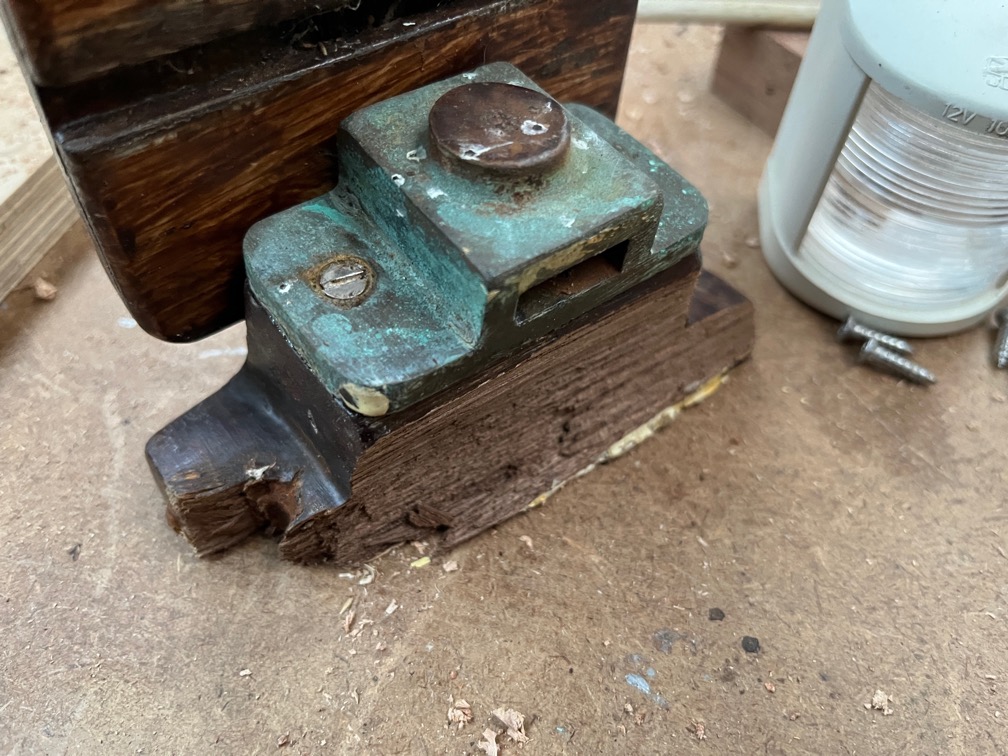
This is the reason for the replacement, the old one had to be broken off as the screw head disintegrated as it was originally brass. Unfortunate as there was nothing wrong with the mount itself, but I needed it out of the way in order to cut the aft deck back with the router.

Here are the two pieces of the new mount hanging in the workroom with a coat of varnish. As usual, these will get at least four coats before being mounted on the aft deck.
Time for a cup of tea.