
Having found yesterday afternoon that the light faded too fast after work to get anything significant done inside the cabin without interior lights, which I haven’t installed yet, I did some work during my lunch break.
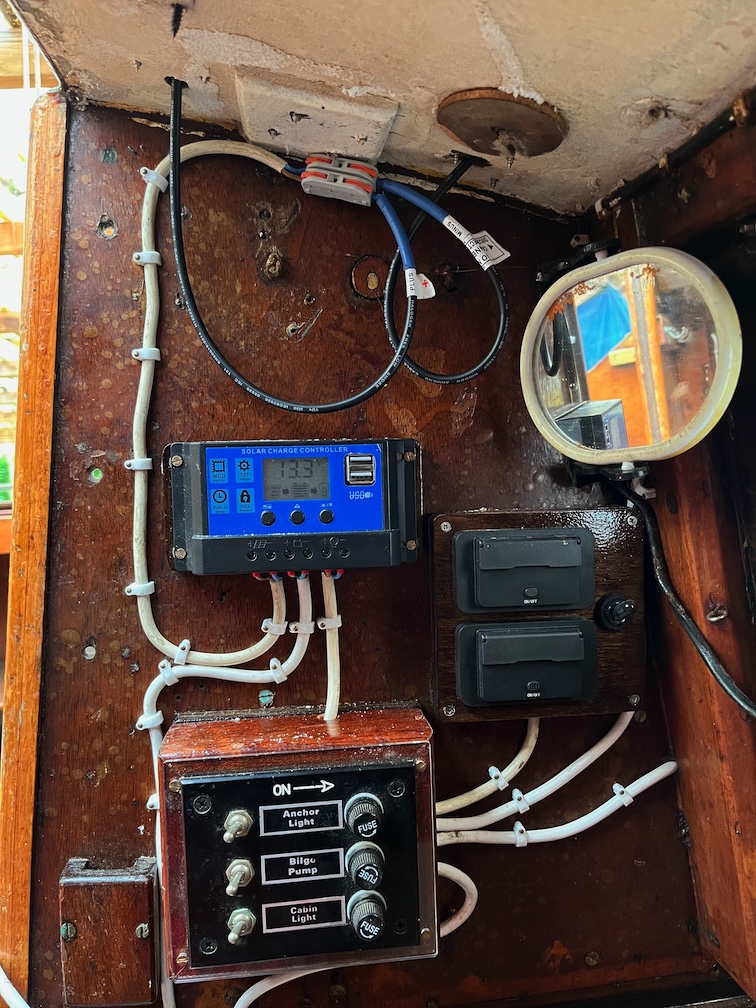
I ran the white cable for the solar panel and clipped it into place. Since the black cables are very stiff I think I’ll not bother to cut them any shorter than they are now, they will not go round a much tighter bend than you see in the photo, and use the cable clips to hold them against the upstand pretty much where they are now. I have some clips that open and close and I may try to use these for the black cables since I’ll need to take the solar panel off periodically and using the nail-on style of clip is not suited to that type of use. The disadvantage of the reusable clips is that the stick on rather than screw on and that might not be a good solution here. I’ll have to see if I can screw them in place anyway.
Some time later…
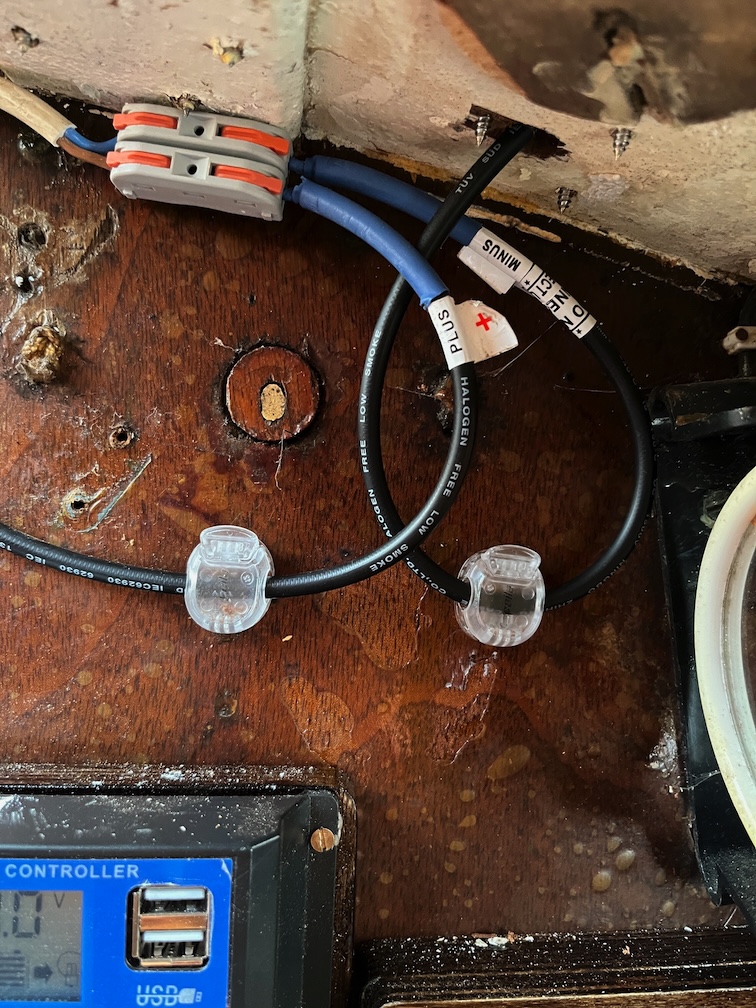
Well, the answer to that question is yes, I can. The double-sided tape on the clips held them in place and then I could screw them to the upstand without having to try and hold them in the correct position at the same time as trying to screw them in.
Mind you, I did have to drill a suitable hole in the bottom of the groove in which the cable runs, but that was not difficult using new, sharp bits and a drill running at a slow speed.
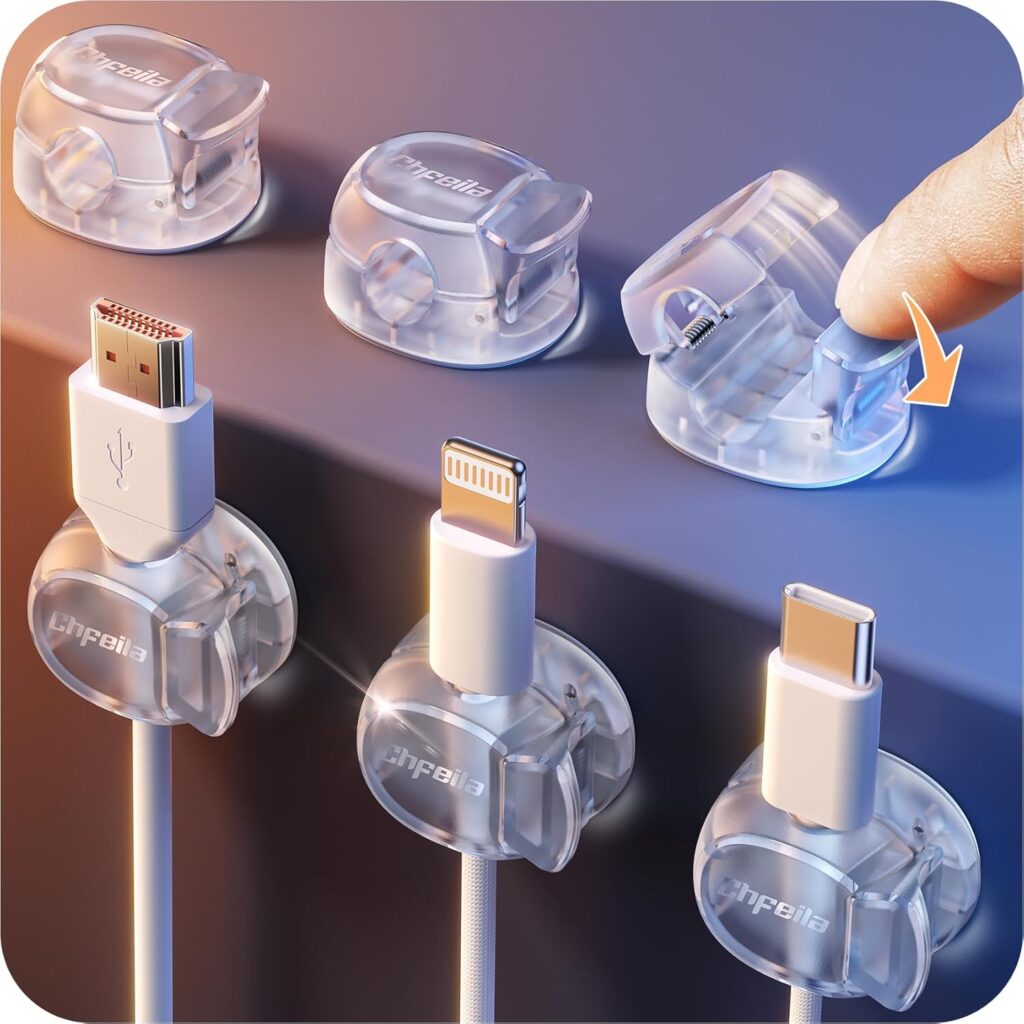
These are the clips I used. they are called Chfeila clips and I bought them from Amazon I have used them in a couple of places in the workshop now and find them very good. They seem to stick quite well in the dry workshop, but I wasn’t sure that they would in a marine environment, hence the screws. I used bronze screws for the job and that seems to have worked well. I’ll be using these again. One place where it is exceedingly hard to hammer in the normal cable clips is under the bridge deck and I’ll be able to use these for the compass light cable which I have removed.
The next task is to mount the first main cabin light. This will be sited in the centre of the cabin top width-wise and just forward of the companionway. The issue here is that there is a narrow beam running fore and aft, so the light will have to be offset slightly otherise the light and heads will meet in the middle !!!
I’ll need to make a base that will allow the light to be screwed to the underside of the coachroof..
So, armed with light and calipers, I made various measurement and then drew out the required parts on the CAD program.

The drawing for this simple shape takes less than ten minutes to create and once that has been imported into the CAM software and the code for the CNC Router done, another ten minutes, I’m ready to cut.
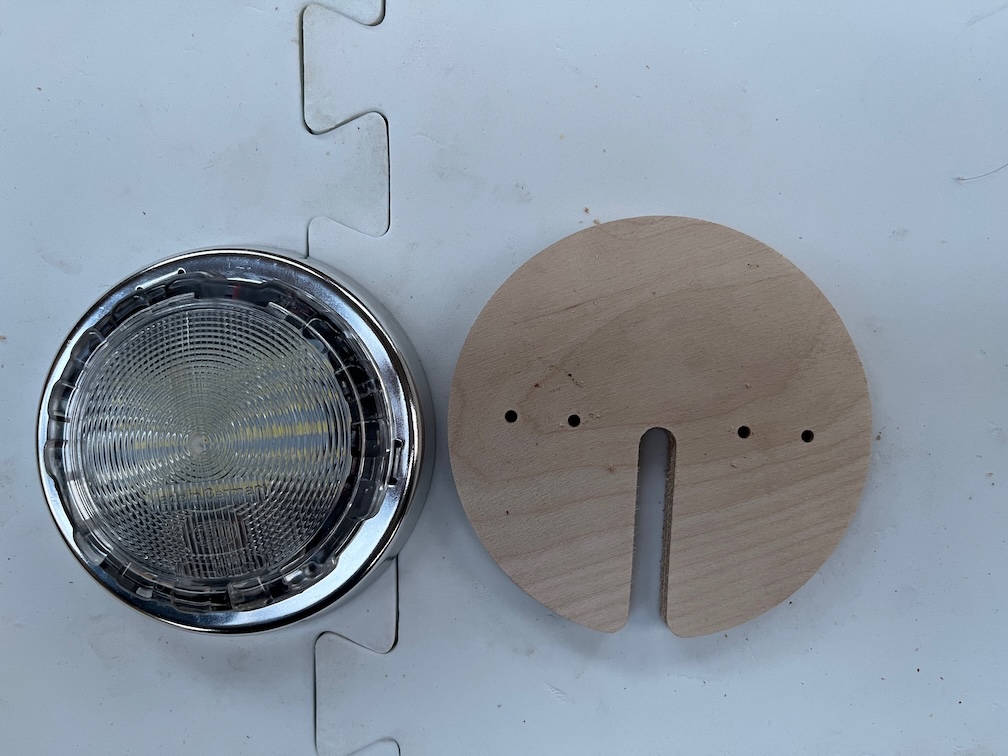
I’ve cut this out from 9.5mm thick Baltic Birch plywood on the CNC Router, around fifteen minutes to set up and cut out. I do like these CNC tools, they save so much time. Now I’ll be able to install the first light in the cabin, probably tomorrow. The two outer holes are for the screws holding the base to the cabin top which will be screwed in from outside, and the inner two are for the screws holding the light to the base.
If all goes well I should have light in the cabin sometime tomorrow.
Time for a cup of tea.