
Since the source of the leak is not obvious, the next step was to remove the outer backing pad to see what was under it.
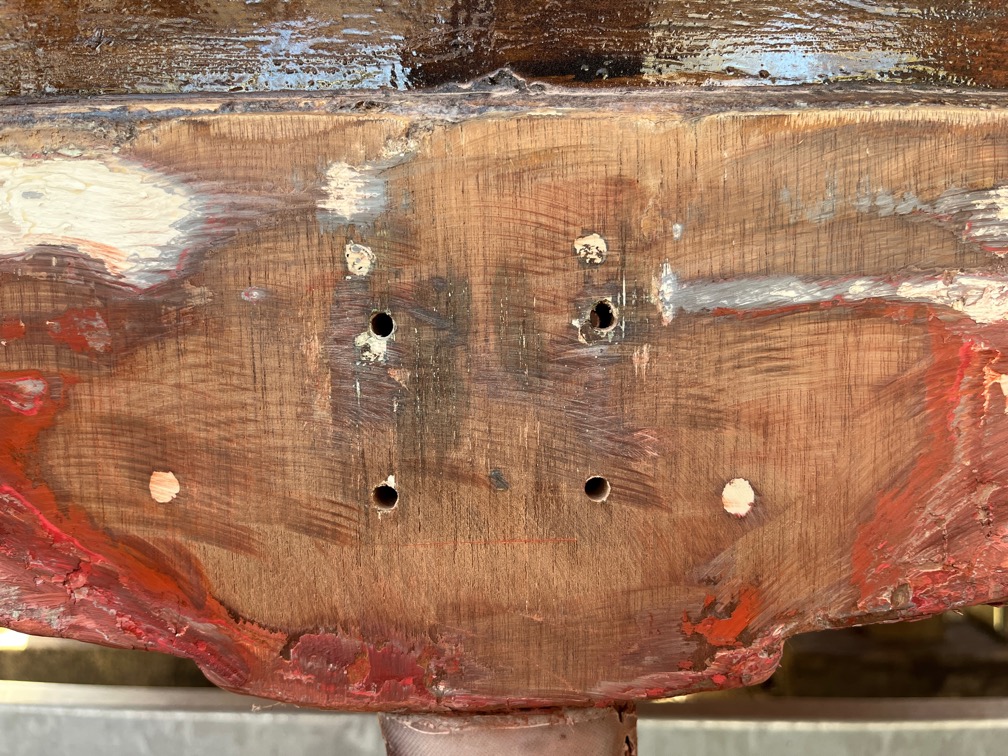
Firstly, I used a sanding disk to remove the antifouling paint from the pad. This revealed four fixings and the two old, plugged fixings.
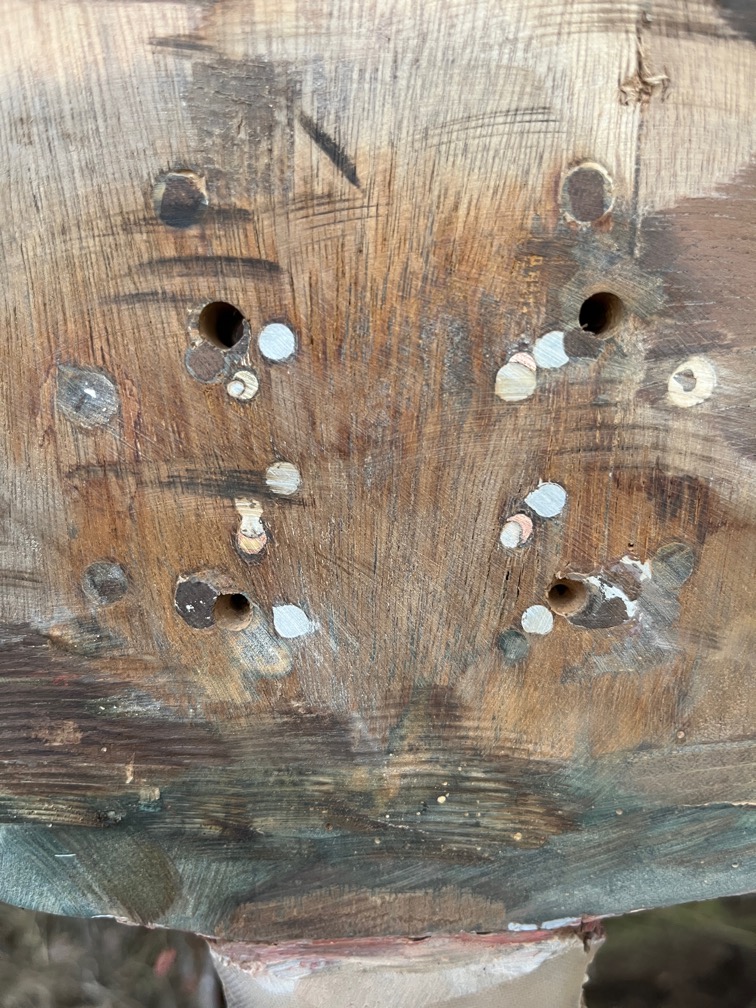
The screws, stainless ones, were removed and the pad removed in pieces using a chisel, followed by the sanding pad. Here it can be seen that the pintle has been positioned five separate times, there are 16 plugged holes and the four current ones . The old holes have been plugged and there is no obvious leak.
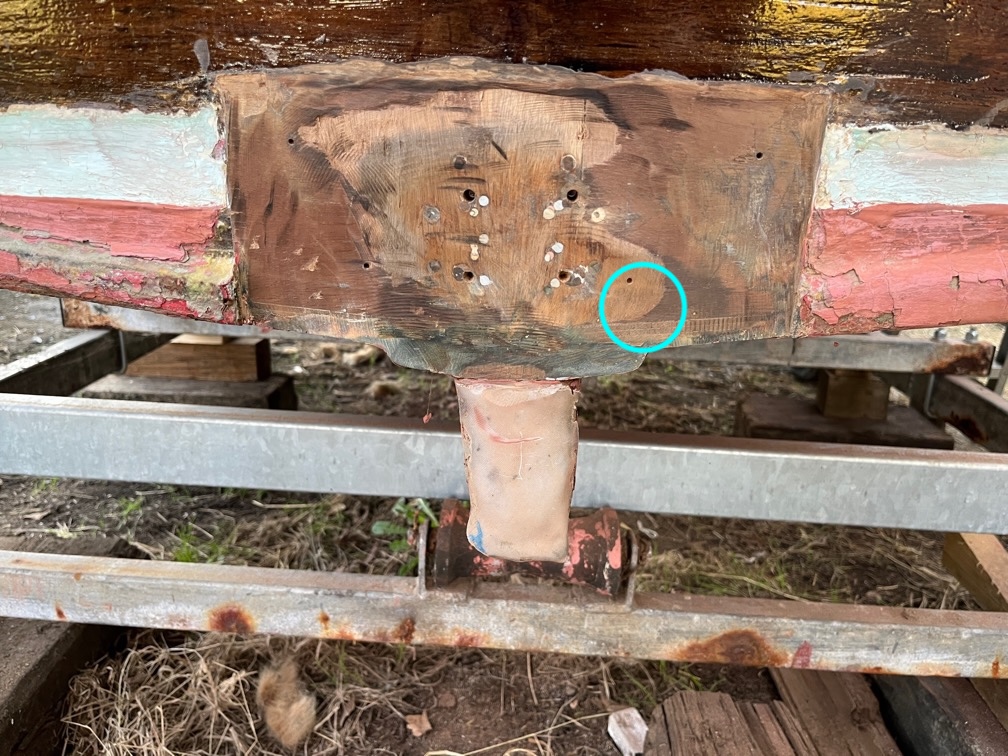
The leak on the inside is shown by the cyan circle on the image, and although there is a fixing hole within this area, it does not appear as though there is a leak here.
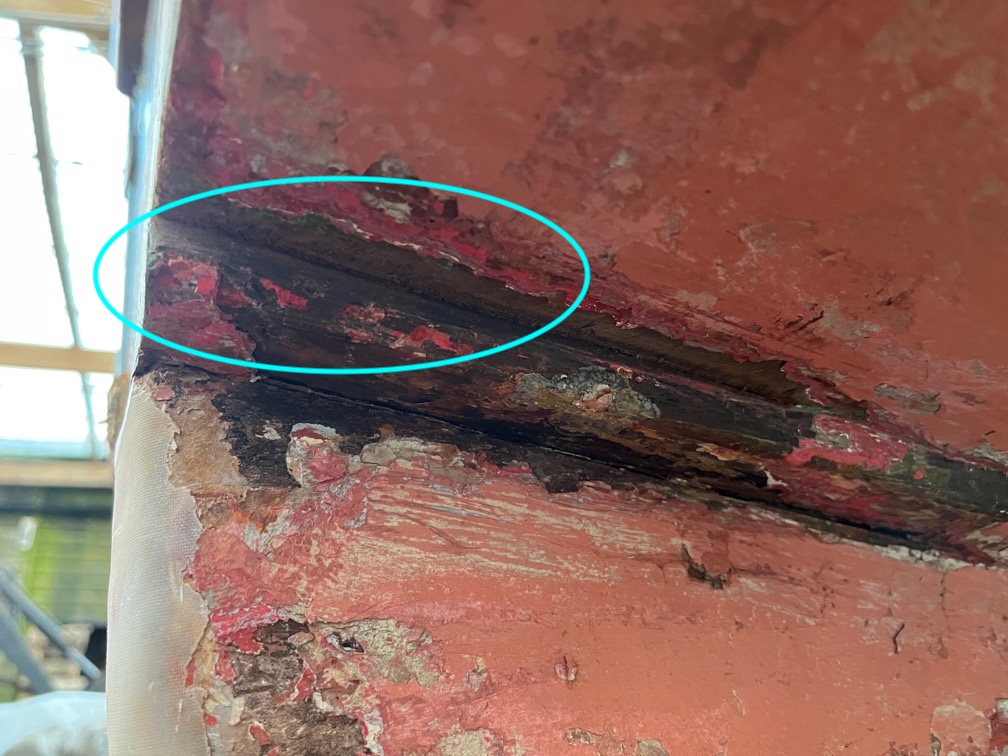
I took a scraper to the antifouling paint on the join between the hull planking and the keel and found that there is a definite gap that you can see highlighted in the image above. It does not appear to be on the other side of the keel and I will have to remove more of the antifouling along this seam to find the extent of the crack. However, there is a very good chance that this is the source of the leak.
If the crack does not extend any further, then the fix will be to open the crack slightly by cutting a chamfer on the keel and then paying this with SikaFlex. If the crack is longer, then it might require a glass fibre tape to be epoxied over the crack.
Whatever the method of the fix, the outer pad needs to be replaced and the pintle refitted. Given the various constraints it may not be possible to move the fitting up such that bolts can be used. If screws are used then they will need to be longer than the previous ones and well sealed.
Time for a cup of tea.