
The aim of the next few days and the weekend is to complete the build of the port side of the centerplate case and, if time allows, cut the aft block below the soft section.
The remaining part of the case side is the forward end and this needs to match the case side that has already been built.
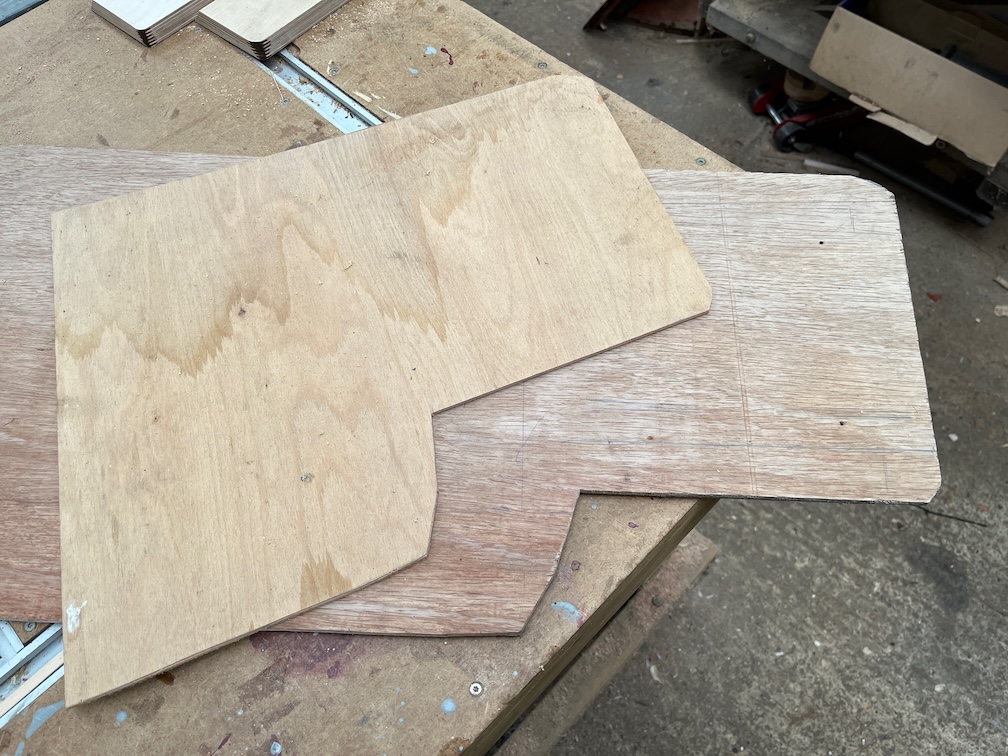
I cut a matching end out of a scrap of plywood so that I can offer this up to the slot and block in the hull and make sure that it fits.
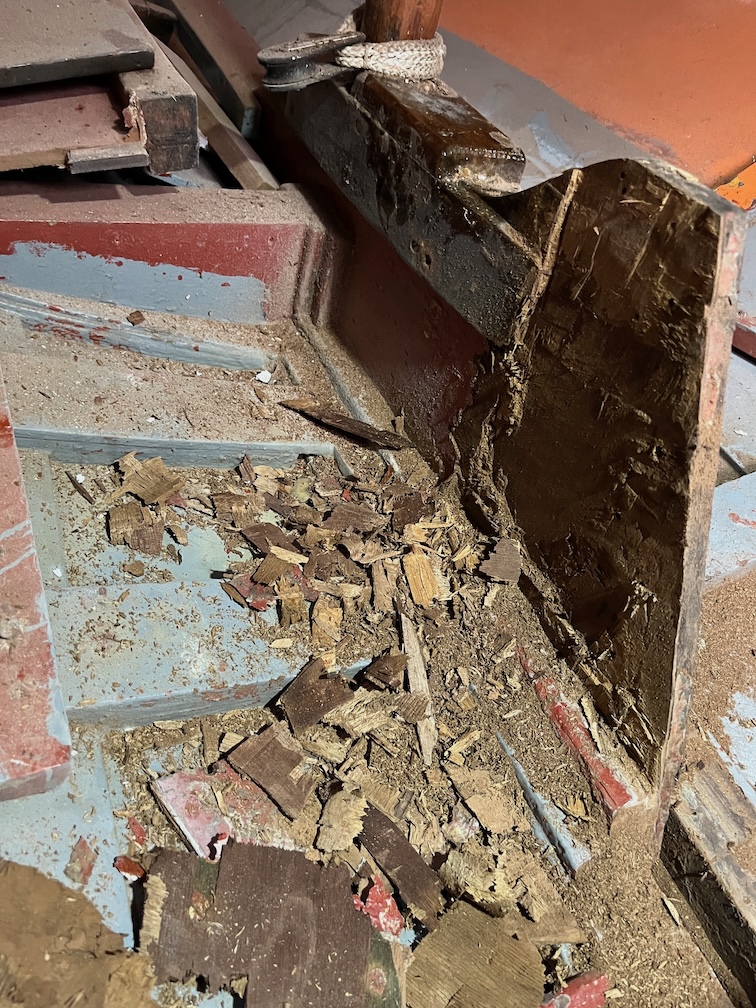
The it was a case of cut and chisel off, rinse and repeat.
However, when I reached the forward part of the section to be removed I found that the plywood was still quite soft and fibrous, or the middle veneer was. The outer veneers remained hard.
So I cut some more off until I reached plywood whose middle veneer was not soft. However, the problem, the second major issue, is that the plywood under the mast step part is soft and that means that the curved section of the step will need to be removed to see how far that soft plywood extends.
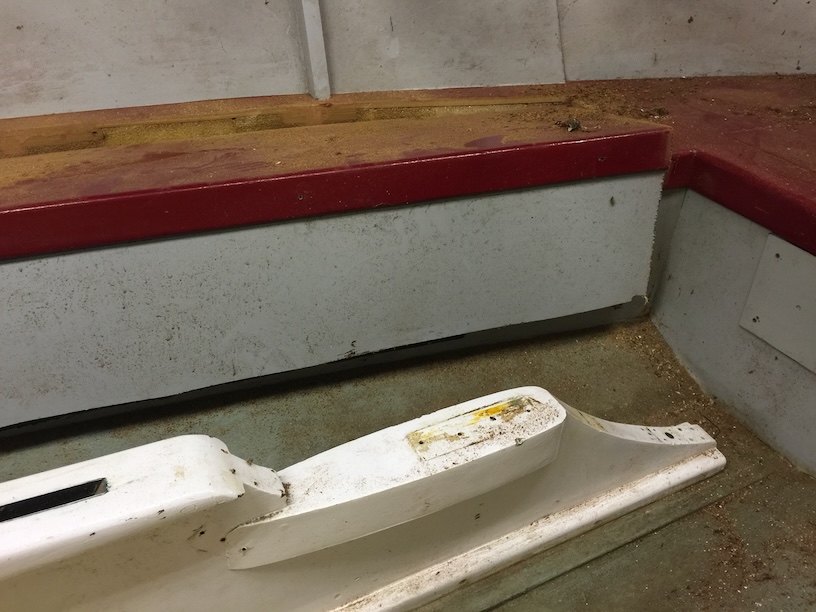
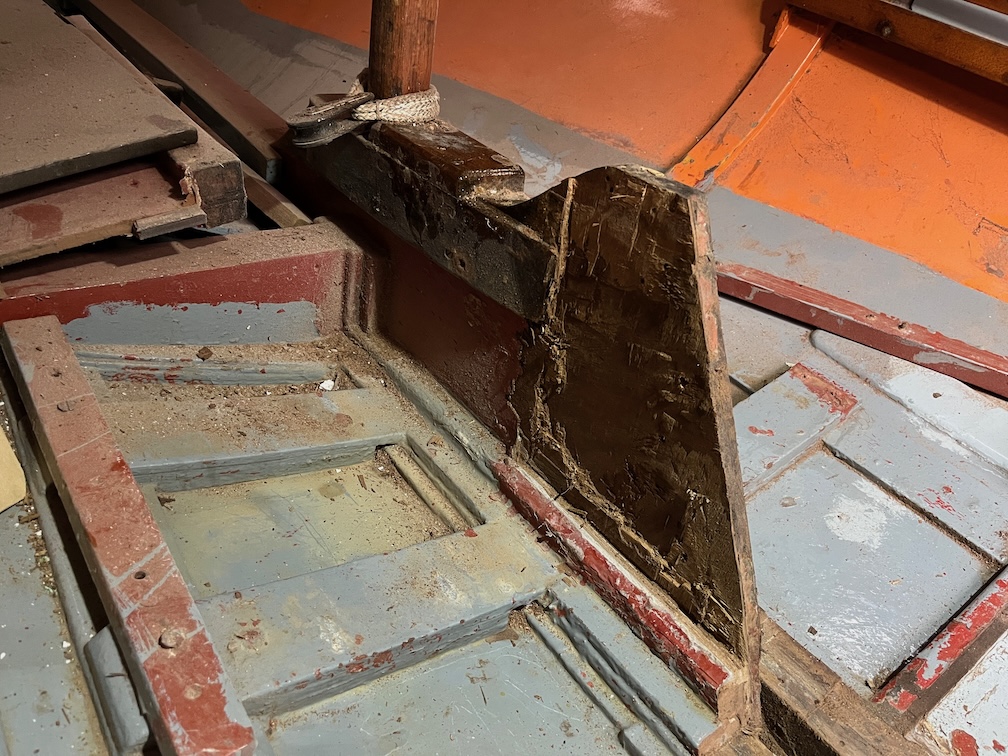
The curved section, seen here in Naiad, is not a single piece on top of the forward block, but two curved pieces screwed and probably glued to the sides of the block, so the removal should just be a matter of getting the brass screws out and cracking the joint along the glue line.
Should be. It remains to be seen if this is really the case.
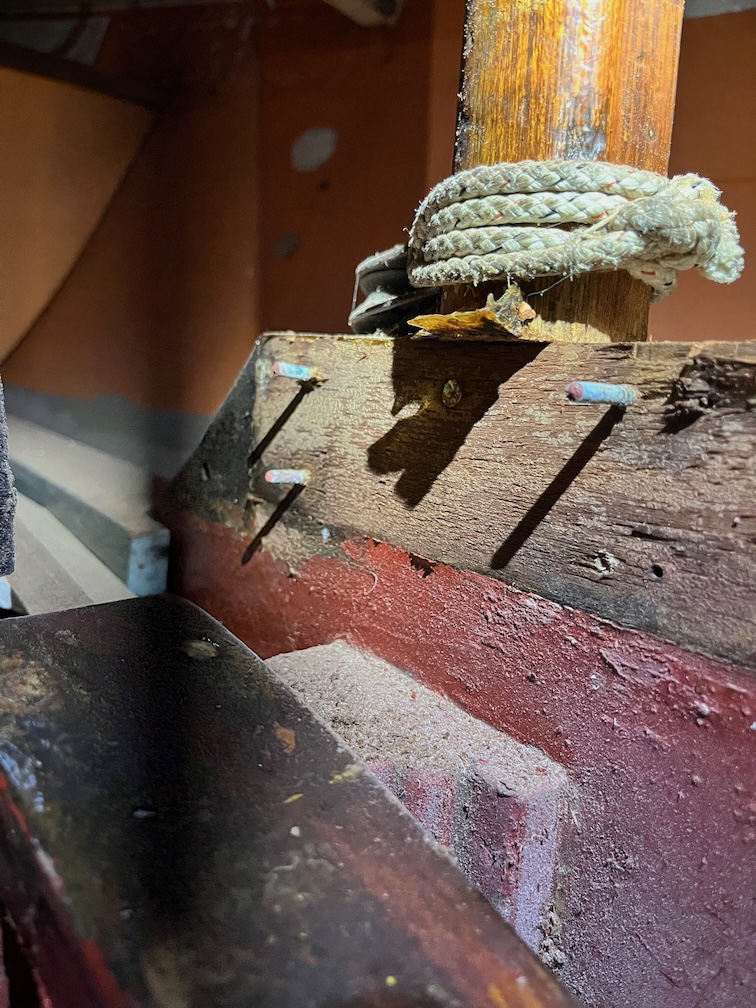
The problem will be if the compression post is fixed to the mast step with screws. There is a stop block aft of the post to stop it from being pulled aft by the centerplate uphaul and I expect that this will need to be removed and it looks like the screws holding it in place may go into the curved pieces.
Once that is done then I’ll be able to take a closer look at how the compression post is fixed. The forepeak light is not installed yet so this will mean using a head torch to illuminate the area. It is also quite cramped up there, so working in that area will be restricted to short times so as to avoid cramps.
Time for a cup of tea.
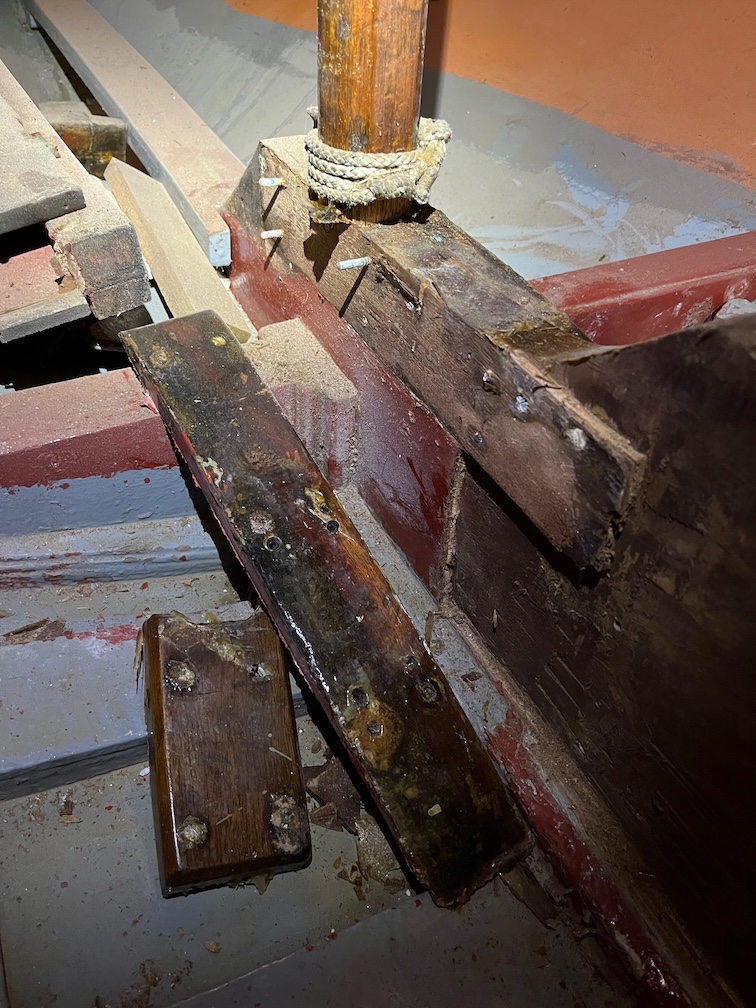
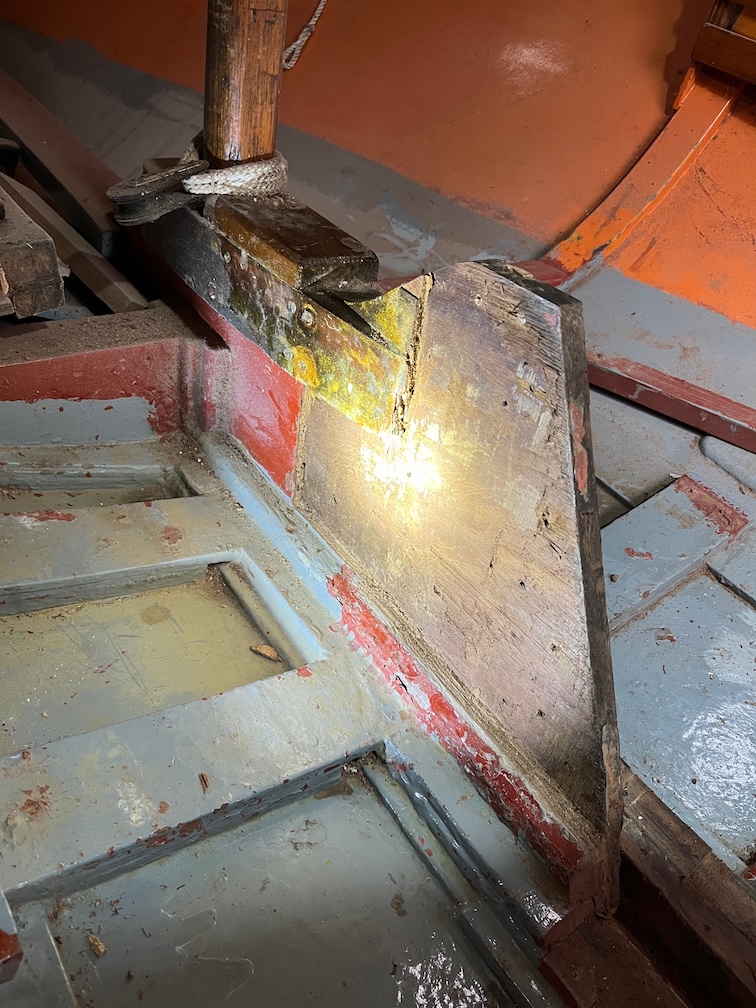
Both the stop block and the port curved piece came off fairly easily. The brass screws in the top piece snapped off as did the ones in the curved piece but that also had four stainless screws that had to be unscrewed first. I took a look at the starboard side and that has the same four stainless screws. I presume that one of the previous owners noticed that the brass screws had disintegrated and added the new ones.
Three of the brass screw stayed in the centre block with just the heads snapping off on removal.
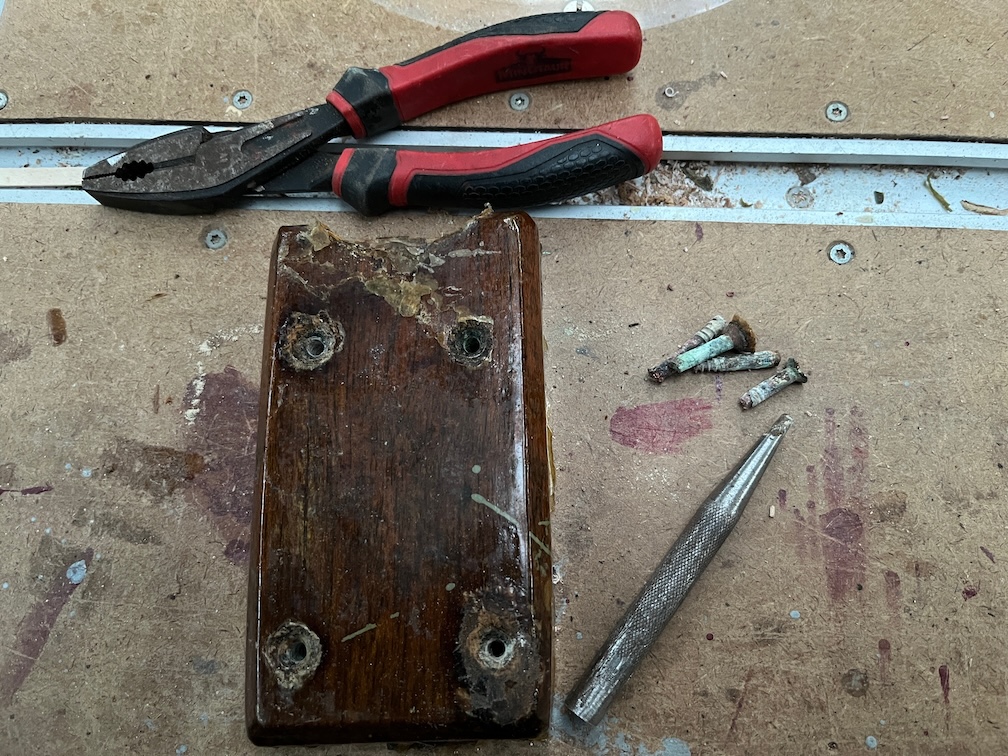
The brass screws in the stop block were punched out a little with a drift and then pulled out with pliers.
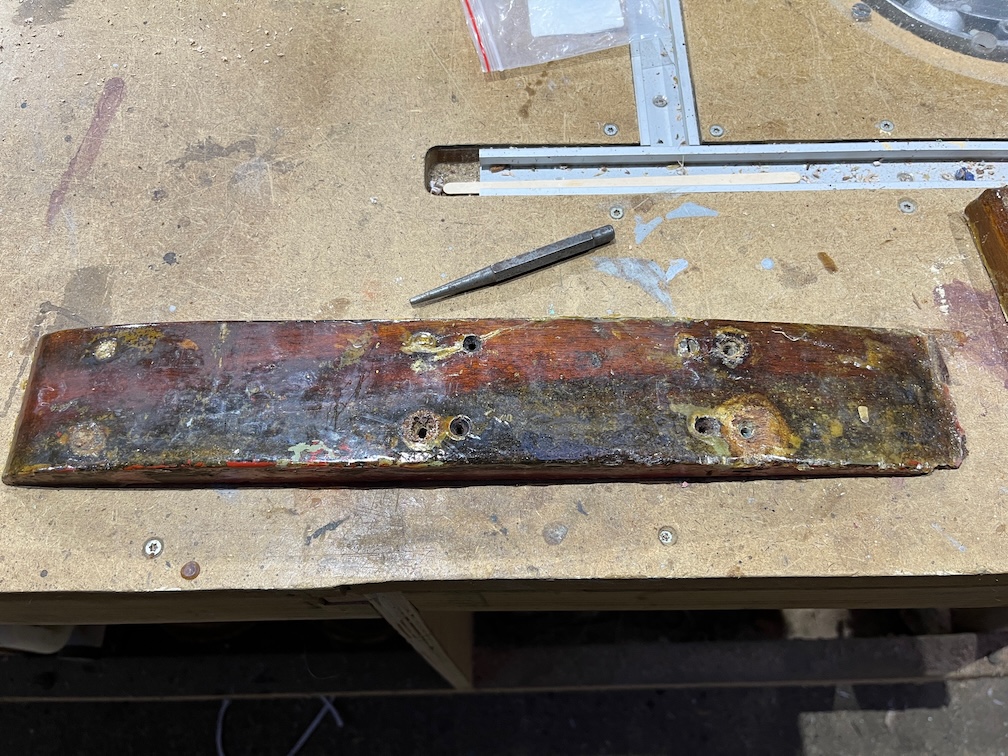
I needed to use a thinner drift for the screws in the curved piece, but they all came out without problems.

After that I carefully cut back the original plywood until I found a good inner veneer.
Given how easily the curved piece came off on the port side, I think I shall do the same for the starboard side and check the plywood under that. In both cases any gap between the new case sides and the original plywood will be filled in with marine plywood although I think I shall soak the edges of the original plywood with Clear Penetrating Epoxy Sealer, just to be on the safe side.
I will sand down the removed pieces, fill in the holes and drill new ones for the new screws as they will need to be in different locations so as not to foul the bits of the brass screws that remain in the block. I’ll probably just use thickened epoxy to fill the old screw holes rather than drill out the holes and plug them. It will not look as good but that part is rarely seen, so it will not matter.
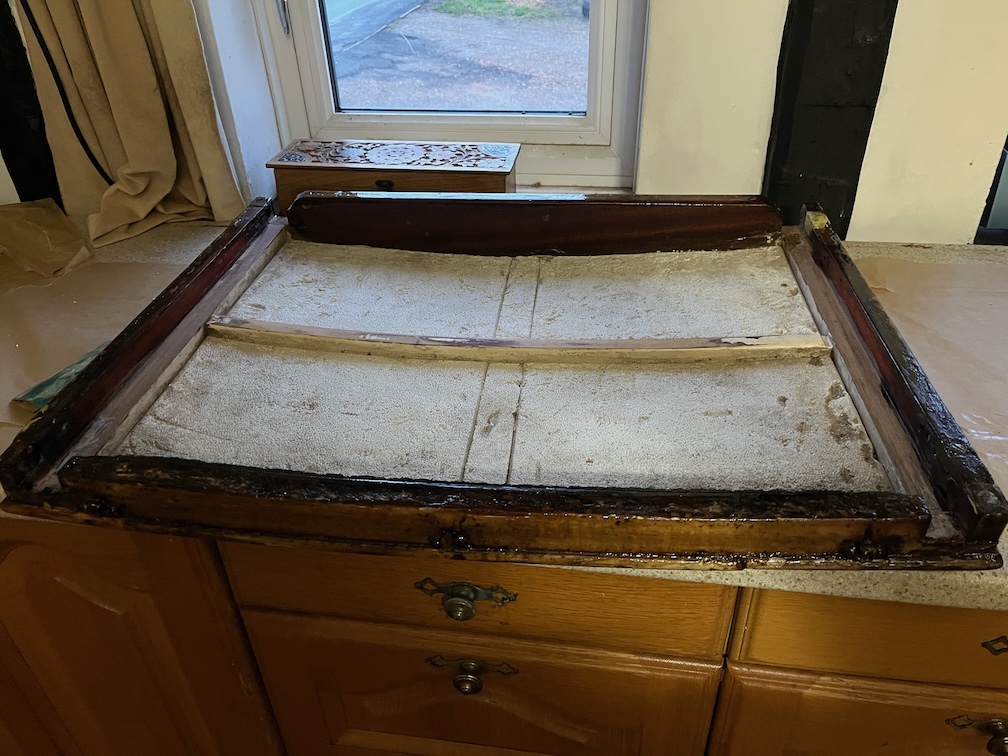
That was it for the outside work for today, inside I turned the hatch over, which has been coated with four coats of varnish on the top and sides, sanded and varnished the bottoms of the sides. To prevent the new top surface from being marked I put a towel under the baking sheet which also serves to stop the hatch from rocking as I varnish.
All in all, a good day’s work and not so much of a major issue after all.
Time for a cup of tea.