2026-01-18 – Runners and Case Side

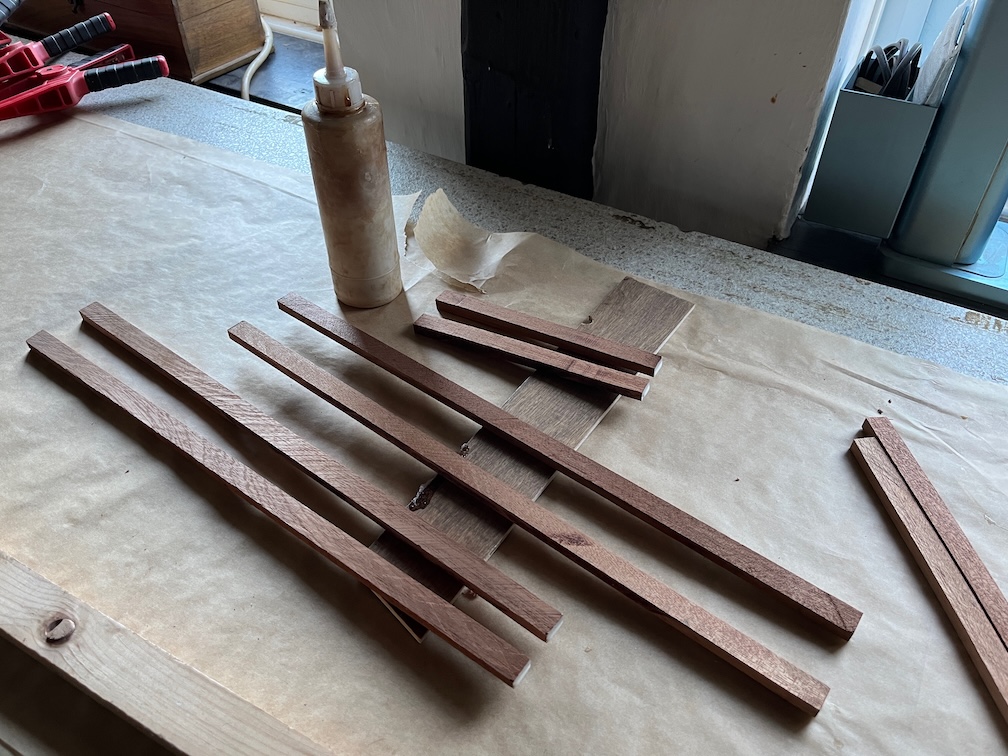
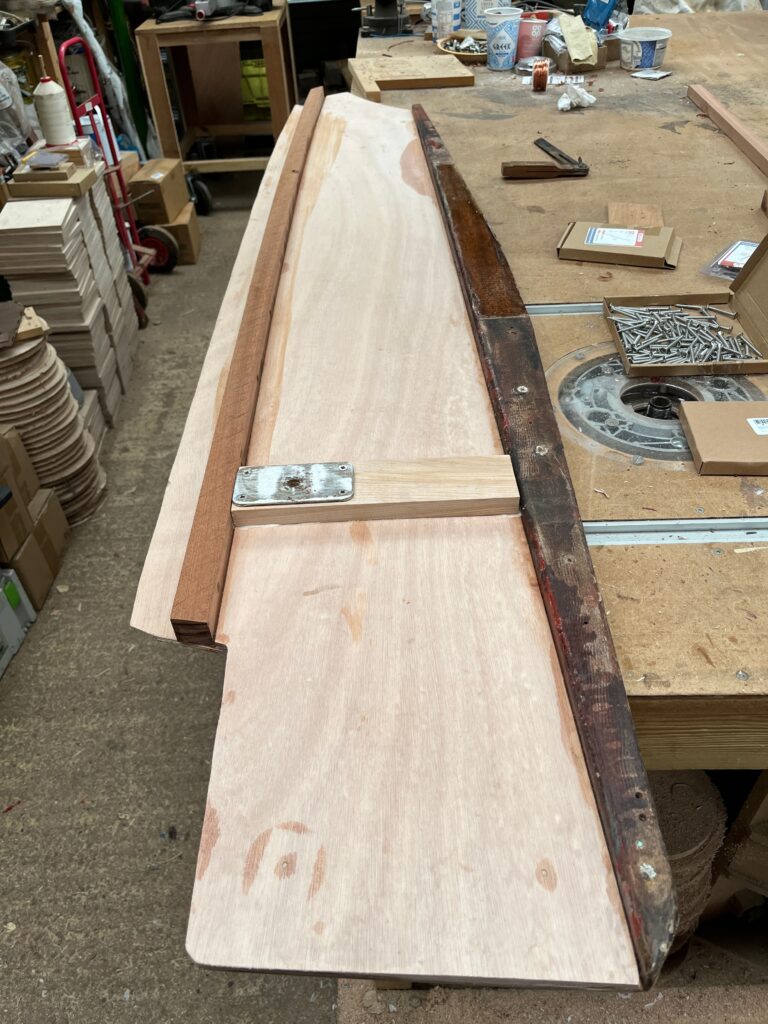
The first task of the day was to get the top runner underway since that needs to be left alone for several hours. So I made a start before breakfast.

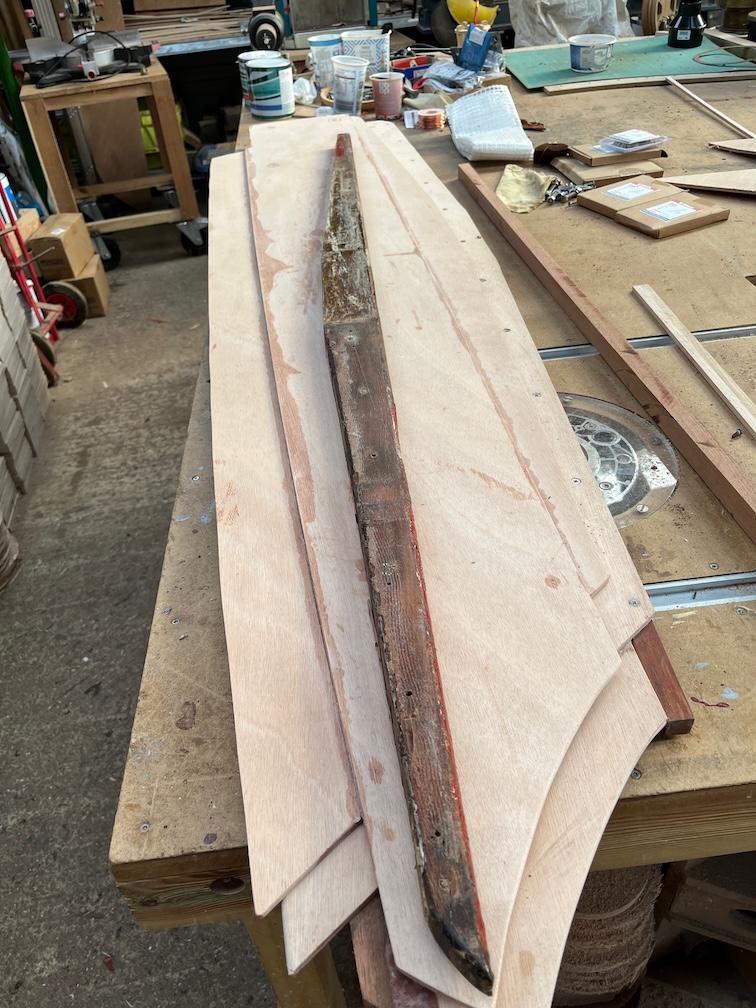
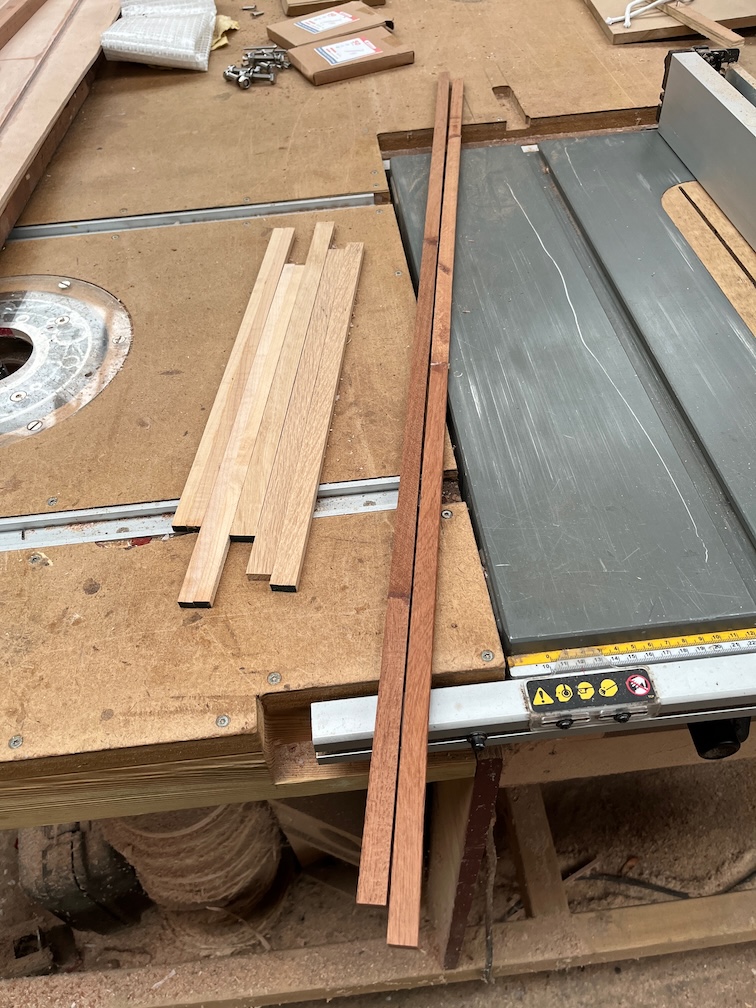
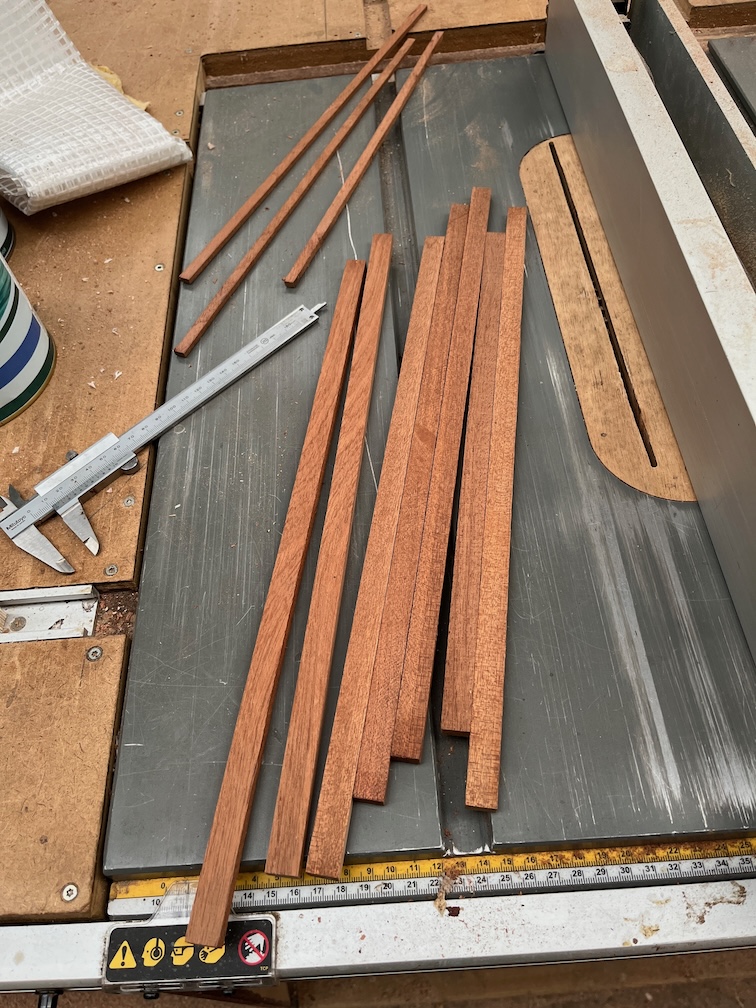
I marked the line that followed the slope of the runner on the new pieces, cutting off the excess with the bandsaw making sure to stay on the waste side of the pencil line. Then I used the belt sander to sand down to the line. The other three sides were also sanded such that the extension piece is fair with the old wood.

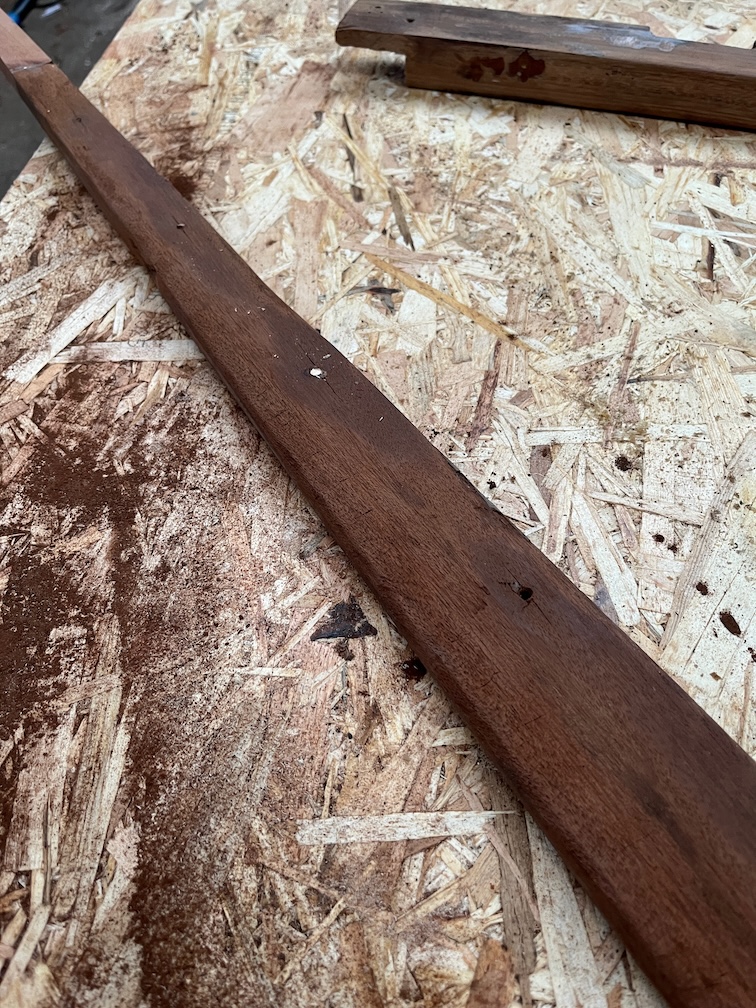
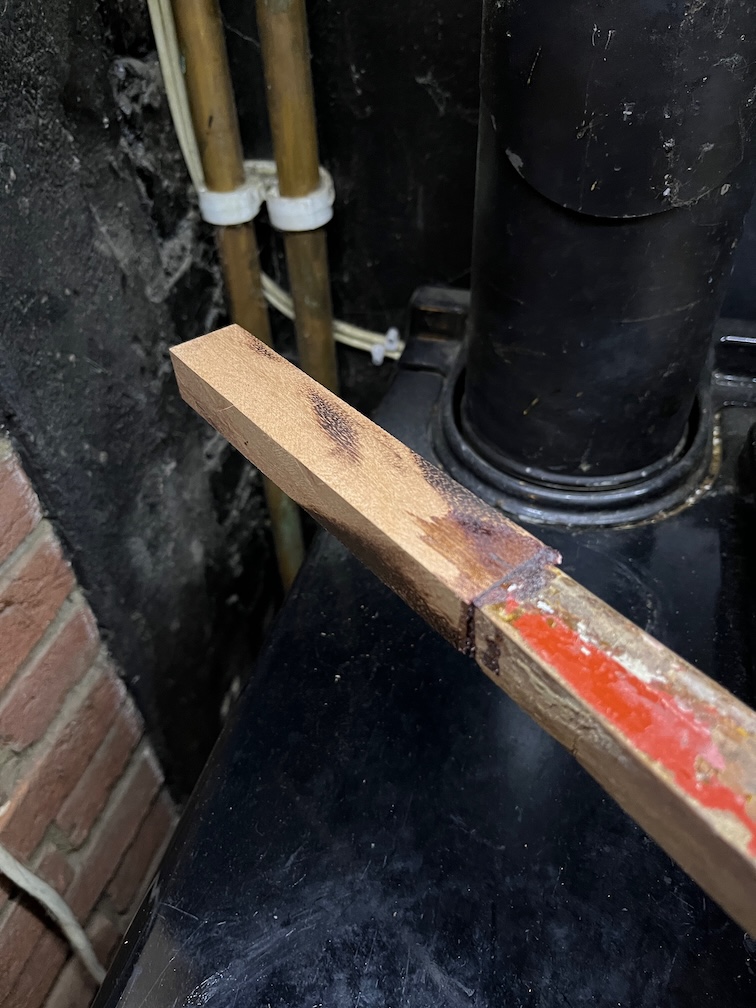
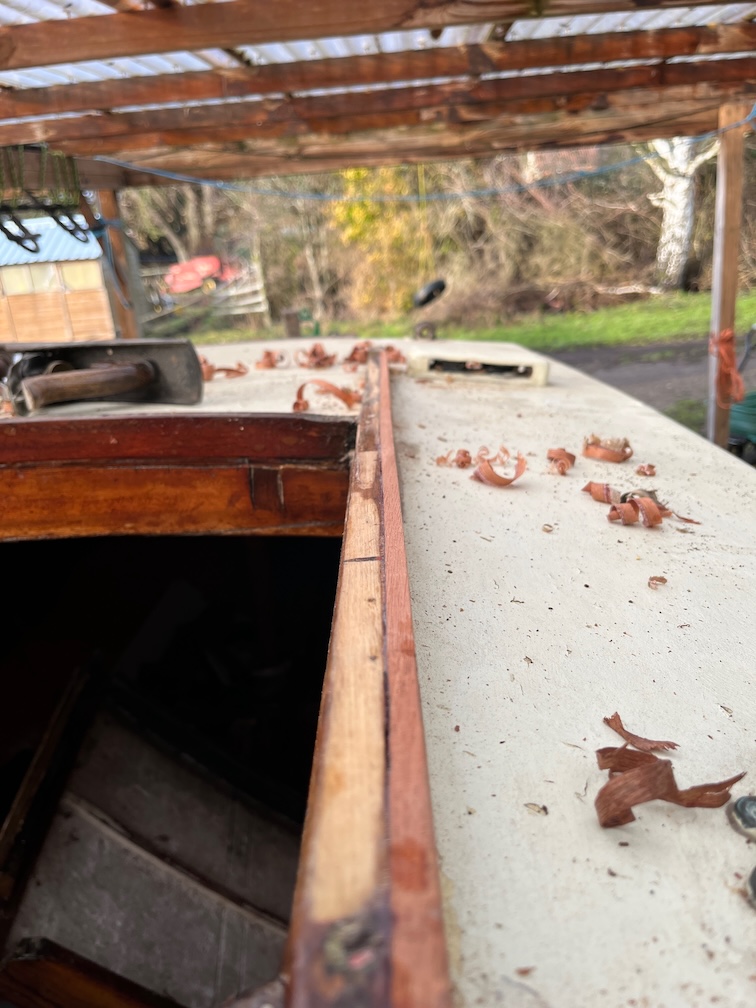
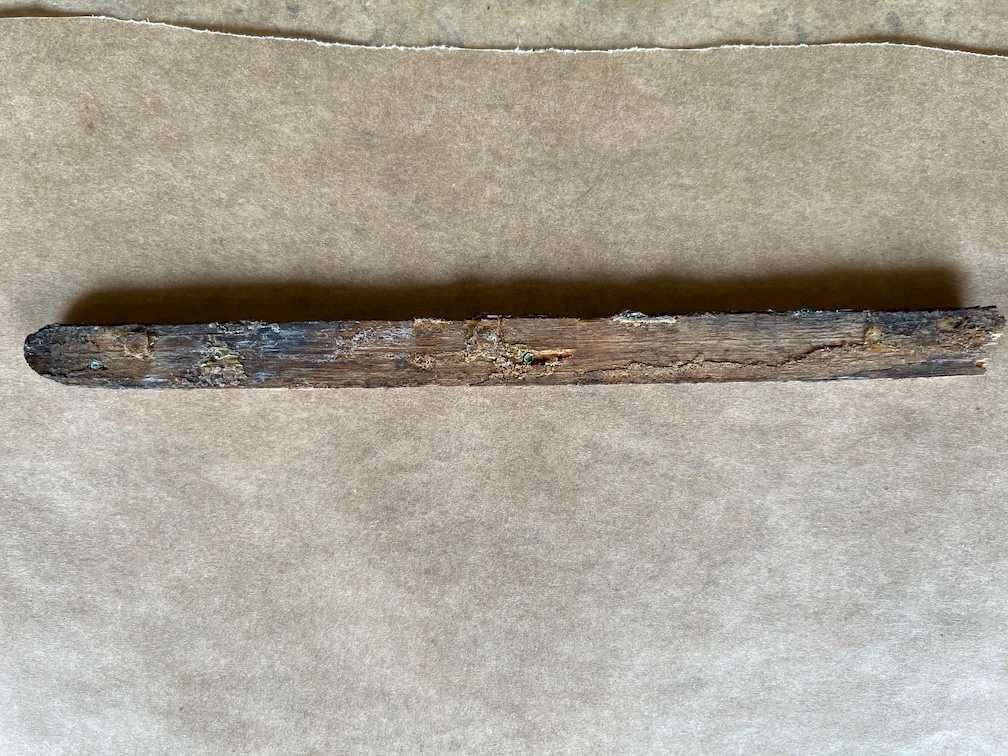
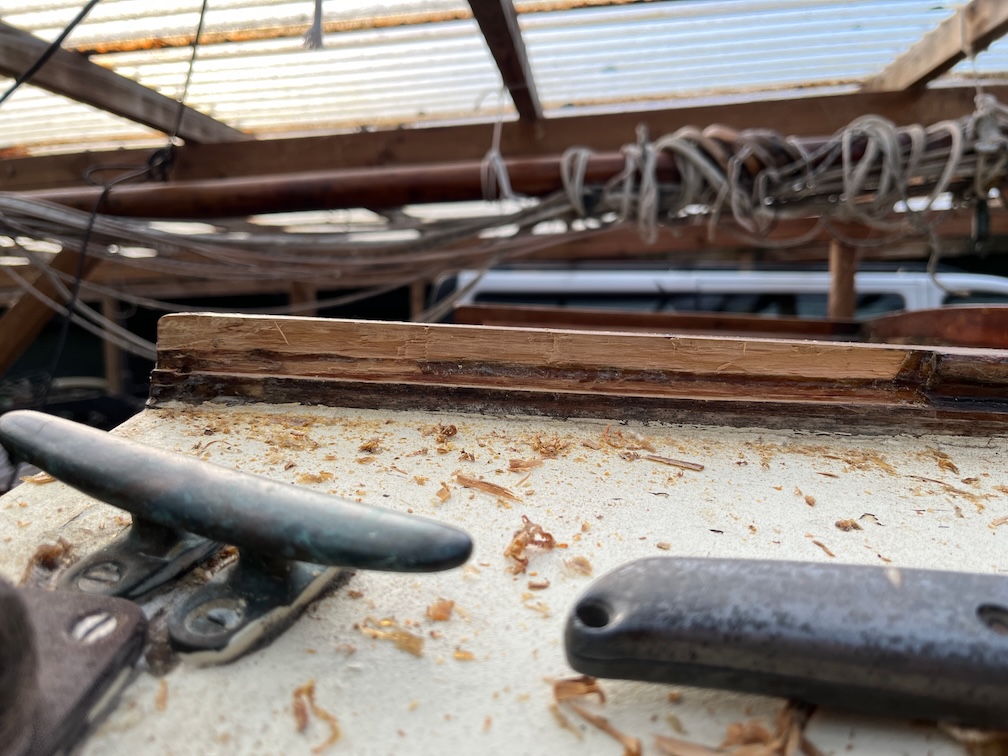
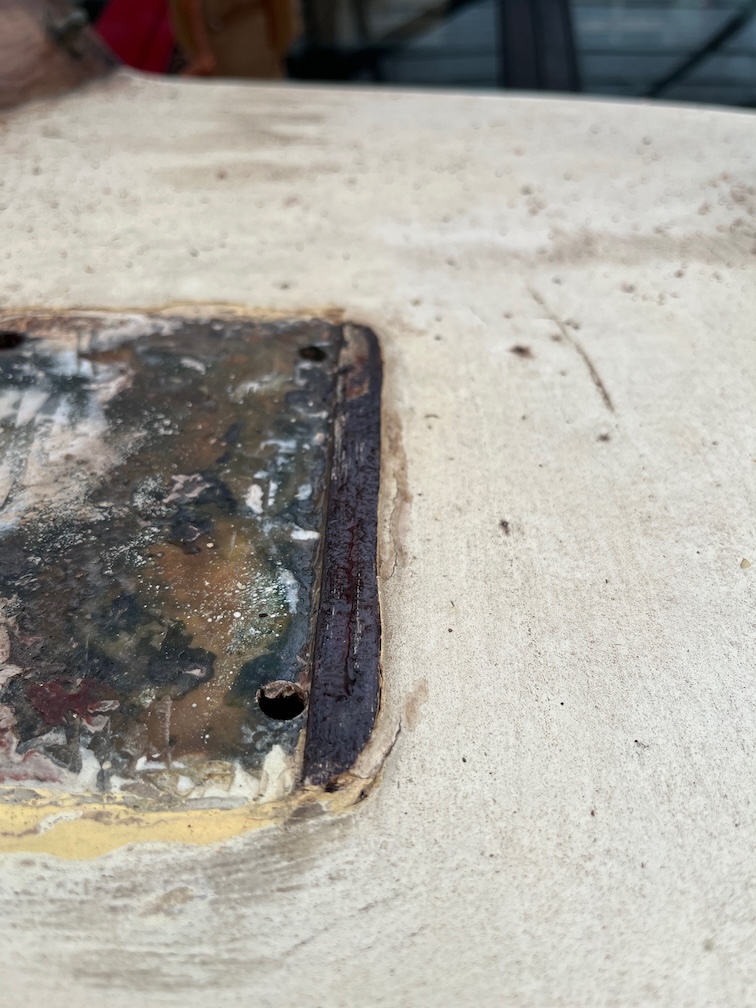
The next task for the runner was to remove all the soft wood which I did using a scraper to start followed with 80 grit sandpaper. In the image above the edge of the runner shown should be square and as you can see, it is not. I presume that this is rot in the wood but since there doesn’t seem to be any organic matter other than the wood, I’m not sure. Still, all the loose wood had to go.

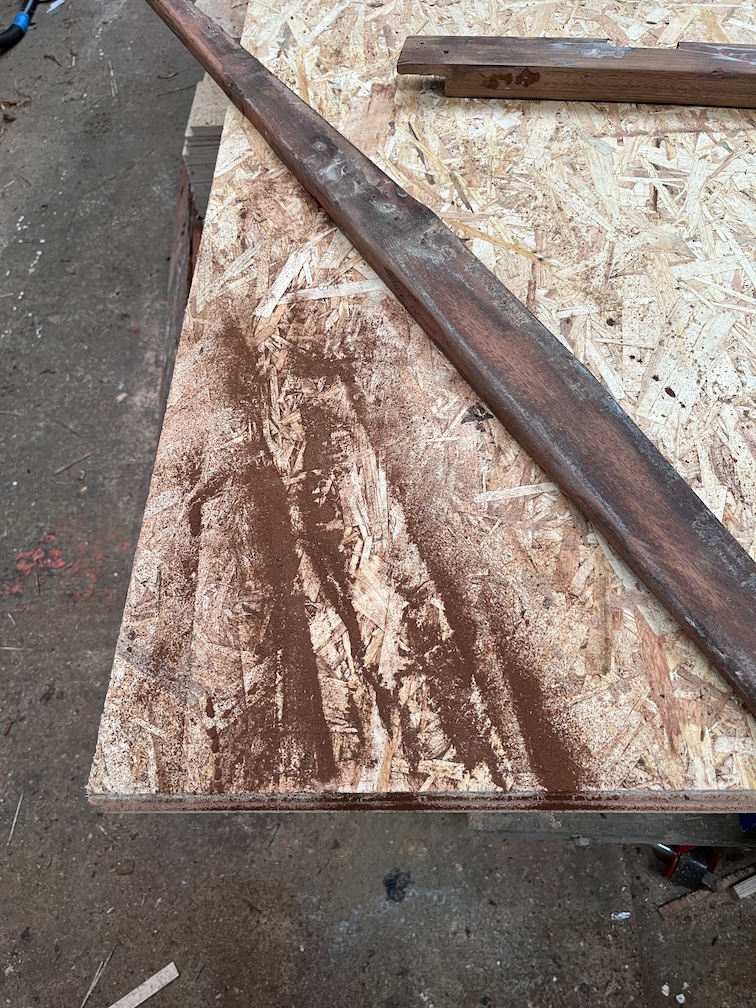
What came off after the scraping and sanding can only be described as wood dust, a very dry powder.

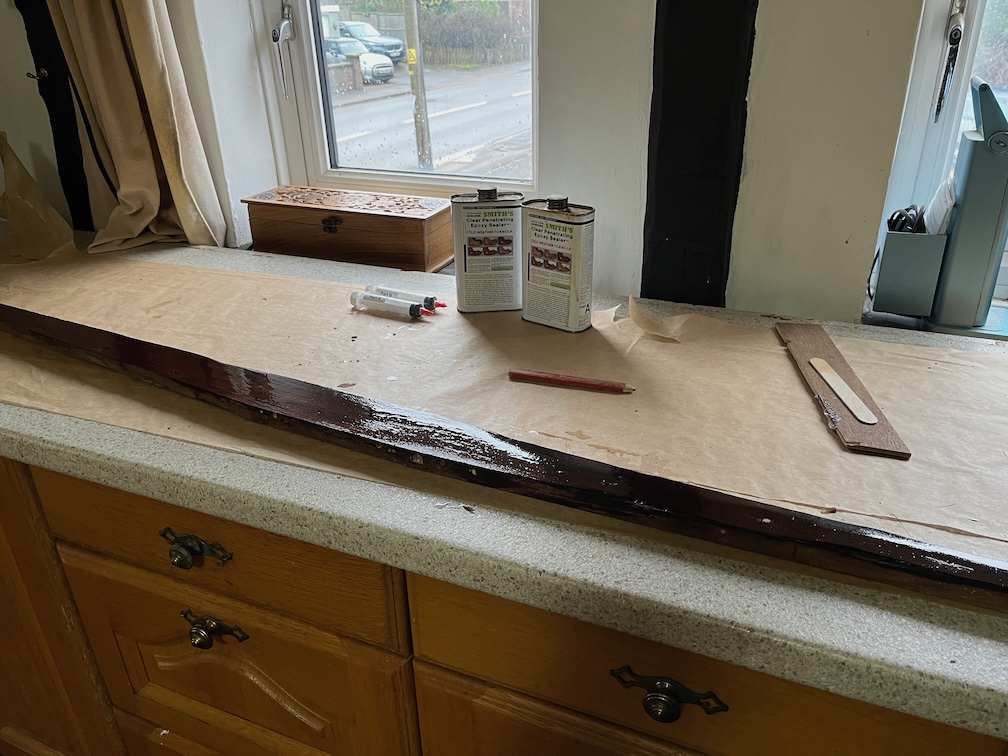
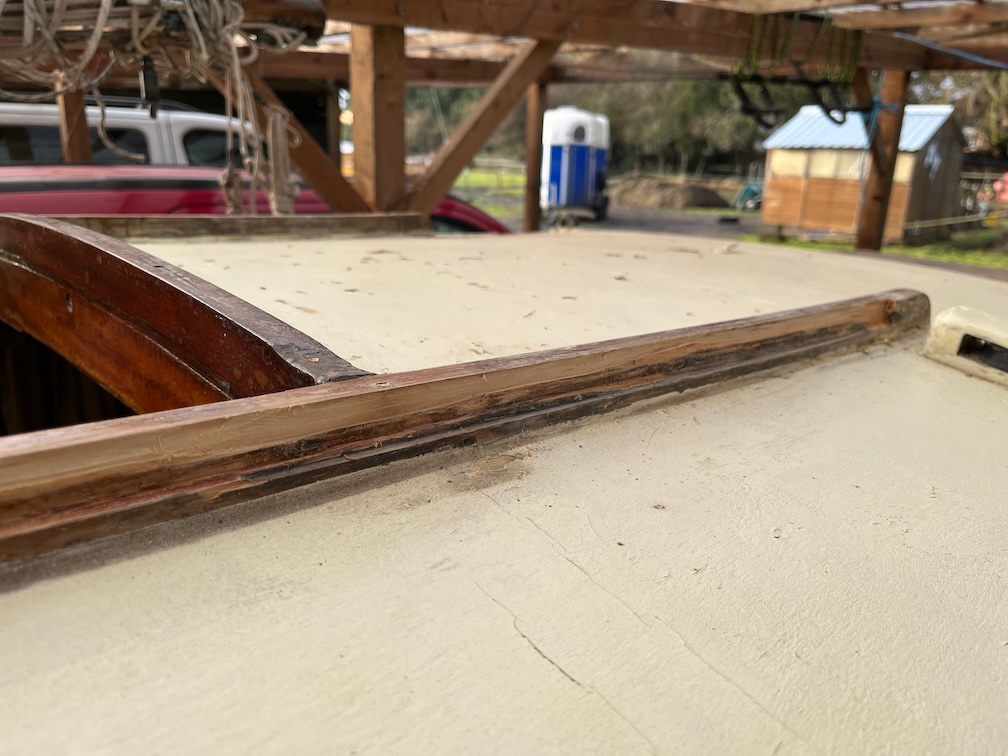
I mixed up 30ml of Clear Penetrating Epoxy Sealer (CPES) and flooded the damaged surface of the runner until the sealer stopped being readily absorbed. The sanded areas absorbed the sealer like a sponge and sat on the surface of the rest of the wood, soaking in slowly. After a few applications the damaged areas stopped soaking up the sealer quickly and I left the runner on the baking paper to left the remaining sealer soak in as much as possible.

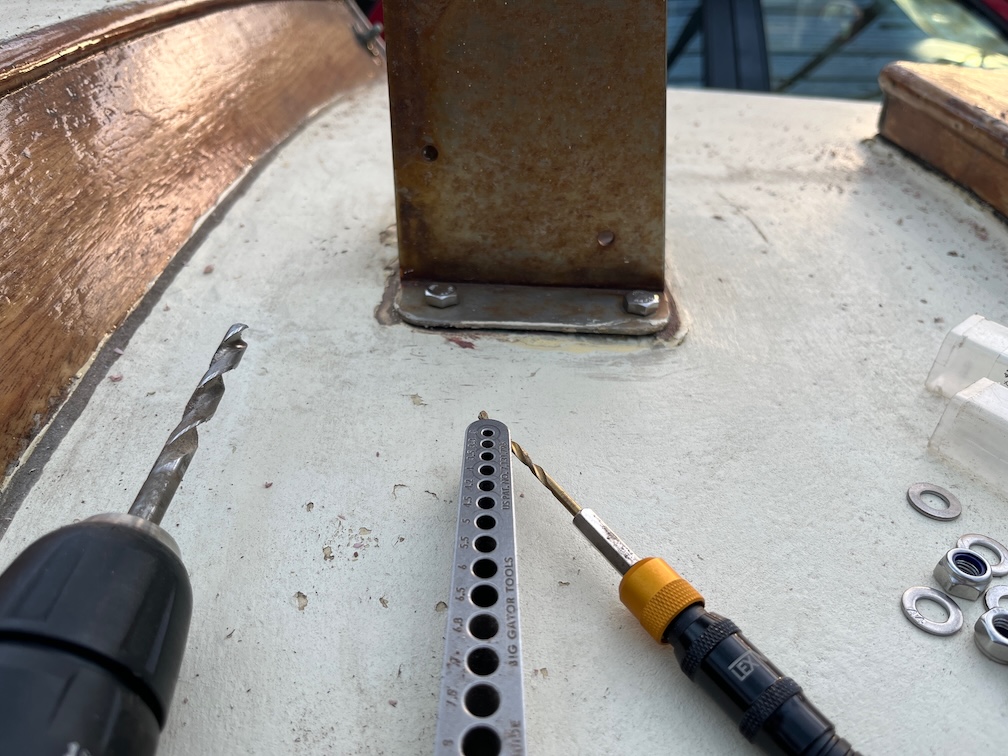
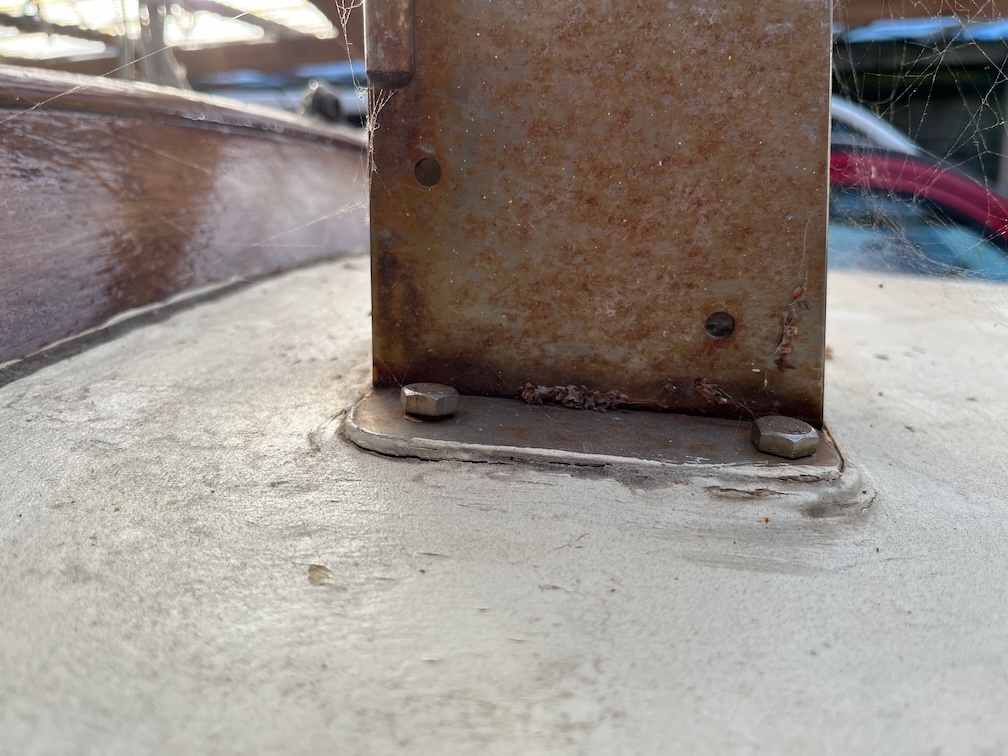
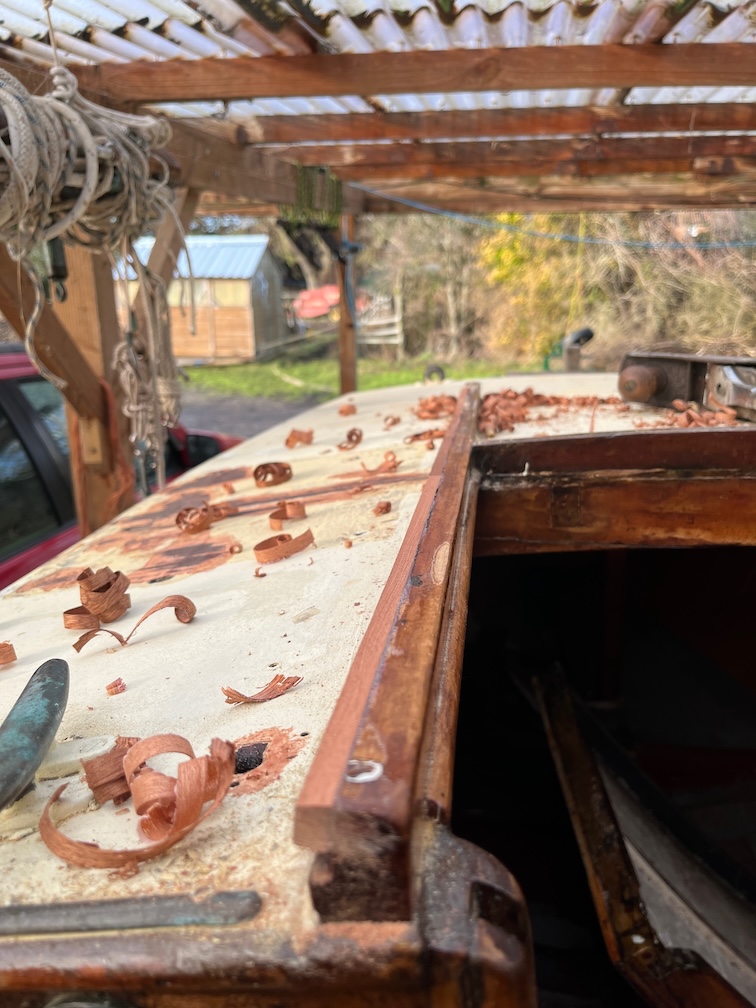
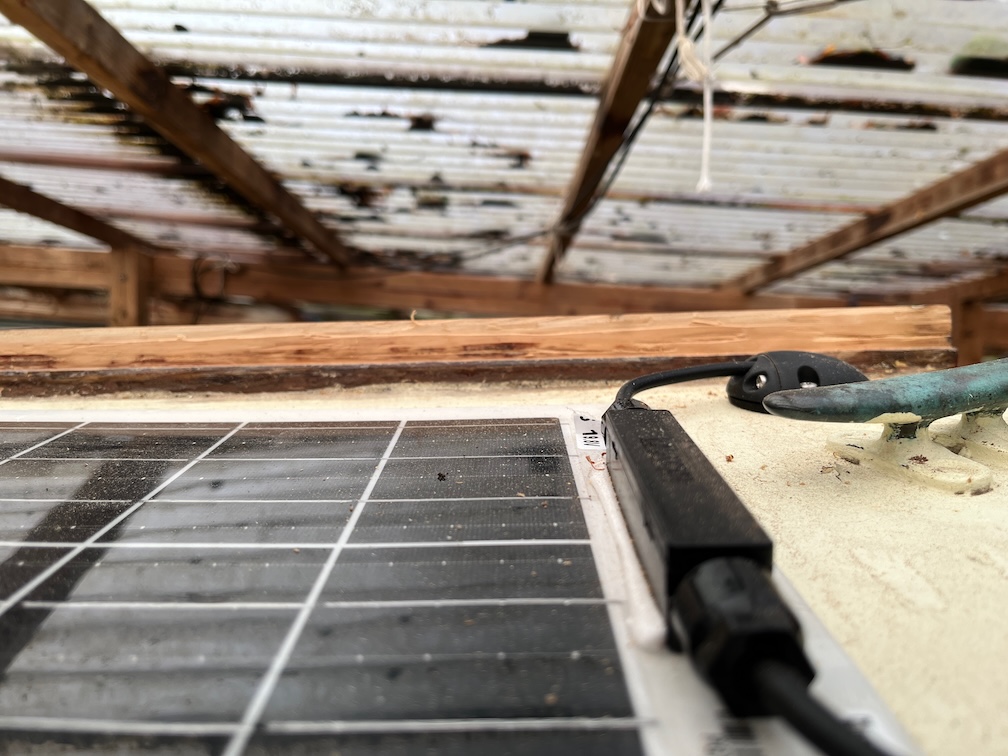
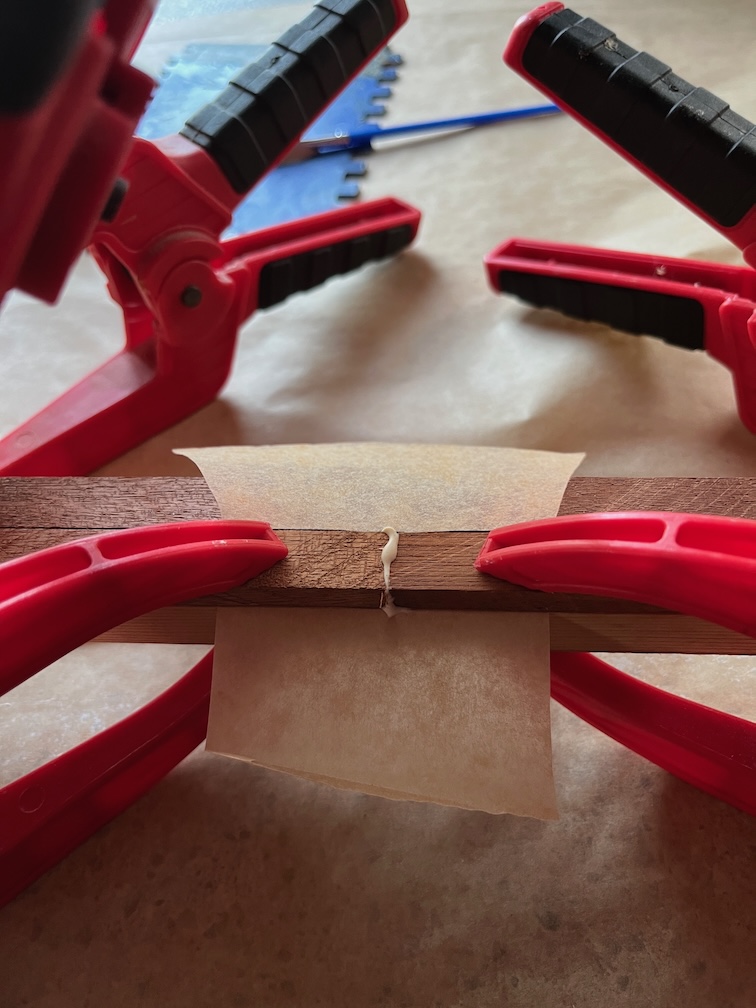
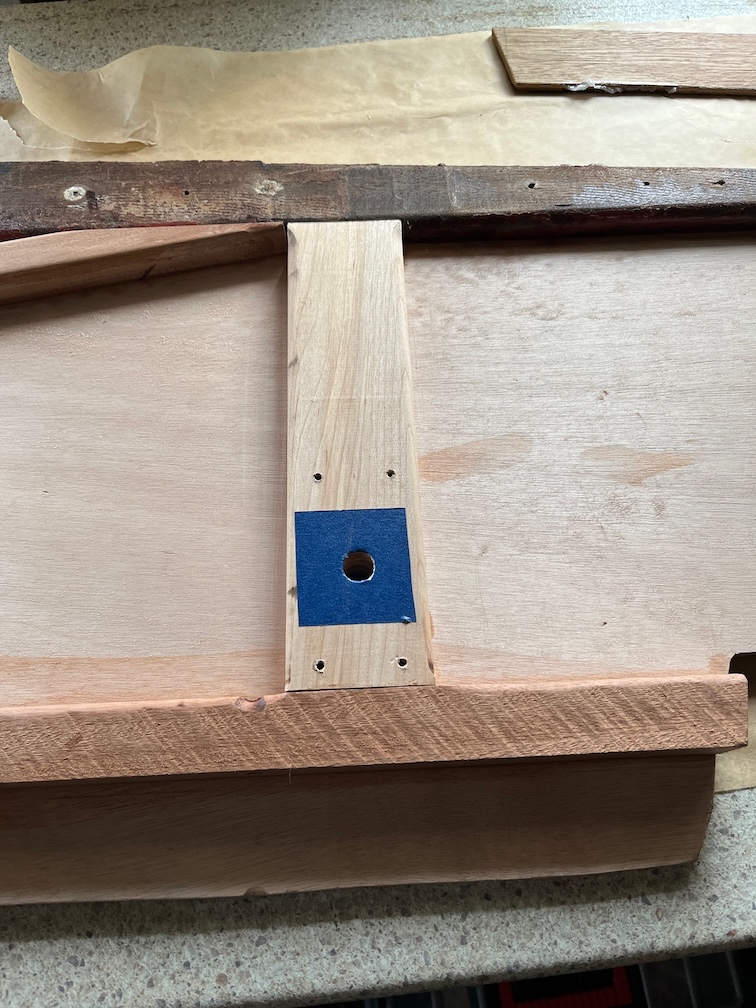
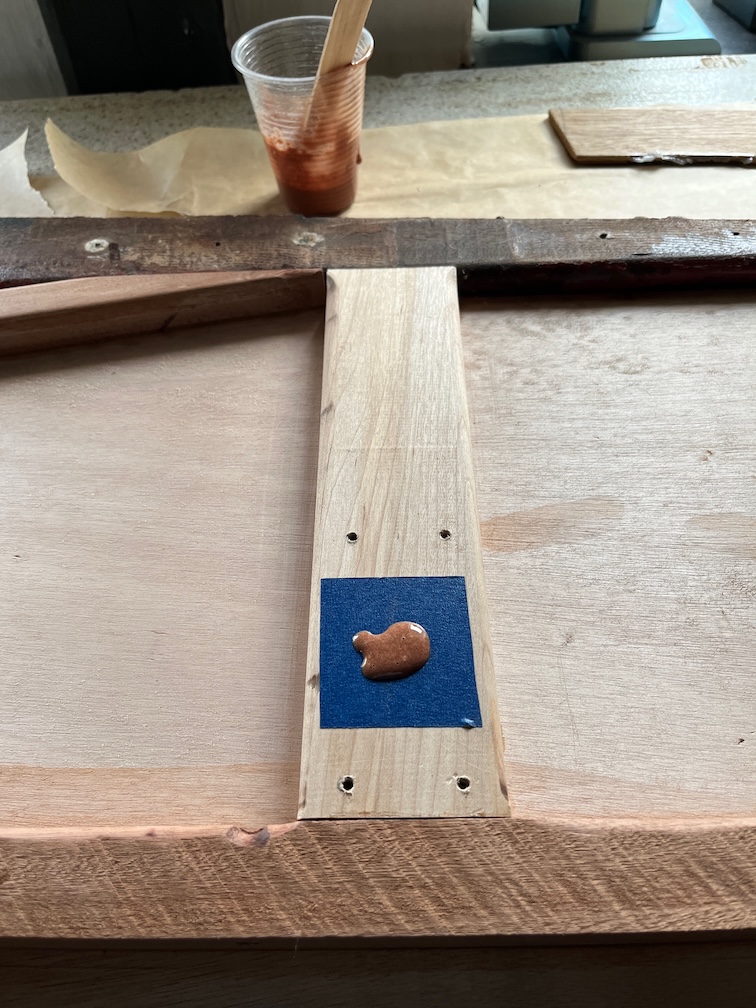
I had a little of the mixed sealer left and some of that was used to seal the wooden strip under the tabernacle as this was just bare wood after the deck had been scraped of old sealant and sanded.

I still had some CPES left and put that on the sampson post, just to use it up. There’s no real need to seal the sampson post, but it will not hurt it and it uses up the CPES that would otherwise be wasted.

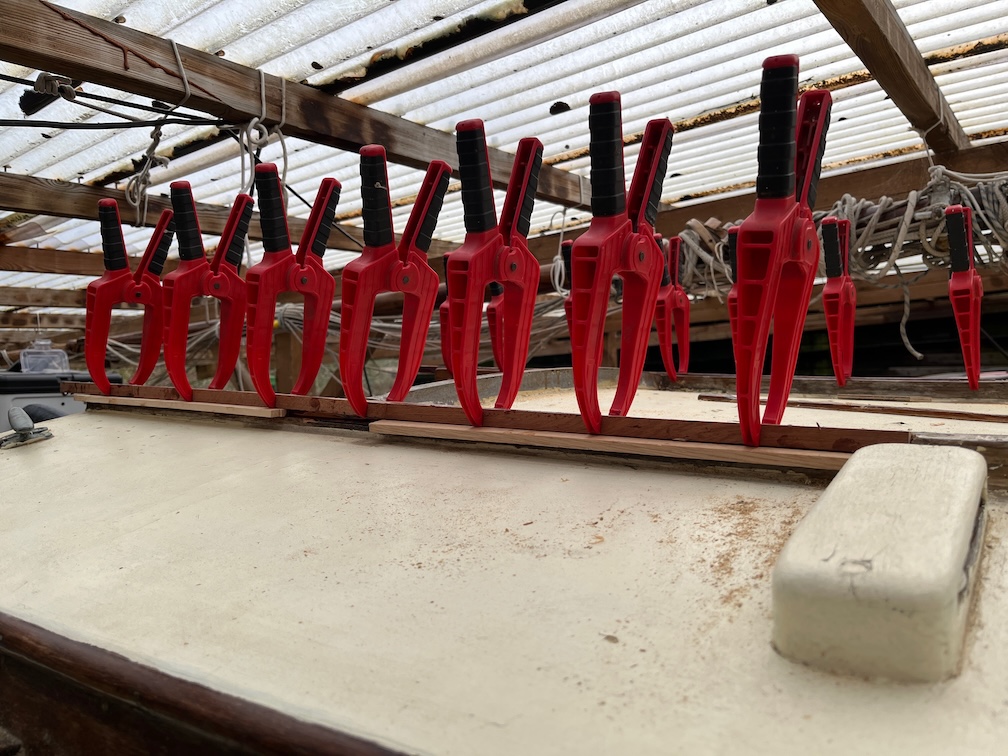
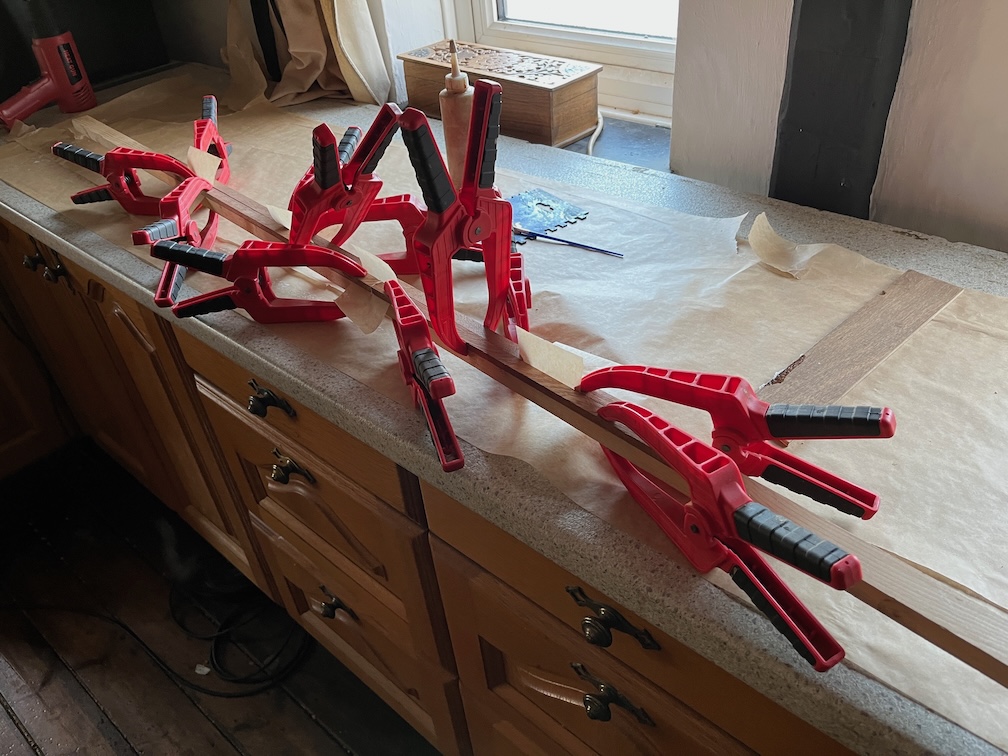
After an hour or so the runner was placed on the Rayburn such that the warmth would aid the CPES cure process

Next up is the removal of the remainder of the port centerplate case side. The majority of the side and the easiest has been removed and what remains is the three bottom runners and the plywood that protrudes into the keel.

The Fairey Falcon comes with one runner on each side that is glued to the plywood case sides and the keel and Charles Stock added a second on alongside this, and a third on top. The top one was screwed and glued to the first and the second was glued to the side of the first and also glued and screwed into the keel. The width of the two lower runners is more than the length of the multi-tool blades so the top one was removed first allowing me to remove the two lower ones one at a time.

The uppermost runner was a bit more difficult than the starboard side as there are more screws holding the it to the lower runner and they are a little more deeply set making them not so easy to spot. The quickest way is to run the multi-tool blade under the uppermost runner, cutting in about 10 mm along the glue line, and note where is doesn’t cut into the wood. A chisel is used to remove the wood around this spot revealing the screw which is then removed.

The drawback of this is that the multi-tool blade becomes blunted very quickly! It’s a blade for wood, not metal.

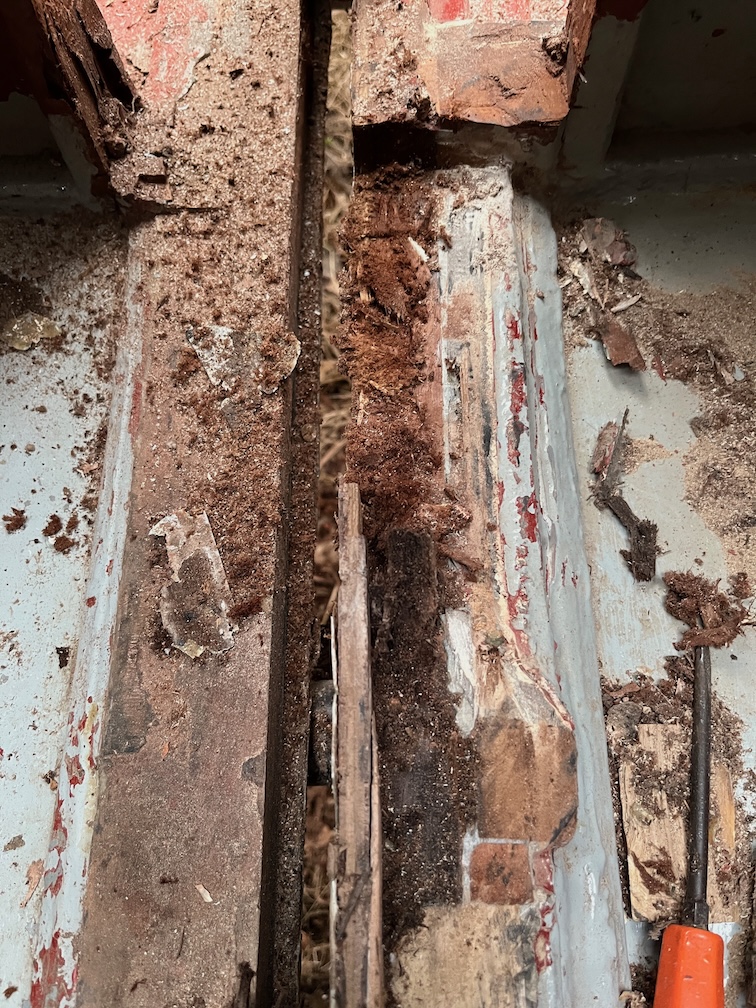
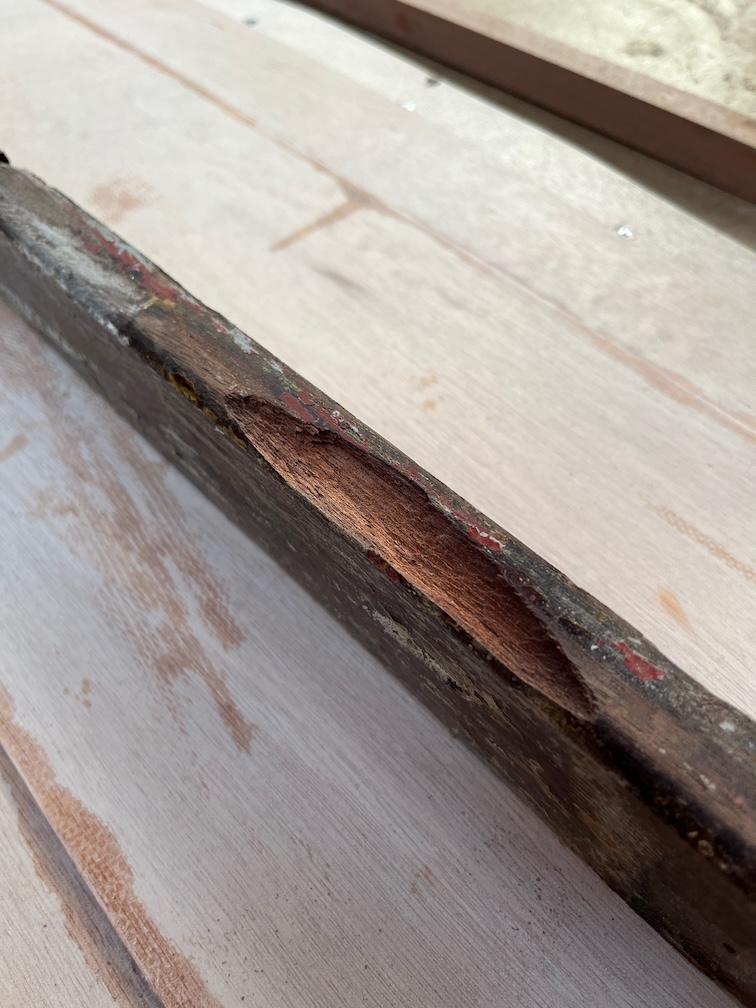
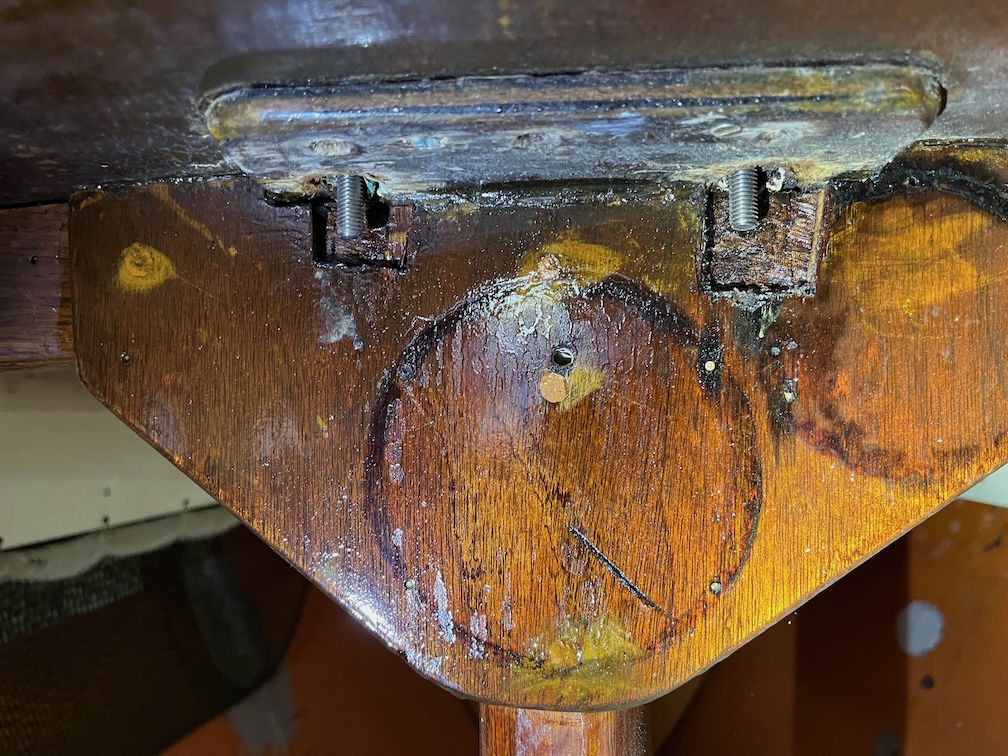
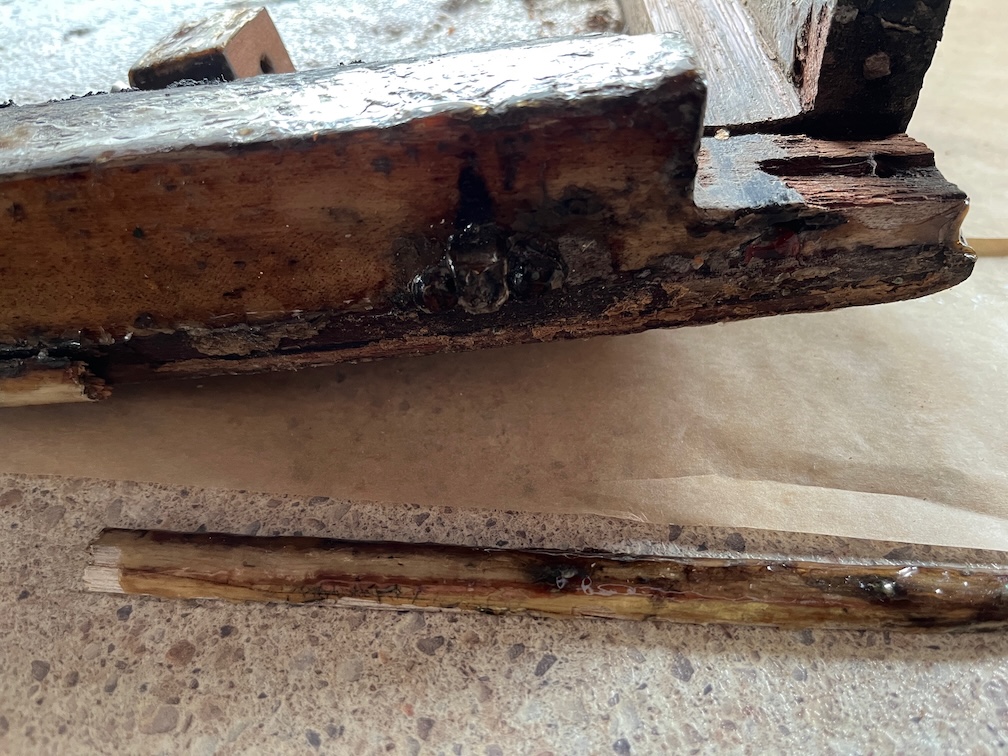
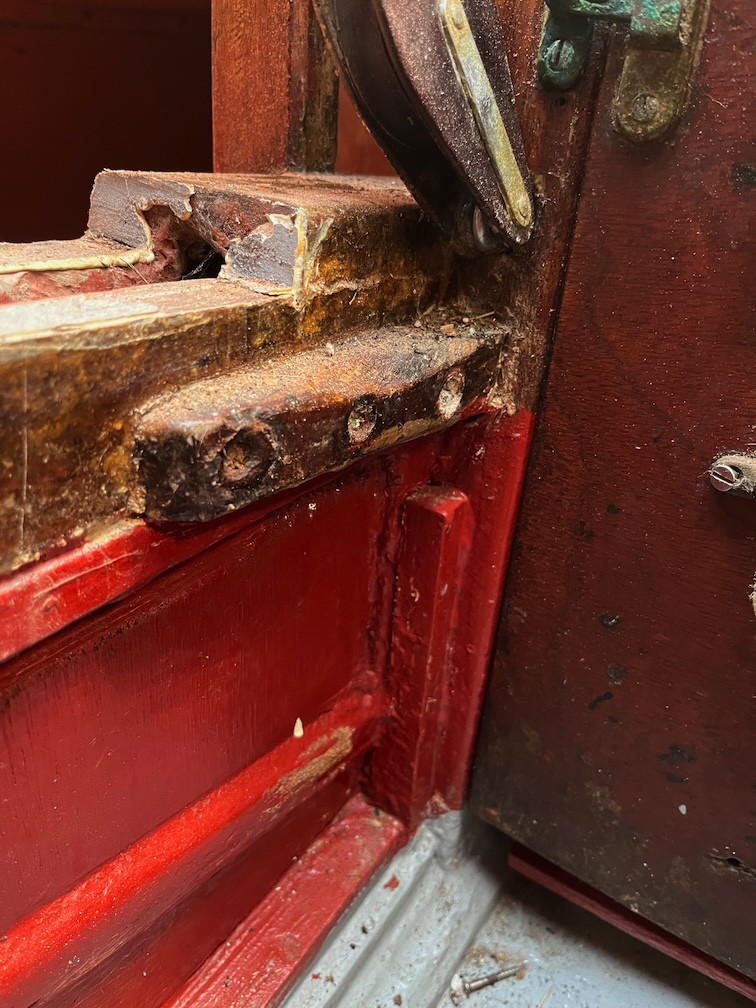
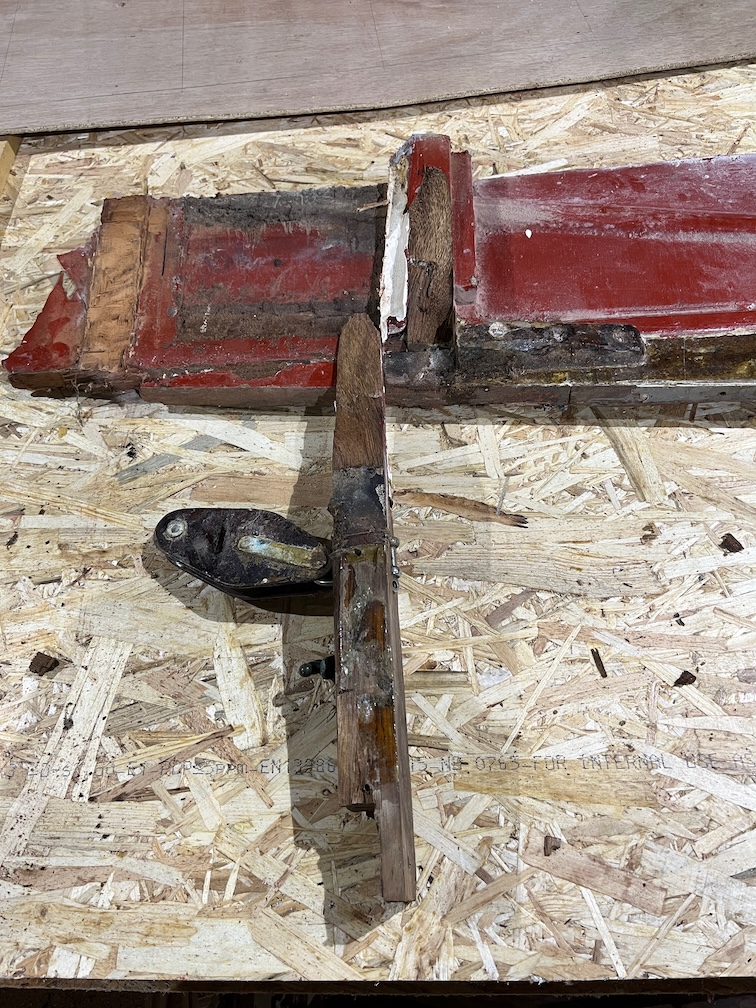
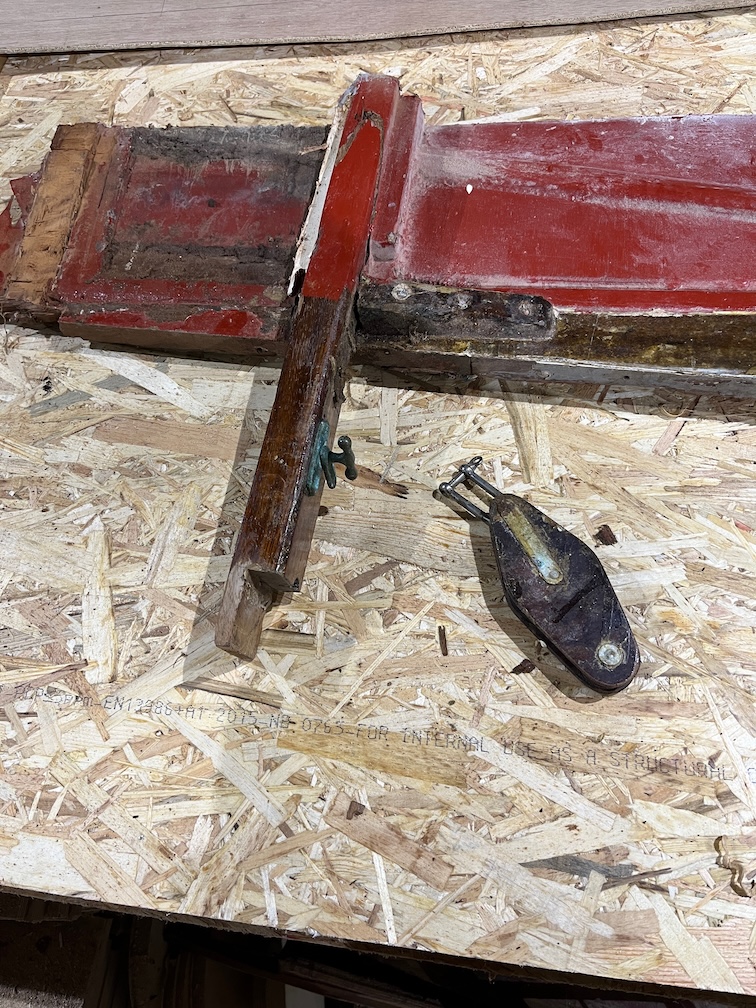
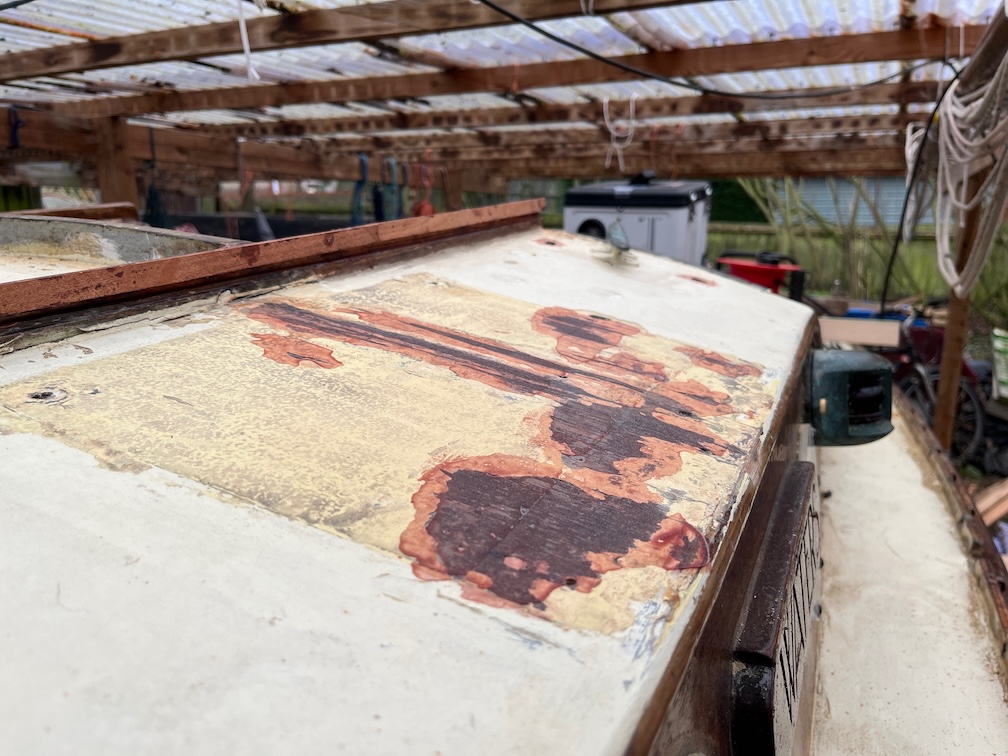
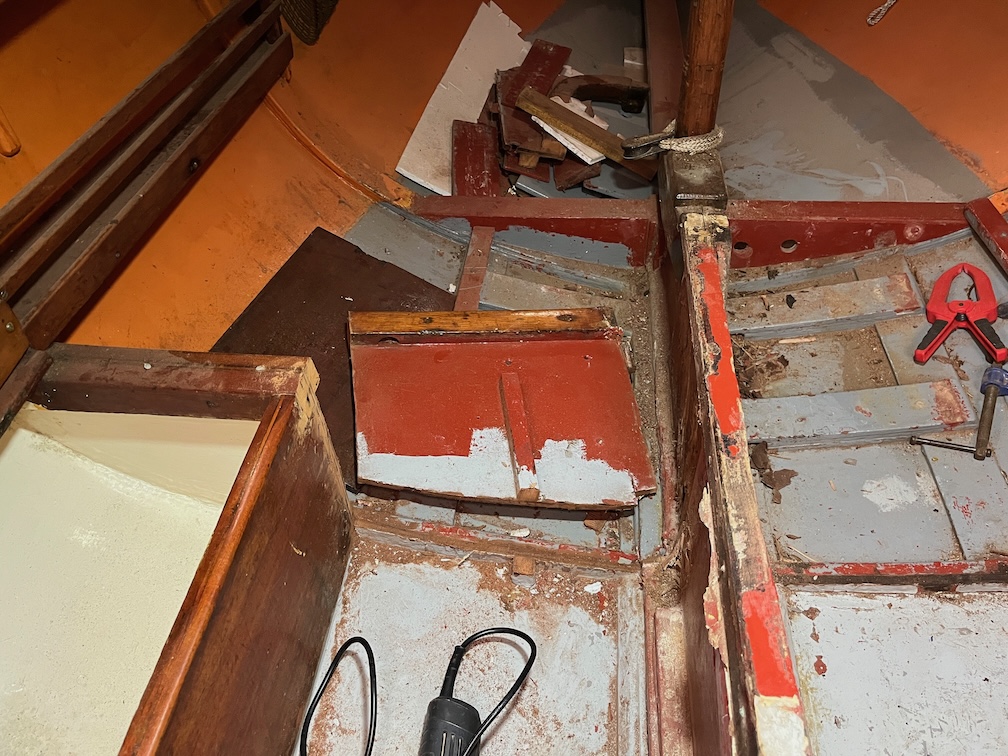
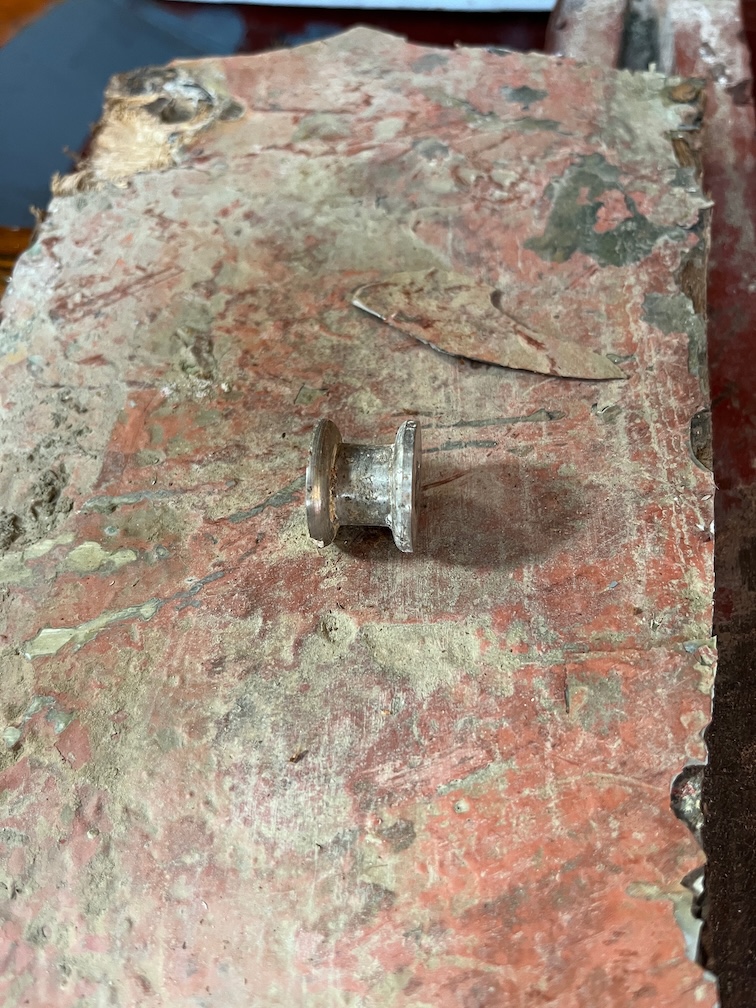
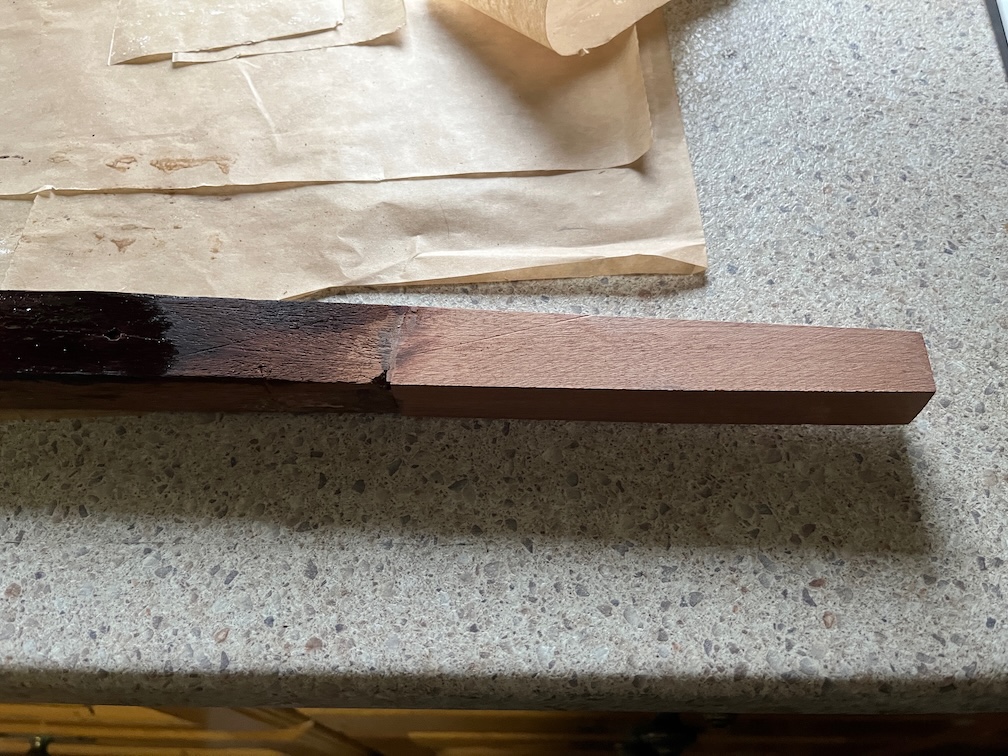
This looks like a right mess at first glance. It is the remains of the uppermost runner at the stern of the case which seems to be made of Mahogany whereas the rest of that runner seems to be Ash. You can see the colour difference at the bottom of the photo. There is a dark section of wood with two lighter brown pieces beside it and below those in the photo the wood turns a light brown, almost beige. This is the Ash.

All the Mahogany in this area with the exception of the two mid-brown pieces, is wet and fibrous indicating that this has been wet for a long time, like the plywood of the case sides. It is still wet as there is nowhere for the water to get out. Paint on the outer parts and glued plywood on the inner sides.

I noted that this was also the case for the starboard side.

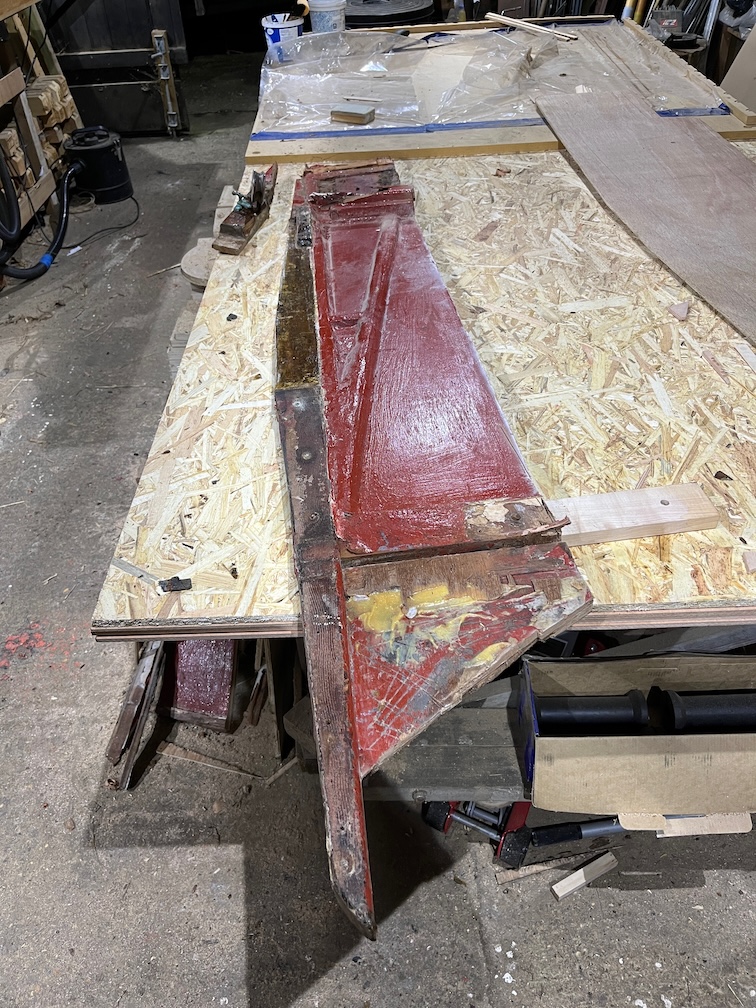
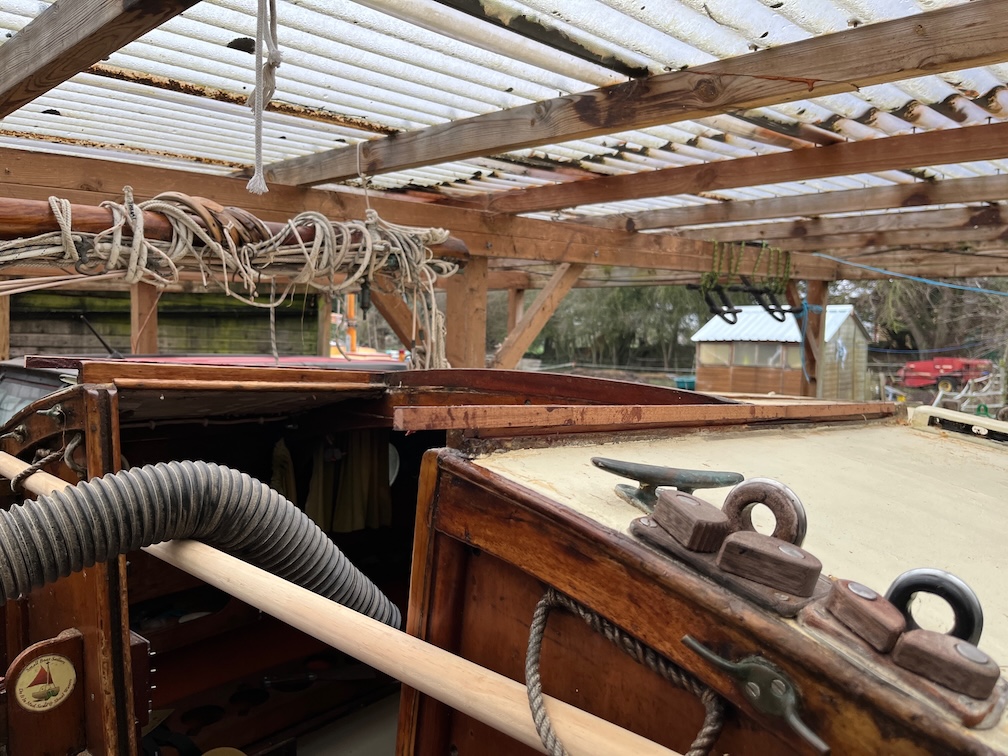
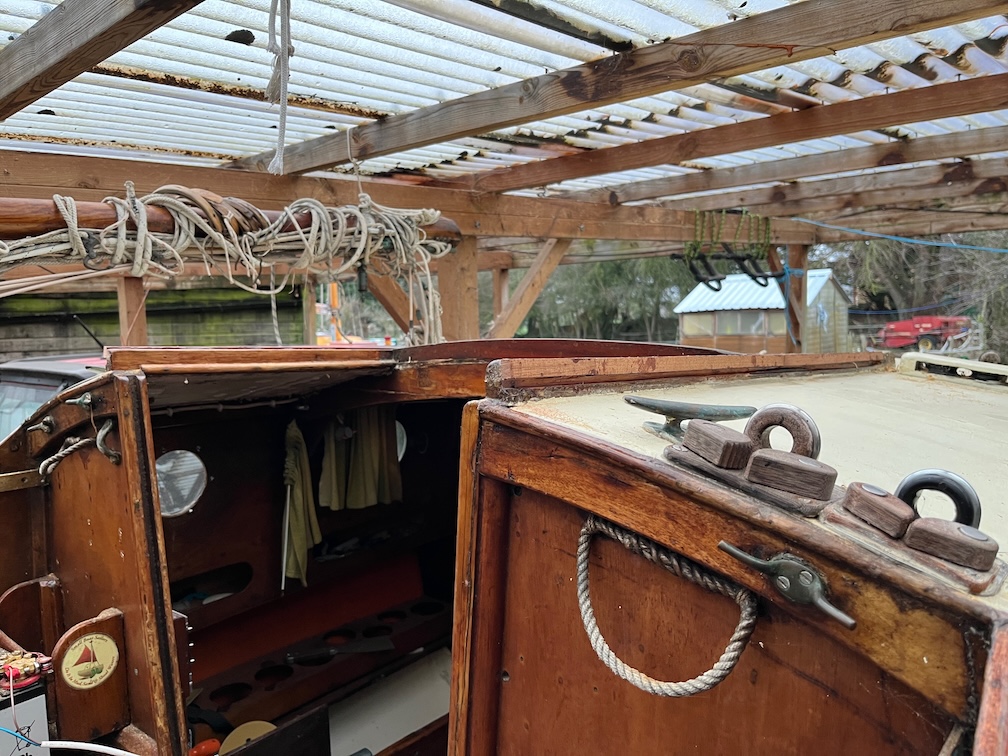
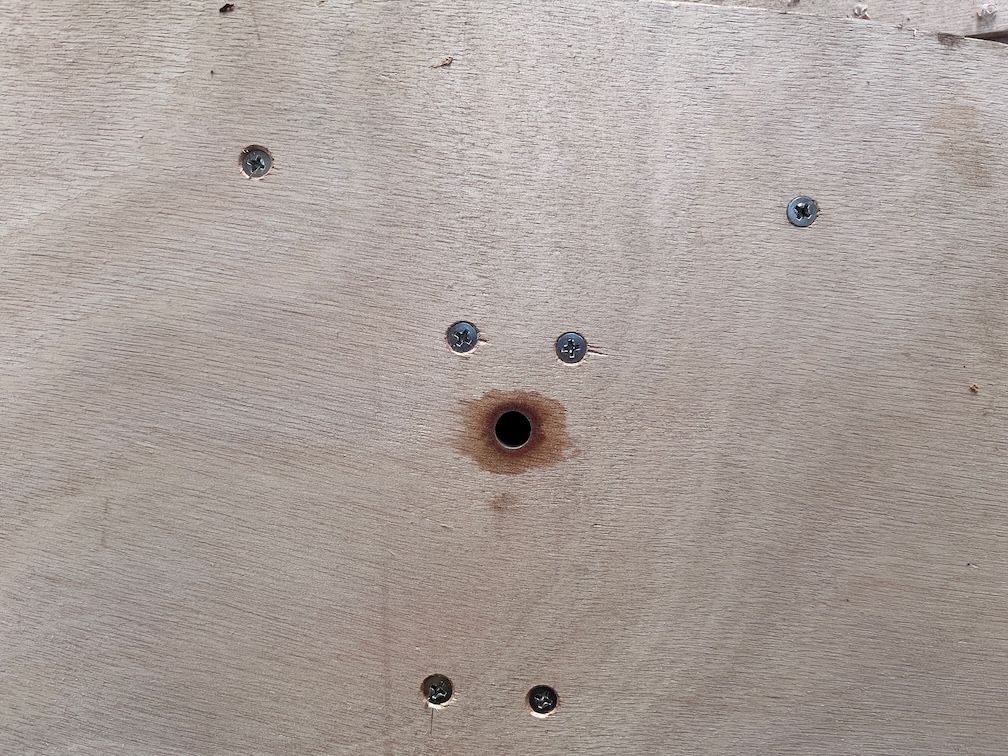
This is the starboard side cleaned up and from the cockpit, but you can see that the wood is a dark brown and I noted in the post at the time that it was wet.

Now, the question in my mind at this time is whether the water has got in from the inside of the centerplate case as is it has for the damaged plywood, or whether the water has got in from the outside, namely the cockpit. The footwell does collect water, mostly fresh from rain, so this is not so strange as it might sound.

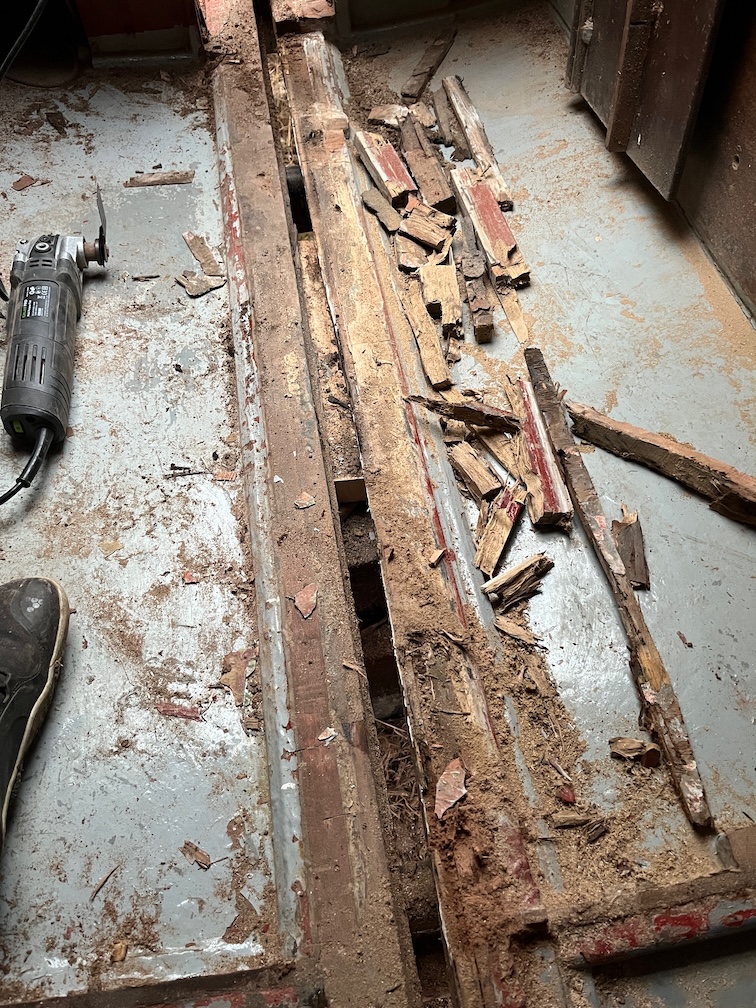
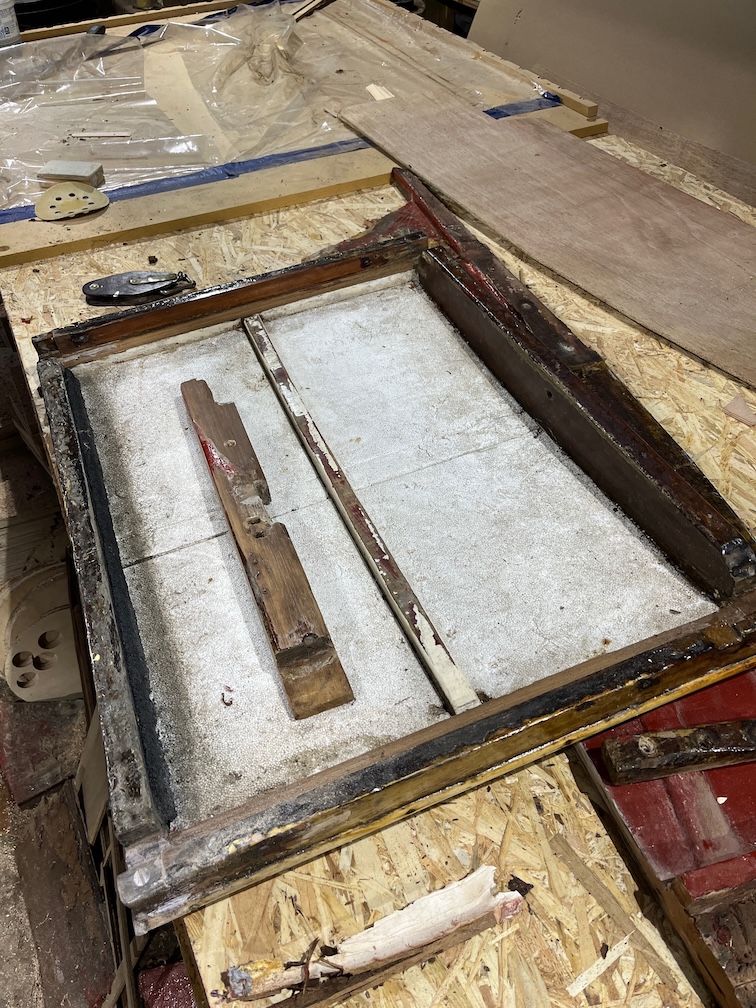
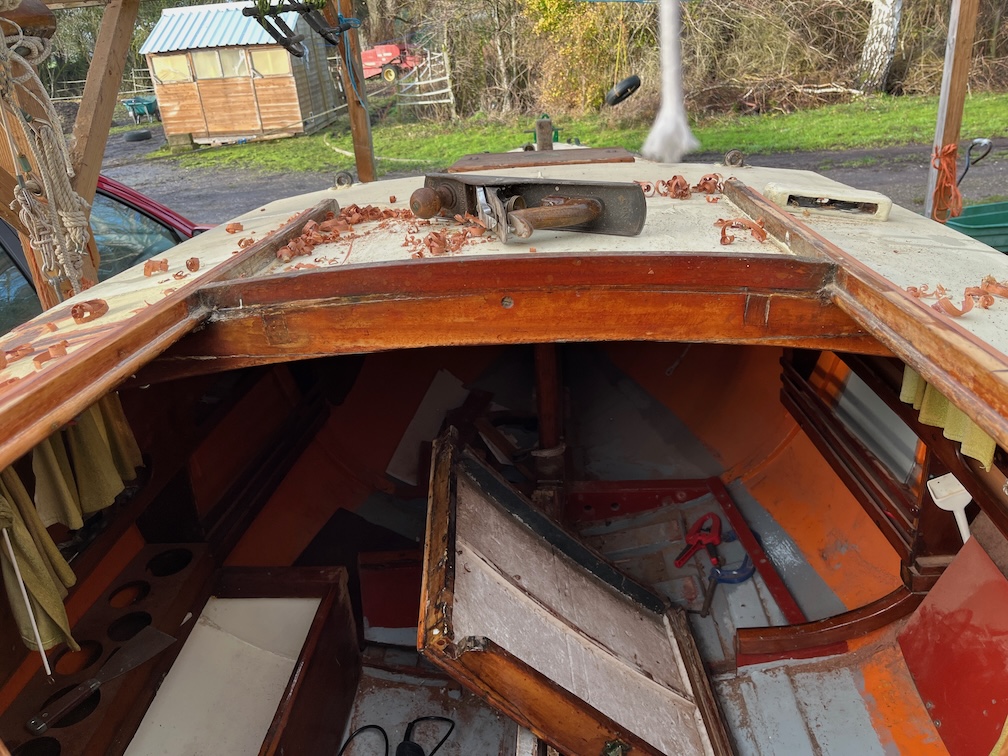
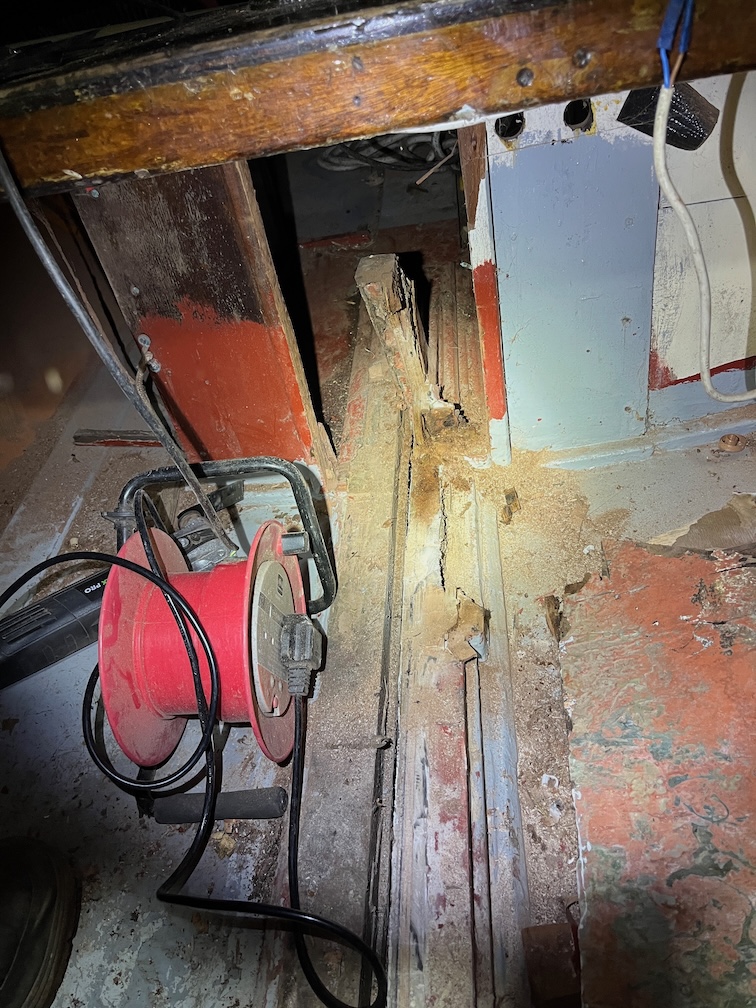
A couple of hours of work and the port side looks like this. I was pretty tired at this point and just left everything as it was, I didn’t have the energy to clean it all up. I’ll do that later. Still, the uppermost of the runners has been removed in the cabin area leaving just the section that is in the cockpit. After cleaning up the mess removing the remainder of the uppermost runner will be the next task.

After that, the lower runners will be removed and the top of the keel cleaned up. Finally, the areas around the forward and aft centerplate case blocks will be worked on and the inside faces of the slot sanded.

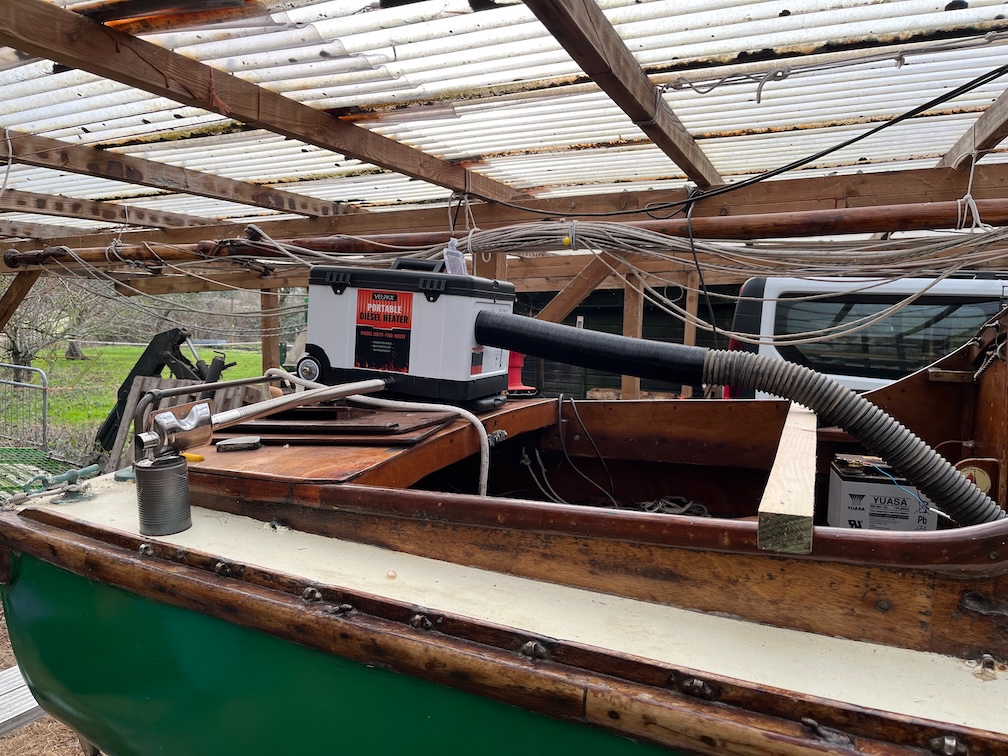
I shall also use the new heater to warm the cabin up with warm/hot air and block the companionway hatch so that the only way out for the warm air is under the bridge deck and into the cockpit and through the slot in the keel. This will help dry out the wet sections of the keel and aft block in preparation for the new case sides to be glued in place.

But that’s a few weeks away yet.

Time for a cup of tea.

2026-01-17 – Oops !

I had big plans for today, get the case top runner done, mount the tabernacle, fit the retaining bolts for the hatch…I figured that these would take me most of the day and if I had any time left over, then I still have many items on my to do list.

First up was the top runner which needs to be extended like the other. This took longer than I wanted, I messed up the first one by making it too narrow, but I got it right on the second try, took the runner into the workroom and epoxied the two pieces together.

This left a fair bit of thickened epoxy left so I used some of it to fill in the block restraining holes in the previously broken upright as I want to use a stainless eye-bolt here instead as the wood that was holding the shackle in place is getting weak.

These two pieces were out into the Rayburn to keep warm. I used the fast hardener for this job, but even so, raising the temperature will make the epoxy cure faster.

I had some epoxy left over so I went out to the boat and filled in a few holes and gaps that I had marked for this very purpose and that used up most of the remaining epoxy.

So far, so good.

The next task, the tabernacle had to be put aside for the moment as I need some wider washers for the bolts. Not a problem as this is not on the critical path.

On to the next task, the bolts on the sliding hatch and here’s where I messed up. Some of the gaps that now had epoxy filling them were on the hatch runners and I couldn’t do the bolts on the hatch.

Oops!

I had a cup of tea and a think and decided that I would spend some time cleaning up the workshop, emptying the sawdust traps, and cleaning out the mess in Shoal Waters, all of which needed to be done.

So, not what I had expected to do today, but necessary tasks all the same.

Time for a cup of tea.

2026-01-16 – Port Centerplate Case I

Before much can be done with the csae side, the top runner from the old side needed to be removed so that it may be fastened to the new side.

Using the band saw the runner was cut off the old side, being careful not to cut into the runner itself. The screws were removed, some of them were still brass although most of them were now copper, and the runner planed to remove the old and damaged plywood leaving the runner fairly well cleaned up.

There were a few problems, this section seems to have fallen away, not entirely sure why since the wood looks to be fairly clean here.

However, like the other side, there are areas in which the wood has become rotten. This will need to be dried, the loose wood and rot scraped away and then the whole area saturated with the Clear Penetrating Epoxy Sealer. Once that is done I shall fill any voids and cracks with thickened epoxy after which the runner may be attached to the new case side.

I took the time yesterday to epoxy the broken support timber since it was a fairly clean break and the repair would be easy. The result turned out to be quite acceptable, as you can see here after the timber had been cleaned up and then sanded.

One other task I decided to do today was the drilling out of the tabernacle bolt hole. This had been filled with epoxy previously as it was drilled at a slope and now needed to be drilled correctly.

This is the result and although the bolts are not fastened down, you can quite clearly see that the offenting bolt, the one on the left, is no longer at an angle.

This is how it looked before the repair.

The bolts protrude into the cabin and there is ample space to fit the nut and washer now, unlike before.

Time for a cup of tea.

2026-01-14 – Continuing With the Hatch Runners

The task for my tea breaks today was to shape the hatch runners and the hatch so that it can be dry fit and then taken inside to varnish.

I used a decent and quite sharp plane for this and soon had the tops of the new runners planed down to meet the existing wood.

Some of the varnish on the old runners was planed off as part of getting everything flat, but this will be replaced one the weather warms up.

The port side needed a lot more planing down, but less varnish needed to be removed to get a flat finish.

After a few adjustments with the plane and a chisel, I had the hatch moving freely on the runners. Here is it completely opened…

…and completely closed here.

Once the old and new runners have been varnished I shall put a thin coat of beeswax on each runner to reduce the friction and to reduce the wear caused by sliding two pieces of wood over each other. I’ll need to be a bit careful about this as too much will mean getting beeswax over your hands when sailing.

A couple of pieces came off the hatch during the fitting, one was an existing repair where the glue had cracked and the other, the thin piece you a see here, came off as the glue and the varnish had cracked, and the brass panel pins had turned to copper.

It looks as though this happened some while ago that there is water damage to the wood in the joint.

No matter, both pieces will be put back in place with epoxy. The original repair requires some gaps to be filled but one pump of thickened epoxy will be too much for just that repair, so I’ll use some of the remainder for the trim piece.

Once these pieces have been repaired I’ll need to take some fairly aggressive sandpaper to the varnish as there are loads of layers and water has gotten under and started to lift it in places. Some parts of the build up are so thick that they are fouling the runners still so it has all got to be sanded down, in places back to the bare wood.

Most of this is due to the previous owners not taking the hatch off for the annual revarnish. Instead the varnish was applied with the hatch in situ. How do I know this? Because on the undersides of the side runners on the hatch show drips and large blobs of varnish showing that the varnish was applied upwards and the varnish has sagged due to gravity. ln some of the harder to reach parts show little or no varnish.

Here’s an example. This is the underneath part of the side of the hatch. You can see where the varnish has dripped down the side and then under the hatch and also areas of the wood that have little or no varnish at all.

No matter, it is easily sorted out and in future I just have to remember that the hatch needs to be removed to get at the awkward parts and not varnished willy-nilly.

After work I turned my attention to the port side of the centerplate case. This as got to go.

It took a bit of effort since I could not kneel down on the port side of the cabin as I could on the starboard side due to the lockers, but I managed to get it all cut off. It is not cut down as far as the keel, I decided that since access was a bit restricted I should cut the side just above the runners that sit on top of the keel and then I would have a lot more access to remove the runners down to the keel.

I was pleased to have done the wiring and lighting by this stage since doing this without the cabin light would have been quite awkward. Probably not impossible with a good torch, but a lot more troublesome.

Not only was the access to the aft part of the side more restricted than in the cabin, but there was a locker and a stronger upright in the way.

The reason for this is that the block for the centerplate uphaul is attached to the upright and therefore it has been braced to resist the force.

With the side now out of the boat I can set about removing the top runner of the side and clean it up before putting it onto the new centerplate side that is ready to be completed.

The upright with teh block broke during the removal, so I need to decide whether to repair it or replace it when I reassemble the case inside the boat.

For now, I’ve removed the block and will put the pieces aside and the next time I do any epoxy work I’ll stick the pieces back together and see how it looks once that is done. Both this upright and the one on the other side will need some modification before being refitted. That is a job for another day in the future.

A successful day as far as Shoal Waters goes and despite the cold start to the day, the trips outside during tea breaks have been very pleasant due to the sunshine and calm conditions. The pleasant and dry condition mean that each small task I undertook during each break was carried out quickly and without having to return inside every five minutes to warm up my hands, as was the case during last weekend.

Time for a cup of tea.

2026-01-13 – Continuing the Epoxy Work

With the warm weather continuing as forecast, I inspected the epoxy first thing and found that it was well cured. Probably not full strength but strong enough for me to get on with the task.

I removed the cramps and visually inspected the new runner edges. They look to be good but there are a few spots that will need further attention. The main problem is that the hatch did not rest entirely on the top of the runners but instead the bolts inserted through the sides of the hatch and located into the slot fouled the top and bottom of the slot. This wore away the slot, and hence the new pieces, but also raised the hatch up off the runners in places where the bolt fouled the bottom of the slot.

I have cleaned up the underside of the hatch where it should contact the runners and remove the bolts as I suspect that these were not in the correct position to run in the slot properly.

I used a pull-saw to trim the deliberately long new runners back to the correct length ready for the wood to be planed. I shall plane the new wood to be flat on the top and to match the top of the old wood and then offer up the hatch to see what needs to be trimmed away after that.

I took the time to remove the peel ply from the epoxy on the coachroof. You can see that the epoxy is partly over the paint. This will be removed with a sander before the coachroof is painted. The painting will have to wait for another warmer spell.

I decided to fill one of the bolts holes through the deck for the tabernacle with some of the thickened epoxy. This is the hole that is canted aft slightly and now that I have opened up the space for the nut in the cabin, this hole needs to be redrilled to be perpendicular to the deck.

However, it is not very easy to drill an existing hole at a different angle and in my experience the best way to achieve this is to fill in the hole and try again. Normally I would glue in a length of dowel that fills the hole completely and then carefully make the new hole. In this case, since I had spare epoxy, I just decided to use the epoxy instead.

Time for a cup of tea.

2026-01-12 – Companionway Hatch Runners

The forecast temperature for today was 11º Celsius, quite a difference from the -10º Celsius we had a week ago, but the warm spell is just forecast to last two days and I determined to get some of the exterior epoxy work done. I took multiple tea breaks and got to work.

The first thing I did when I saw the forecast on Saturday was to buy this portable diesel heater which was delivered yesterday. The idea is to pump warm air into the cabin and thereby heat up the decking and coachroof from underneath. Hopefully this will allow the epoxy on the outside to cure in a reasonable time. The heater will be used for other purposes, but I bought it sooner than I expected for this job.

Then it was on with the epoxy. These are the new runner pieces with some spacers that were used to make sure that the slot itself is at least the correct size.

It took some time but this is the result. For this part of the repairs I used the fast hardener as the temperature is reduced, rather than the slow hardener I’ve been using to give me a longer pot life.

The new runners and the old were coated with neat epoxy and then a layer of thickened epoxy was spread on one side of the new runners. These were put into position with the spacers and clamped. The excess epoxy was scrapped off as much as possible.

The spacers were removed and a thin mixing stick with a square end was used to scrape any epoxy squeeze out from inside the slot. The new runner piece is bigger than required which will allow me to use a plane to trim back the wood to match the old runners. At least that is the idea.

I made enough epoxy to coat several other areas on the coachroof where bare wood was showing.

Peel ply tape covered the layer of epoxy so that I can easily remove the amine blush, a waxy layer that forms on the surface of this epoxy when curing.

Now I shall wait until the epoxy is cured before carrying on.

Time for a cup of tea.

2026-01-10 – Companionway Hatch & Runners

The forecast for next Monday is 11º C which means that it will be a good day to get some of the exterior glue and epoxy work done. In order to do that I have to prepare the work such that what remains on Monday is just the glue and epoxy work, no preparation.

This is the port companionway hatch runner and the grove is not in good shape, having been worn down over the years.

The part that needs to be fixed it the top part of the runner as it is this that prevents the hatch itself from coming off.

The runner needs attention along its entire length and the same is the case for the other side. To fix this the top “overhang” needs to be cut away, the wood and groove cleaned up and a new piece glued in place.

I started on the starboard side, just because, and just worked on a short section to prove the method. I tried using a plane to start with, but this was going to take too long. In the end I clamped a straight edge along the top of the runner where the cut needed to be made and scored the wood deeply with a utility knife. Then I used the multi-tool to cut down from the top following the scored line.

This proved to be quite successful, as you can see, and it did not take long to get the top “overhang” removed.

The groove itself was, in parts, completely blocked with multiple layers of varnish and I had to resort to using a chisel to remove them.

The result is fairly good and I cleaned up the rest using the block plane being careful not to remove any of the bottom of the groove.

The next task is to do the same thing to the port side.

This doesn’t take that long since I have already done the other side and know what to do this time.

I could have spent a lot of time getting both sides really smooth and vertical, but the replacement parts will be fixed using thickened epoxy so there is little point is spending too much time that will end up being wasted effort.

Next the replacements needs to be made and for this I used some left over Sapele from the Naiad rebuild that just happens to be the correct width. The pieces are too short and will need to be glued into longer pieces.

I cut them all to the correct height and took them into the workroom where it is warmer. Useful since my hands were cold again so I could warm them up as well as glueing the new pieces together.

As always with end grain glue ups, I coated the grain with an initial coat of glue and set the pieces aside for 15-20 minutes to let the glue seep into the grain.

After this time, more glue was applied to the pieces and glued together on a former, to keep them straight,

Each joint has a piece of baking paper put between the parts that must not be glued, then the whole thing is put over the Rayburn where it is hot and left for the glue to harden.

I had some time left over before it got too dark to work, so I attacked the port bulkhead that reinforces the canterplate case.

The work of about ten minutes with the multitool and the bulkhead is cut away. If I am very careful, this piece will be epoxied back into position once the centerplate case has been rebuilt. The starboard side will be rebuilt to match the port side as it was originally, rather than the cut down version.

Just before the light faded I put a second coat of varnish on the clock & barometer board and called it a day.

Time for a cup of tea.

2026-01-03 – More Things That Need Fixing

Every time I go into Shoal Waters’ cabin I wince at seeing the clock. It is a brass clock that has lost its clock bit, leaving just the outer case. A modern, plastic clock had been put into the case and the gap between the case and the clock filled with some type of foam strip.

Here it is. It’s quite good fix especially if you don’t want to spend the money on a new one, and they are expensive, but to me, it just looks wrong.

So, I’ve ordered a new brass clock.

Now with a forecast high of zero degrees Celsius today, it’s just 1 Celsius according to my weather station, I didn’t expect to get any work done today, but I decided that I could remove the old brass clock as it’s inside the cabin and therefore would not be so cold. The wind chill is pretty fierce outside today.

So I did.

And here is the result. the camera is wonky as I’m trying to hold a light to illuminate the area and hold the camera steady enough to take a non-blurry photo whilst also half kneeling in a small space.

But whilst I was attempting to take this photo I noticed that one of the bolts that holds the tabernacle to the boat is rusted. You can see it right next to the barometer to the right which has a lot of verdigris on the outside which is what rust on brass is called. This is not good. The bolts are stainless and rust on stainless steel is never a good sign. I’ll also have to remove the barometer and clean that up although the verdigris on the small screws holding it to the wood may not come loose. Still, I’ll cross that bridge when I come to it.

I had a look at the tabernacle from the outside since water was obviously getting in from outside and that meant that the bolt was no longer sealed.

Sure enough, the bolt is no longer tightened down properly, the tabernacle has lifted a little and the sealant has cracked. With rapidly numbing fingers I got out the requisite tools, removed the bolts and the tabernacle and took them into the workshop.

As you can see from above, the severely rusted bolt immediately sheared off the first time I tried to loosen the nut with a spanner. The bolt was rusty just about all the way through. I suspect therefore, that the bolt was originally bolted down tightly but the seal cracked over time and allowed the water in, which in turn caused the bolt to rust and that allowed the tabernacle and thus the bolt to lift making the issue worse. Ferrous Oxide, also known as rust has a volume that is ten times larger than the non-rusted steel and that is how the bolt was allowed to “stretch”.

The tabernacle itself is in good condition with a little surface discolouration. I’ll have to replace the bolts and I’ll make sure that they are marine grade 316, also known as A4, to try and prevent this from happening again. Normally you would only use 304 (or A2) stainless steel above the waterline, and the 316 grade below the waterline, but since these bolts are stainless but still rusting, I’ll pay the extra cost for the 316 grade.

I’ll also need to check the decking under the plywood and the beam underneath for rot and deal with that before I replace the bolts.

At this point I had to pack everything up and go back indoors. My fingers were totally numb and working with tools and numb fingers is never a good idea. I lasted just 30 minutes. The cold tools and the wind chill were too much. The tabernacle bolts had to be removed from the outside and the wind is from the North-West, straight into the Hay Barn.

Now I have to go through the slightly uncomfortable process of warming up very cold fingers.

Time for a cup of tea.

Once my fingers had warmed up I decided to try a few other short jobs. the first was to clear the old sealant from the deck where the tabernacle stands.

This is the state of the deck before I started work…

… and here is the after view. A lot of the deck under the tabernacle seems to be epoxy and I recall Charles writing in “Sailing Just for Fun” p37 footnote:

In May 1997 while Shoal Waters was on a trailer the mast hit an obstruction and ripped the tabernacle out of the foredeck. It was quickly and easily repaired.

I presume that the epoxy I found is part of that repair. I’ll have to clean up more of the remaining sealant and then I’ll probably skim that area with thickened epoxy to smooth it all off and to give it some more rigidity.

You’ll note the piece of Mahogany at the front of the cleaned up area, This is to tip the tabernacle aft a little to compensate for the slope of the foredeck in that area. If this were not done, when the mast was fully upright in the tabernacle, it would lean forward due to the slope.

Having done that and still being able to feel my fingers I moved into the cabin and set about removing the barameter.

The exterior of the barometer has been coated with varnish over the years but this has not prevented the retaining screws from degrading to the point that they could not be unscrewed. I resorted to slipping a flat-bladed screwdriver under the lip and levering the instrument off. It released very easily since the screw threads were now virtually non-existent and thus not gripping the wood any longer. It seemed that the barometer stayed in place due to the varnish than the retaining screws.

With the barometer removed I can now easily sand and revarnish the instrument board. It will also make it easier to replace the one bolt that almost touches the barometer.

I did take the opportunity to give the wood around the bolt holes a good poke with a sharp tool and found that the wood seems to be free from soft spots although there is quite a bit of salt residue that will need to be sanded away before the tabernacle is replaced. I also noted that the piece of wood upon which the clock and barometer were mounted fouls the two aftmost bolt holes and has been partially cut away to allow the bolts to protrude. However, the one on the starboard side hasn’t been removed enough causing the bolt to be canted slightly aft and this will have contributed to the leak,

As part of the work in refitting the bolts, I shall cut the backing board away completely around these holes such that the bolts can sit perpendicular to the deck.

The barometer seems to be in fairly good condition. It is partially covered in old varnish and part of the retaining lips has turned to copper, the zinc having been leached away by the water..

It is quite clear which is the upper side from the level of verdigris on the back and you can clearly see the old varnish and the three screws.

Here it is again but cleaned up a little. You can see the pinkish hue on the rim where the brass has turned to copper.

I don’t know if the barometer still operates, so having cleaned it up a bit more I took it inside to my office where I have the repeater for my weather station. I used the set screw in the back of the instrument to set it to the same value as the pressure reading on the station and I’ll keep an eye on it over the next few days to see if it tracks the same pressure.

If it does then I’ll replace it, if not then it will be retired and a new one purchased and installed in its place. Assuming that I can find one that small in solid brass, that is.

Time for a cup of tea.

2026-01-01 – Why did the Centerplate Case Disintegrate?

The reason why the centerplate case sides disintegrated is a question that has occupied my mind regularly since I first discovered the issue back at the beginning of August and I have come up with some wild ideas as well as a few prosaic ones. However, bearing in mind Occam’s Razor, I believe that the most likely reason is as follows:

Since the pivot bolt and thus the hole through which it runs, is underwater when the boat is floating, the bolt must be well tightened up in order to prevent the water from seeping through the hole and into the bilges. However, the sides of the case are only 8mm plywood with a stiffening piece on the outside of the case.

You can see the stiffening piece on the side of the new case above.

If the pivot bolt is tightened too much the sides of the case will bend inwards excessively and a spacer is inserted between the sides to prevent this.

The is the spacer. the plate pivots on the centre section and the two wide ends press against the sides of the case. I presume that the spacer was a good fit but not a tight fit and tightening up the pivot bolt did bend the sides of the case in just a little and this made the joint between the case and the spaces very tight, tight enough to stop water from getting into the hole.

So far, so good. Now Charles Stock reinforced the sides of the centerplate case when he was building Shoal Waters and my conjecture is that this added so much stiffness to the sides of the case that when the pivot bolt was tightened enough to stop the water getting into the boat, during the occasional pivot bolt inspection, it prevented the sides of the case from bending inwards slightly and forming a good seal with the spacer. This in turn allowed water to seep into the end grain exposed by the hole in the plywood and over the decades water had been slowly seeping into the original layer of plywood on both sides, eventually causing the disintegration we see today.

This explanation is contingent upon two things only. Firstly that the end grain exposed by hole through the original plywood was not sealed and secondly, the additional stiffness of the case sides prevented a good seal being made between the spacer and the case sides.

All the other explanations I have come up with require more than two contingencies.

Alas, we shall never know if I am right but the mechanism is valid and a concern for the new centerplate sides. To prevent this from happening again is simple, just seal the end grain in the hole.

Simple in concept, but not so simple to achieve reliably, especially when the hole is only 10 mm in diameter and is nearly 40 mm deep. To completely seal the end grain I decided to use a technique that I used for all such holes in Naiad.

I drilled out the hole to 13 mm and placed tape across both ends. The top end was cut to open the hole as seen above.

Epoxy thickened with low-density filler was poured into the hole to completely fill it and the epoxy allowed to cure. The epoxy was about the consistency of thick double-cream but liquid enough to easily soak into the sides of the hole, from top to bottom. Once this has completely cured I will sand the epoxy flat with the wood and drill a 10 mm hole through the epoxy which will leave 1.5 mm of epoxy between the hole and the plywood and the hole will be completely sealed.

Overkill?

Certainly, perhaps even overkill to the overkill, but quick and easy to do, so why not?

Time for a cup of tea.

The result after the epoxy has cured and the hole drilled.

Time for a cup of tea.