
I elected to make a start on the rewiring of Shoal Waters since I will be needing a light in the cabin in the evenings and that seemed to be a good enough reason to start on the electrics. Now I have to say that I had wondered about the comments that the surveyor made about the electrics, and I quote:
The wiring loom is untidy, poorly routed and loosely cable-tied.
I couldn’t see what he meant by this. The cables in the cabin were neatly run and held in place by cable clips even where the cables ran under the bridge deck and not in view.
Then I looked in the battery compartment and then it became clear. I forgot to take a photo of this, so I’ll try to describe it. Originally, a single cable ran from the battery to the switch box

You can see the switch box in this photo just above the radiant heater. Now, the battery cable was attached to the battery with large crocodile clips. All the services ran from the switch box. The cables to the nav lights, including the stern light, and the original cabin light you can see above the switch box. The switch for this light is mounted to the underside of the cabin roof just forward of the hatch making it easy to turn on when opening the hatch in the dark or when sitting in the cockpit. No fiddling around trying to work out which switch was the correct one on the switch box.
Some time later, Charles added a small 5W solar panel to keep the battery charged and the cables for this were neatly run with cable clips into the battery box. This cable also ended with large crocodile clips and these were clipped to the first set of clips on the battery.
Later still, a three-port 12v lighter socket bank was added and this had large crocodile clips that were then clipped to the ones for the solar panel. The excess cable was wound around one of the other cables to keep it out of the way.
So, the battery locker had three sets of large crocodile clips stacked one on top of the other and the cables fixed together with cable ties to prevent them from getting tangled up and pulling the clips loose.
It was a mess. Known in the trade as rat’s or bird’s nest wiring.
Now, the life of a solar panel is around 10-15 years for one like this and that’s for a modern one. Some of the very latest ones may last 25-30 years but this panel is not that good and is already around 20 years old. The surface is yellowed and starting to crack and it looks like there has been some water ingress through the bolt and screw holes holding it to the cabin top. So it will be replaced.
Now this is where it gets a little tricky. A 5W panel may have been sufficient when first installed before the days of electronic navigation aids, mobile phones, drones, video camera and so on, but these days it’s just not going to be enough if you spend a few days aboard.
A quick electronics lesson. Every few seconds your phone sends out a signal effectively saying ‘This is me’ and the nearest cell tower picks up this signal and relays that back to the service centre so that when a call is made to your phone, the service knows where the phone is and can send the call to the correct cell tower. So, even when you are not using it, the phone is transmitting and using battery power. If there is a good signal to the tower, then the phone only uses a small amount of power, but if the signal is poor, only one bar for example, then the phone transmits at a higher power to reach the tower. This is why your phone seems to run out of battery power much more quickly when the reception is poor.
The reception in the Blackwater River is poor just about everywhere and so a phone, when aboard, needs recharging more often than when ashore.
Anyway, I decided on a 50W flexible solar panel since I can get one with that power rating that will fit onto the cabin top.
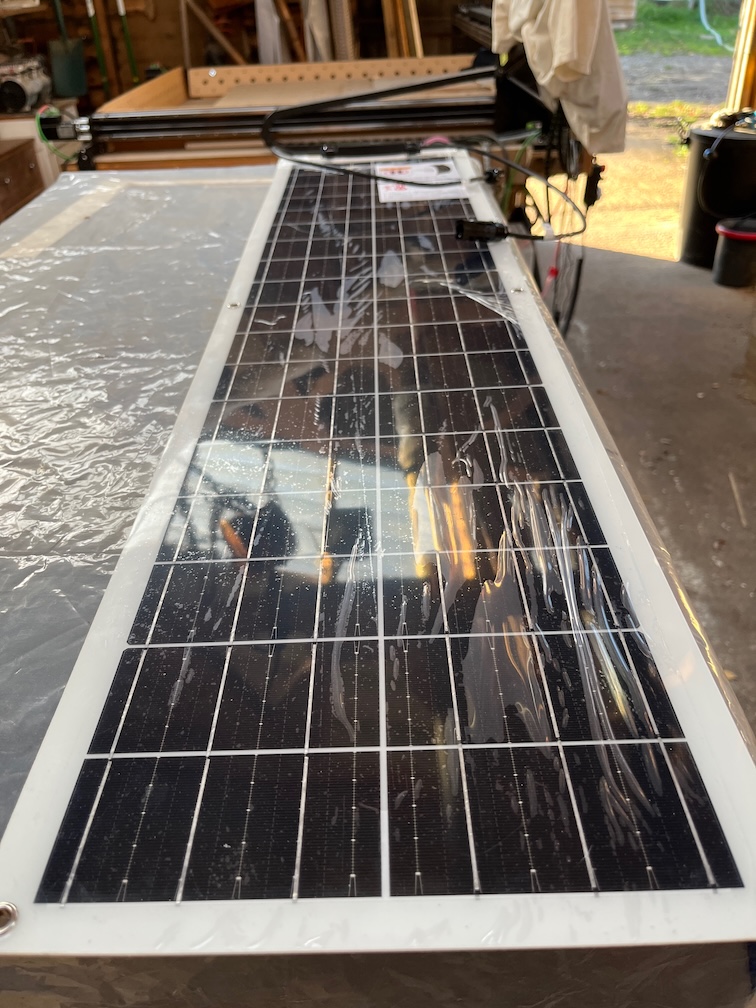
It looks quite large in the photo, but it will easily fit onto the cabin top where the old one was, just extending a lot further forward.

Here’s the old panel removed and you can see the yellowing of the panel which reduces its efficiency greatly. Also note the crocodile clips.
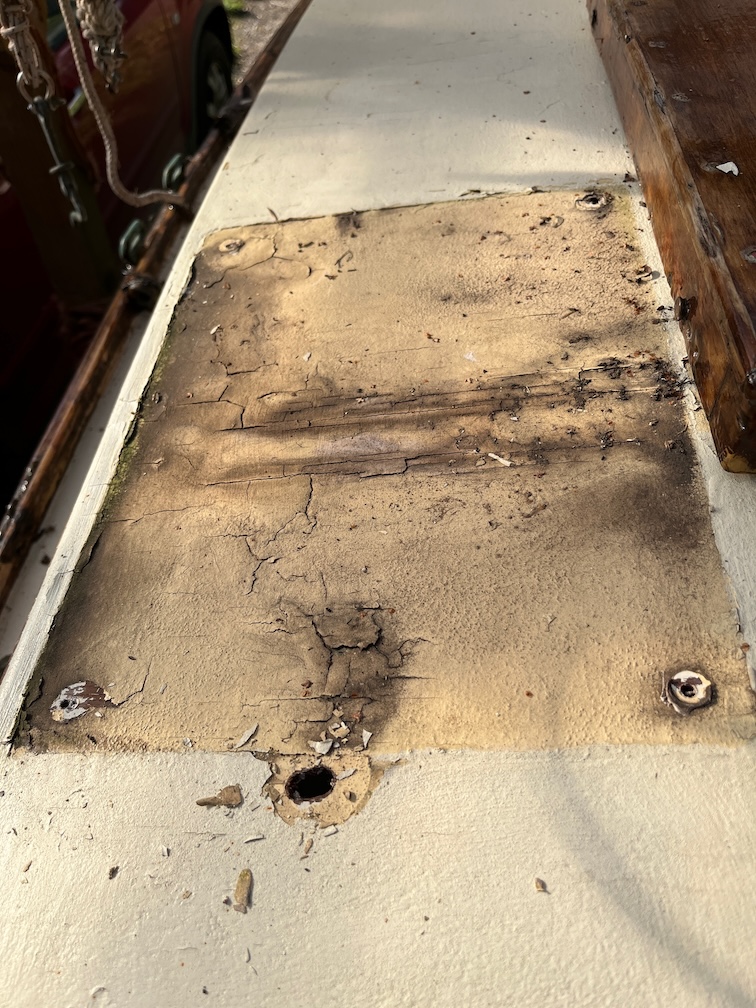
The paint under the panel is old and cracked and I’ll have to check the state of the plywood of the cabin top. There might be some rot or water damage there.

This is the 12V lighter extension cable complete with crocodile clips.
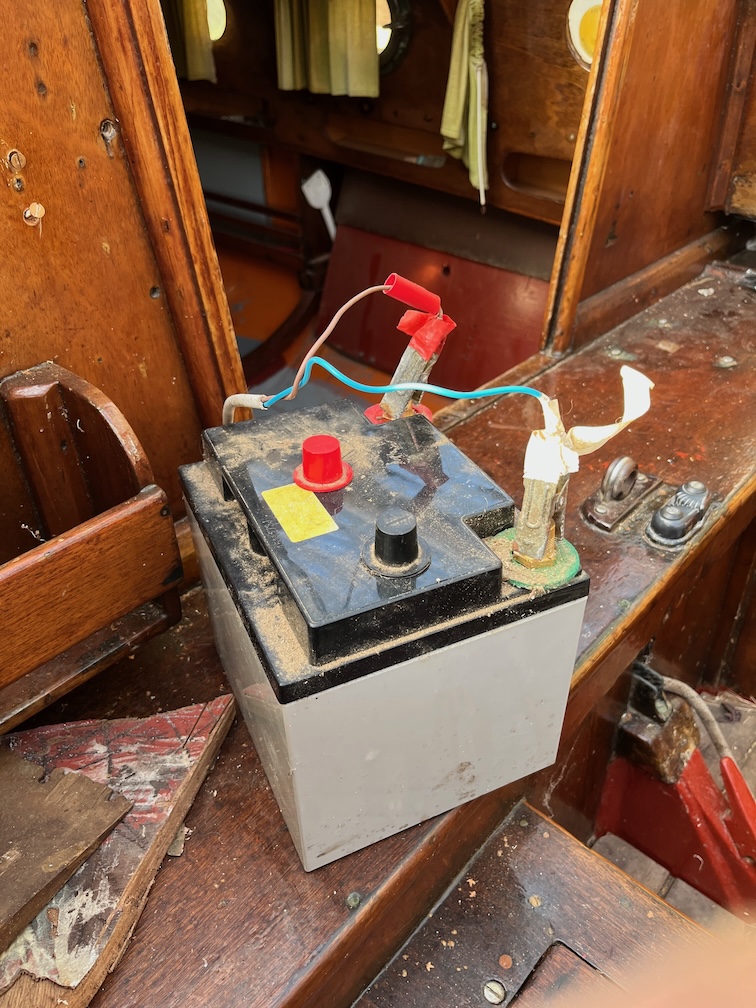
Finally the battery leads again with crocodile clips !! These one will remain, the rest will be ditched.
Now, it is inadvisable to attach a 50W solar panel directly to a battery as you run the risk of overcharging the battery, also known as cooking it, and damaging it over time. Instead you should use a charge controller.
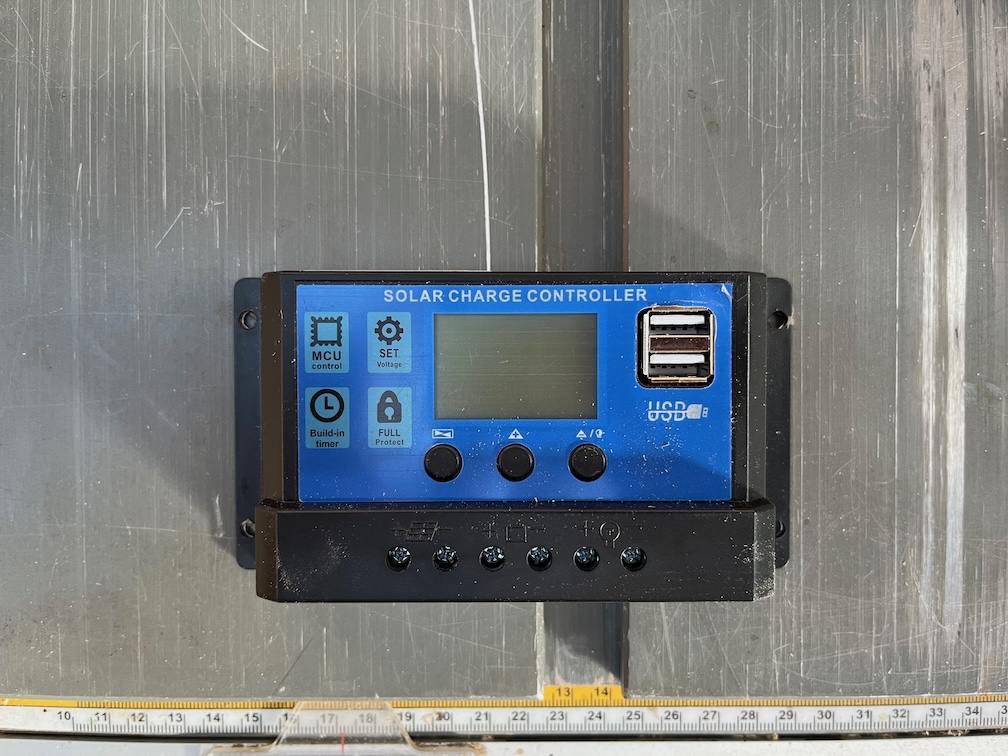
Like this. Not only does this monitor the battery state but prevents the solar panel from overcharging the battery. It also has two USB A sockets for charging devices.
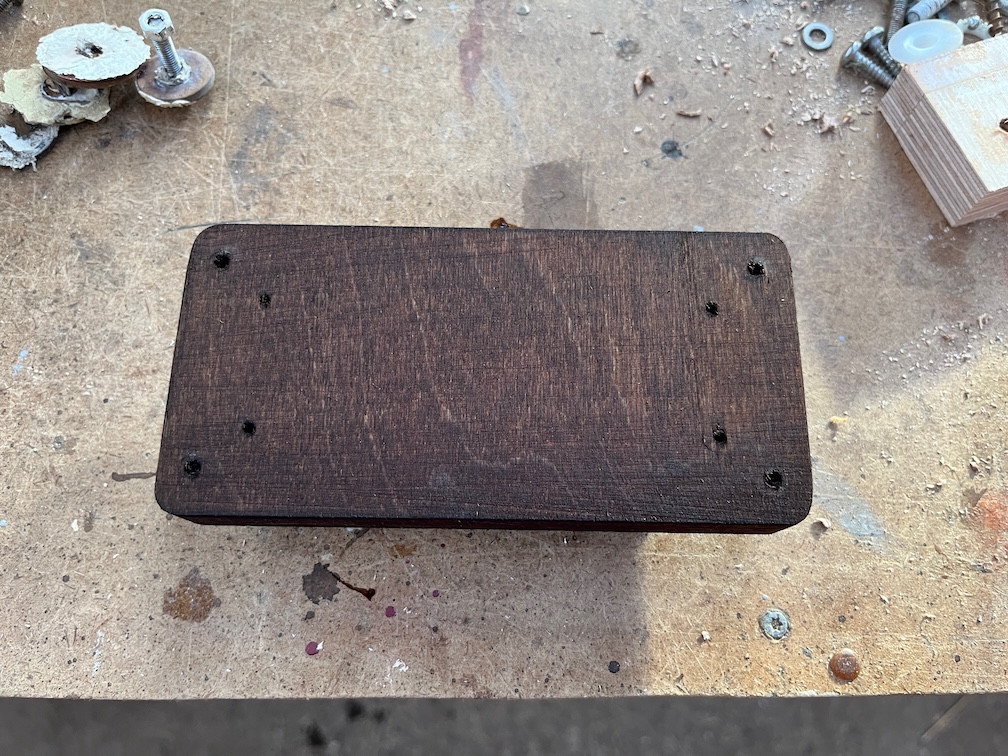
The aft cabin upstand is too thin to screw onto directly, so I’ve made a mounting block. This will be screwed to the inside of the cabin upstand from the outside and allow the charge controller to be screwed to the block on the inside without the points of the screws protruding out anywhere. This is made from Baltic Birch and since it is normally a very light colour I’m staining it before applying varnish to make it fit in with the rest of the cabin.
Currently, the lighting in Shoal Waters is very limited.
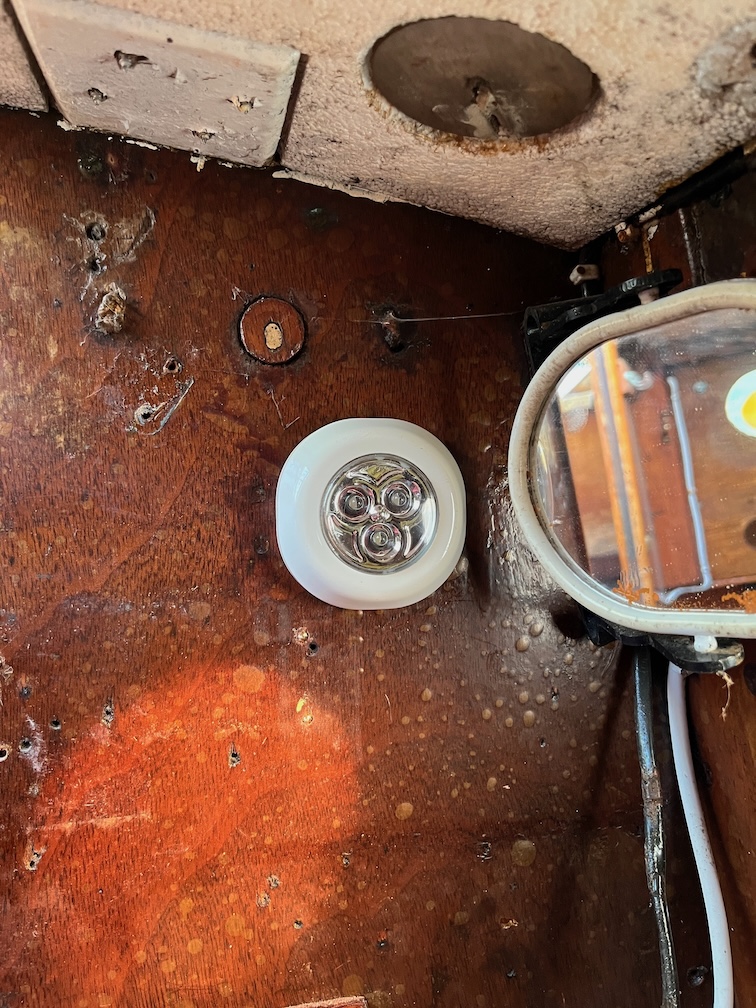
This is it. Powered by three AAA batteries it is the lighting for the entire interior of the boat. If you want any more than this, you need to use a torch. You press the clear plastic lens in to turn it on and again to turn it off. I don’t like this, at least not for the main lighting, it’s too limited and you have to keep at least three spare AAA batteries to make sure you don’t run out of power. I may well keep it as a backup, but I’ll have to try it out in the dark first to see how well it lights up the cabin.
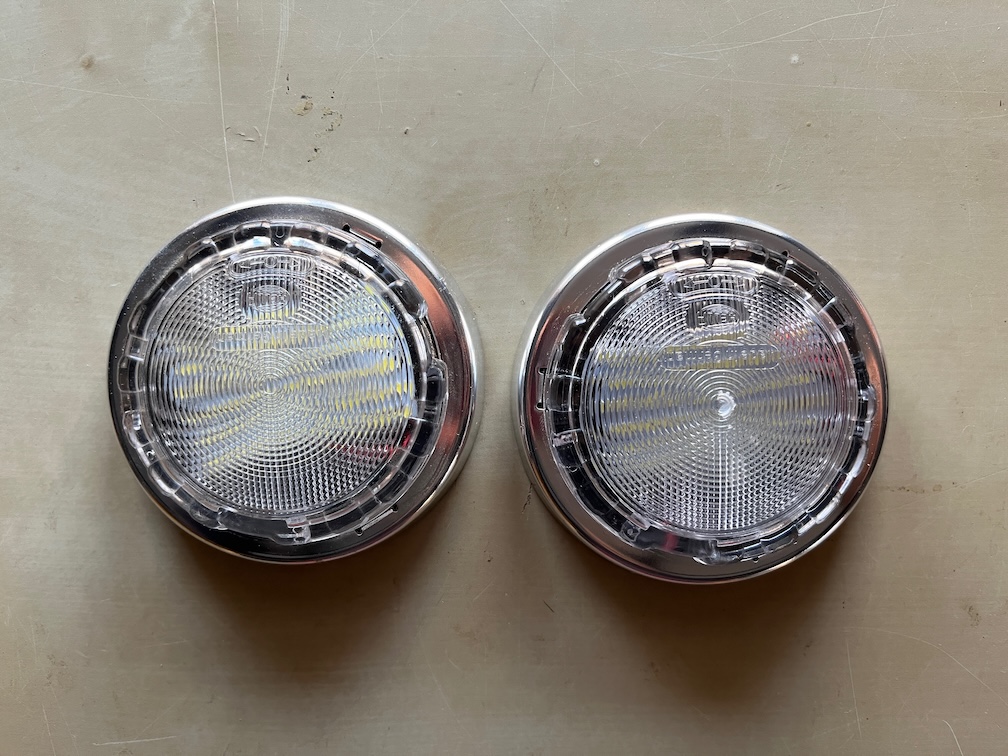
Instead I shall install these. One amidships in line with the galley so that whatever is cooking is illuminated and the other forward of the mast so that you can get to it when in bed. You rotate the plastic lens clockwise to turn the light on and back again for off.
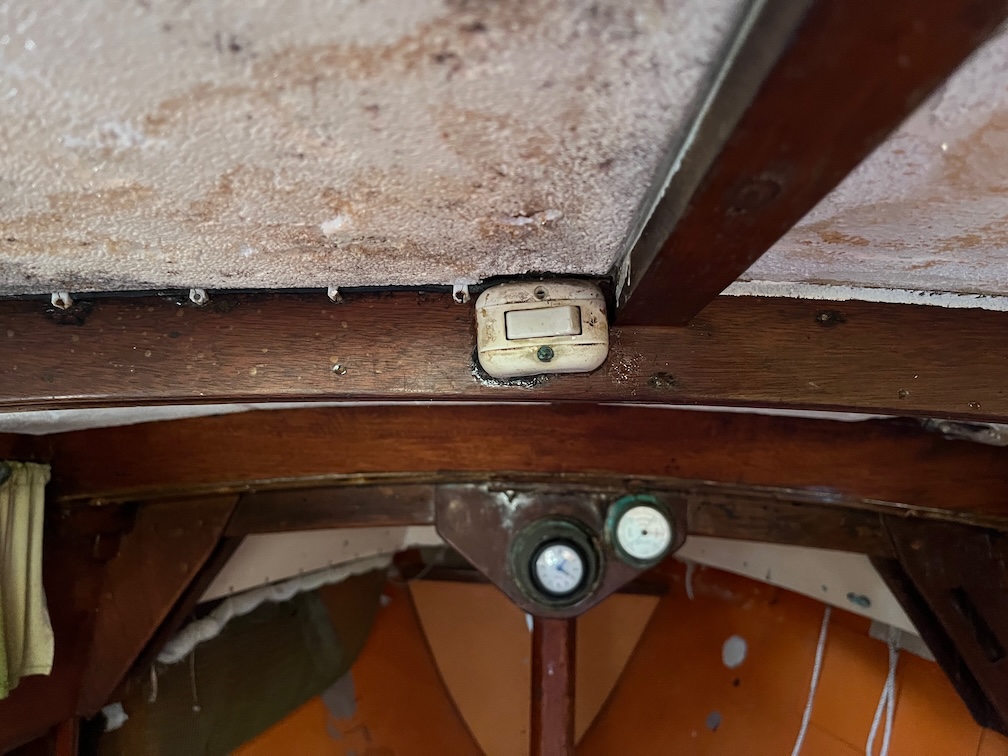
This is the original light switch. I don’t know if it still works, but if it does, I may well use to do turn a red light on and off for night sailing. To be decided. I don’t have a red light but I do have all the parts to make one.
The next thing to look at is the switch box.
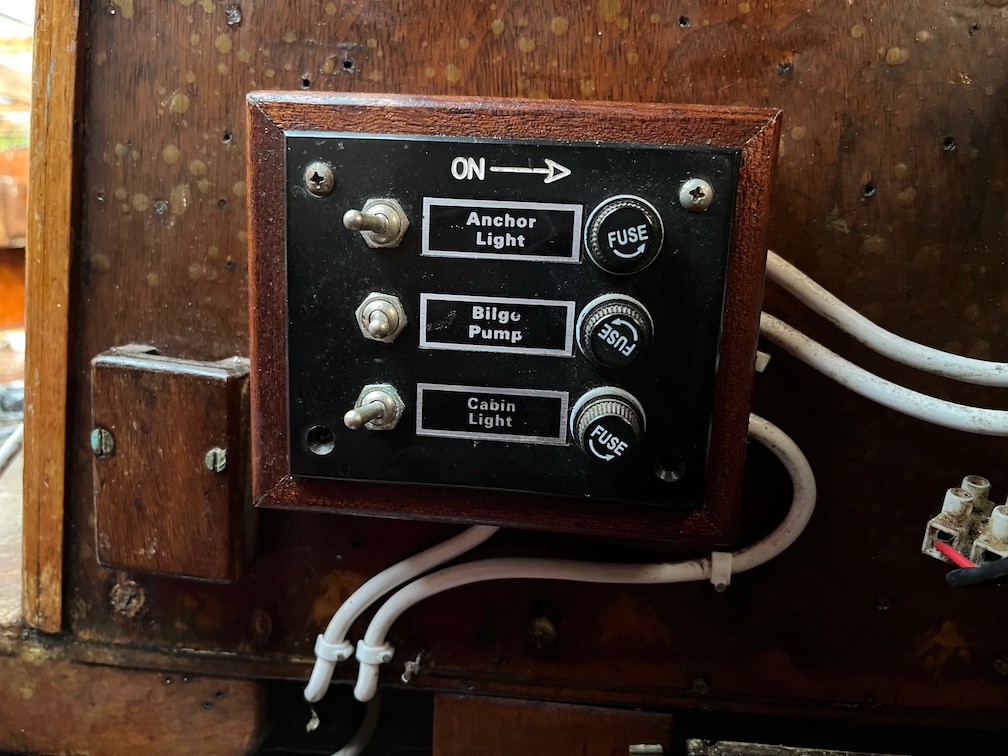
Looks quite nice, doesn’t it?
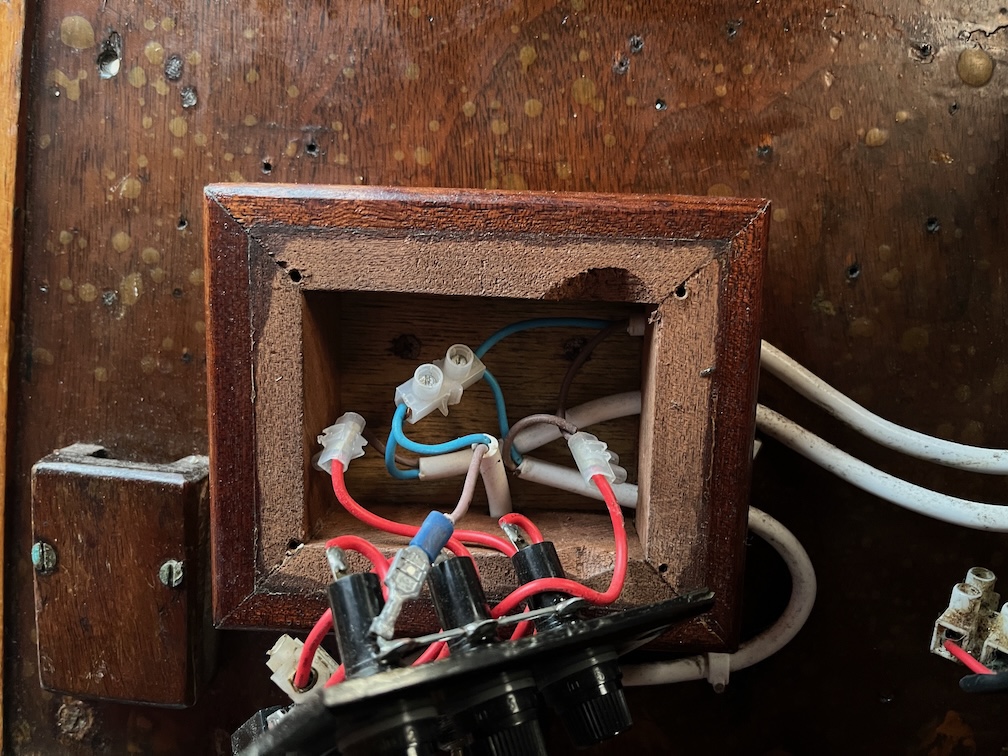
Until you open it up. then, there is a problem. Well, two. Firstly the inner recess is far too small and secondly, it’s a bit of a rat’s nest in there.
So, I took it out of the boat…
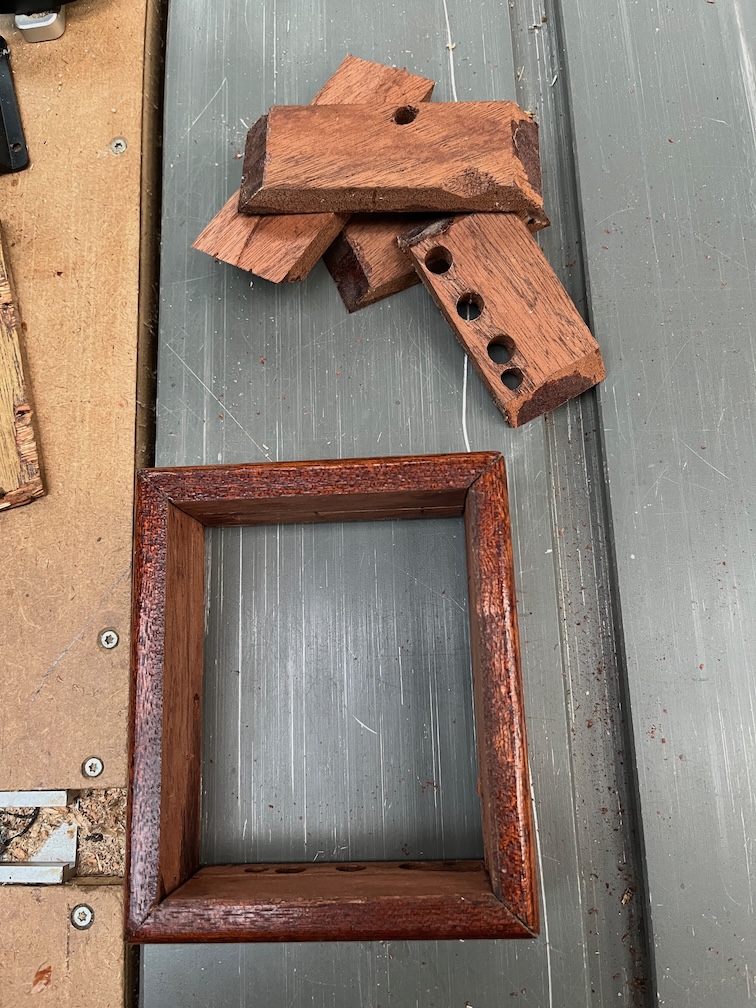
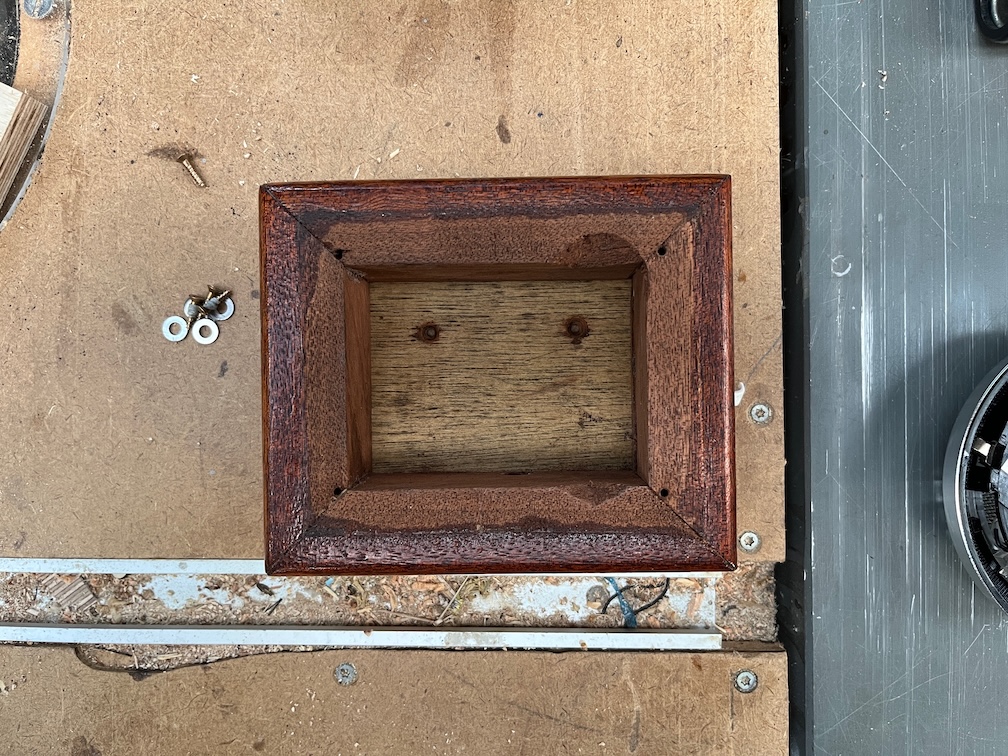
..disassembled it and cut the side walls down so that they are about half the thickness that they were. Now, why did I do that? Firstly, with more space inside it will be easier to add or change the wiring. Secondly, I want to put in a busbar for the negative from the battery.

Like this. If I can fit both in I will but the main thing is to get the black one in. That will tidy up the wiring considerably.
So, there’s a lot to be getting on with. I’ve made a good start.
Time for a cup of tea.