
With the weather forecast for the next few days indicating that the temperature is going to be 10º C or above, I have a shed load of things to get done on Shoal Waters. Here’s the list in no particular order:
- Sand the transom and the graving pieces.
- Stain the transom & graving pieces.
- Epoxy in the three graving pieces.
- Dry fit the centerplate case sides & adjust where required.
- Fit the case sides.
- Cut back the aft deck to good wood.
- Epoxy glue in plywood to repair the aft deck.
- Fit the through deck fitting for the aft navigation light.
- Laminate a new rubbing strake for the top of the transom.
- Epoxy glue the backing pad on the transom that was cut away for access.
- Carve ‘Shoal Waters’ into the old name plate.
- Carve ‘Maldon’ on to a new name plate or the existing one. TBD
That is what I can think of right now and it is a fair bit of work to get done in the time I have.
So, after the morning varnish application, during a tea break, I made a cardboard template for the curve of the aft deck.
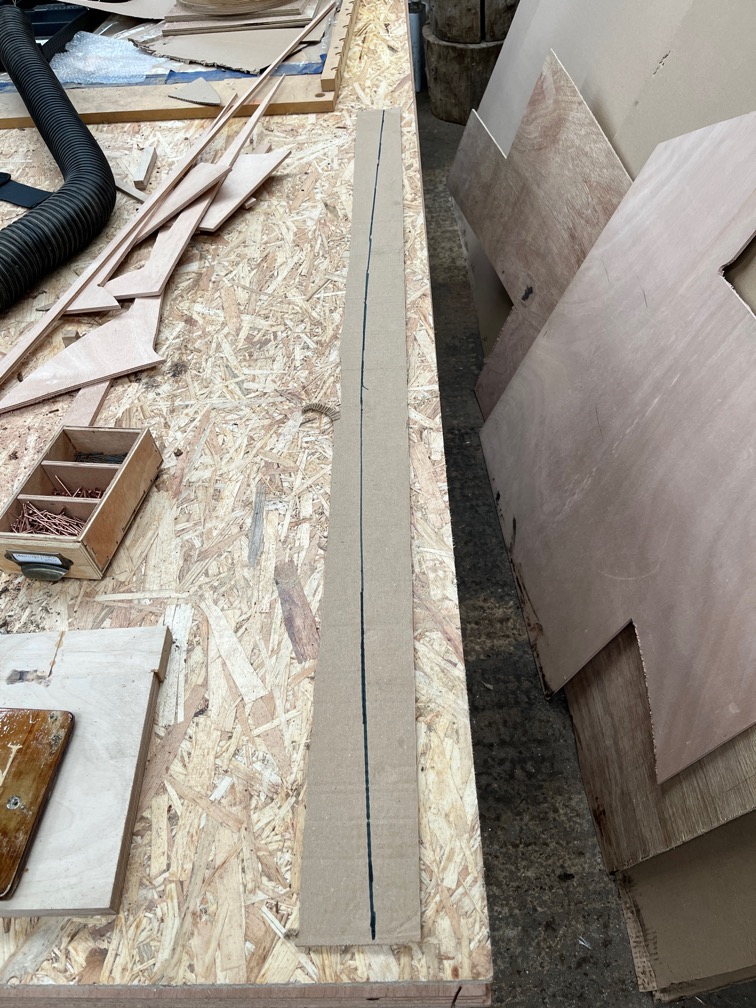
The idea is to laminate a new rubbing strake for the entire width of the transom. The pieces I did not cut off before will be removed and replaced by this new one. The reasoning is that I will need to remove the rubbing strake the next time Shoal Waters is out of the water for maintenance so that I can repair the repair that is giving soft returns. If I make an entire new timber, screw it on with 304 stainless screws, with a non-adhesive sealant between it and the transom and aft deck edge, then I will be able to remove it without damaging it when the time comes to make the repair. It will be alot easier to make the whole thing rather than pieces here and there.
Hence the template. I’ll also use this template to replace the timber on the transom that is under the aft deck on the inside. This was originally a single piece, I think, but has been cut away in sections over the years. Now that the aft lockers have been removed, there is no need for the timber to be in pieces, so I’ll do the same, laminate a new timber as part of the transom repair next time.
The next task was to clear up the work tables again. Lots of odd pieces of wood went either into the burn barrel of into the useful bits of wood box. I need to find somewhere to put all the pieces of wood that I have cut out or otherwise removed from the boat.
I also need to service the CNC Router as it hasn’t been used in two or three months and it needs to be cleaned up, oiled and the calibration checked before I do any work on the name places. I have several other non-boat projects that need the CNC Laser and the CNC Router and I hope to get these done before the temperature drops again.
The staining needs to be done and dry before the epoxy work and since it was 10º C I took my tea break and applied a coat of stain. To show you the difference I’m putting up a set of three photos showing before, after scraping and after staining
I think the stained version is quite good and, unlike the coloured varnish or paint that was applied before, it does not hide the problems. It may lighten a bit once it has dried and I’ll decide then whether to put on another coat.
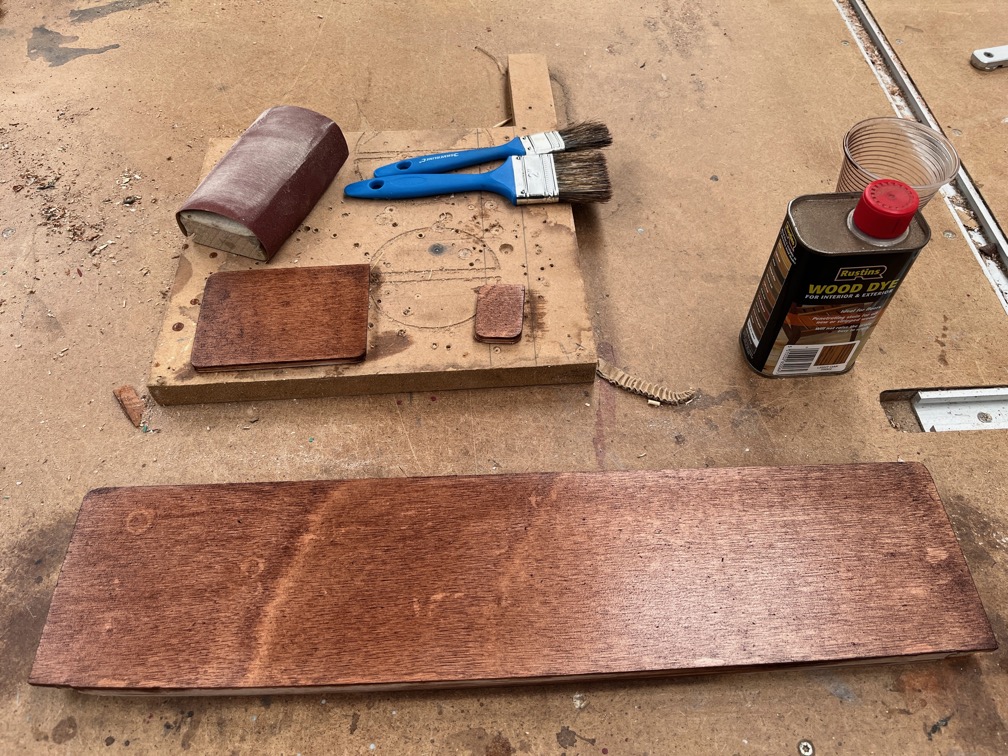
The graving pieces also received a coat of stain.
The reason for staining all these before gluing in the repairs is that if you glue first and then stain, unless you are ultra careful not to get glue or epoxy on the wood you will find that the glue stops the stain from soaking into the wood fibres and you get blotchy bits. Doing it this way prevents that and the glue does not have any problems being applied after the stain.
So far, so good.
Time for a cup of tea.
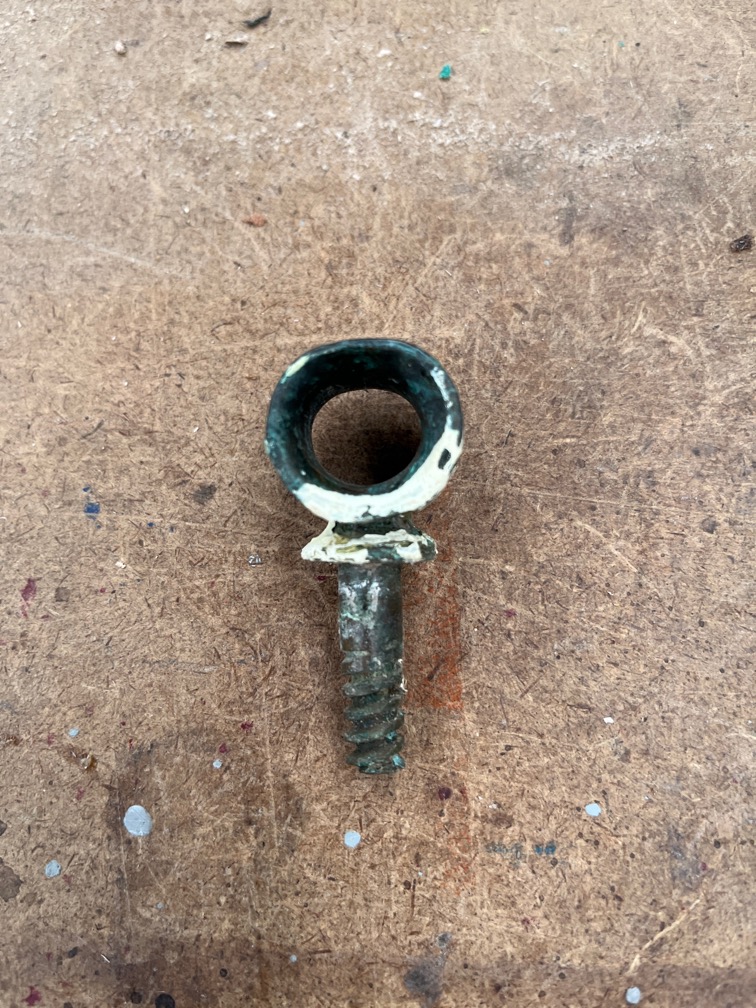
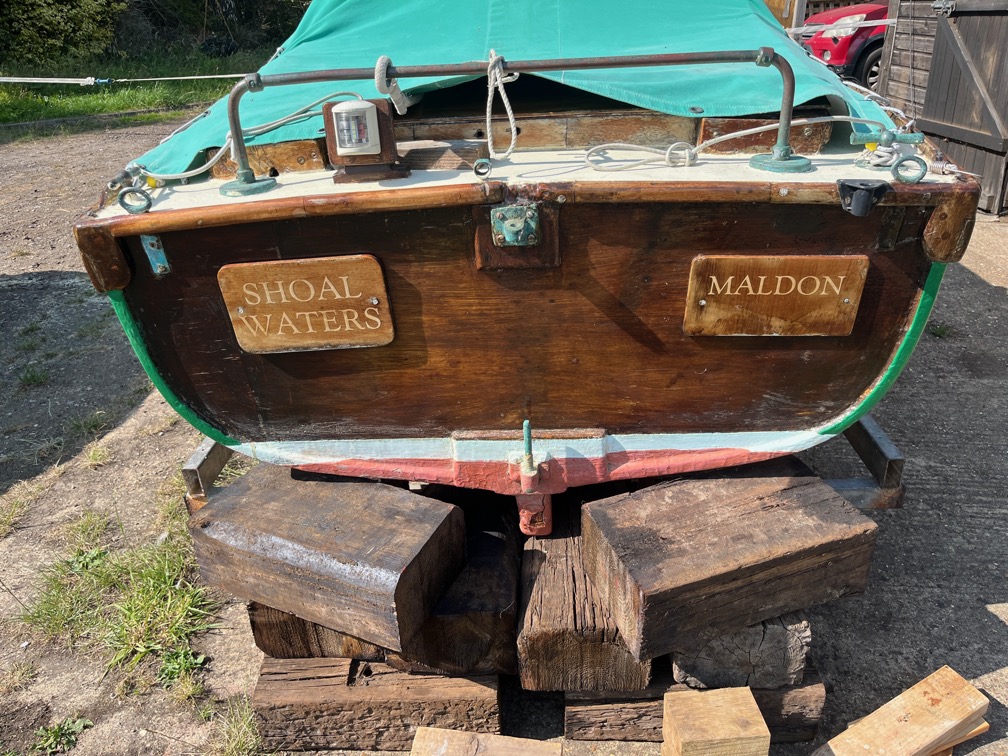
This little fitting was the reason that there was rot or water damage in the transom.
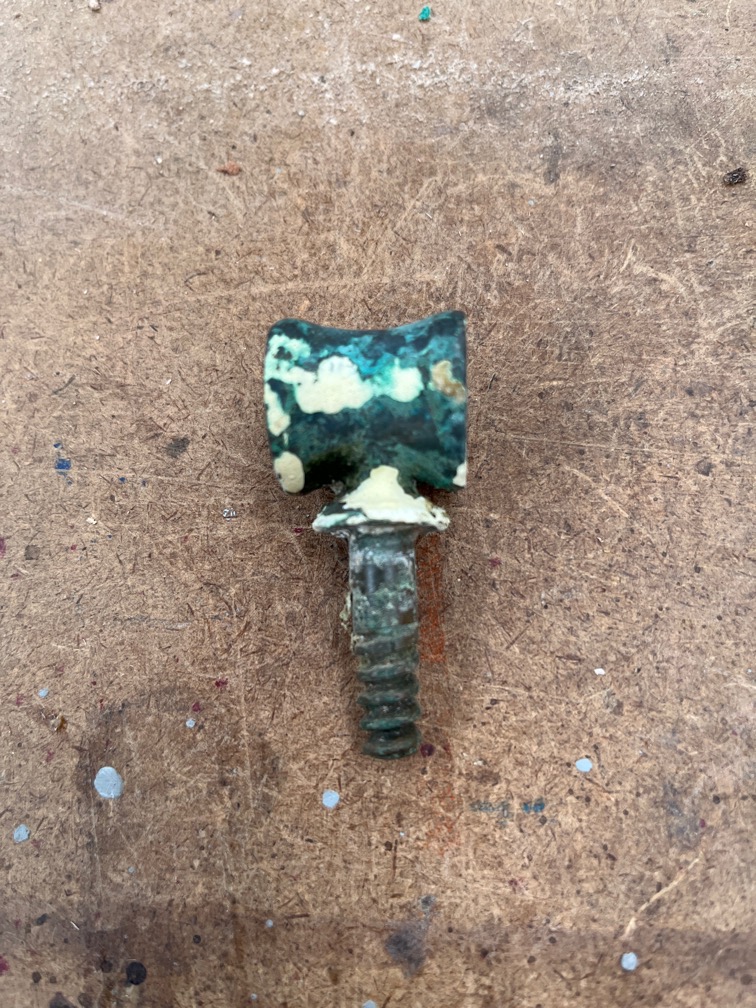
Its purpose was to guide the up and down hauls form the rudder into the cockit.
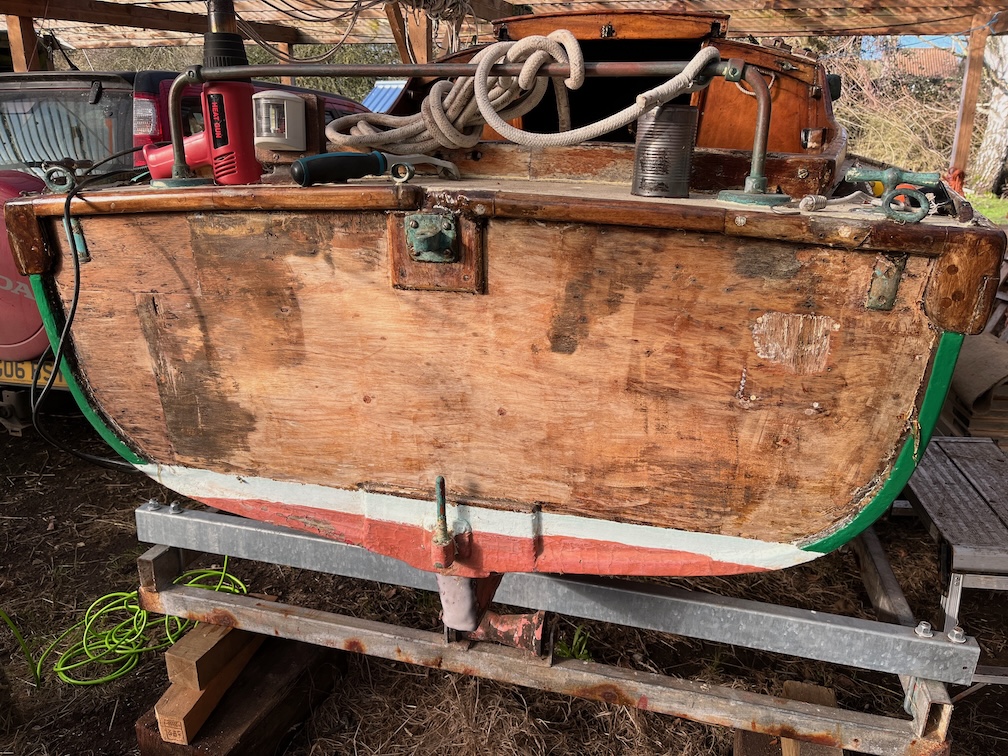
You can see it this photo on the aft deck above and to the left of the gudgeon fitting.
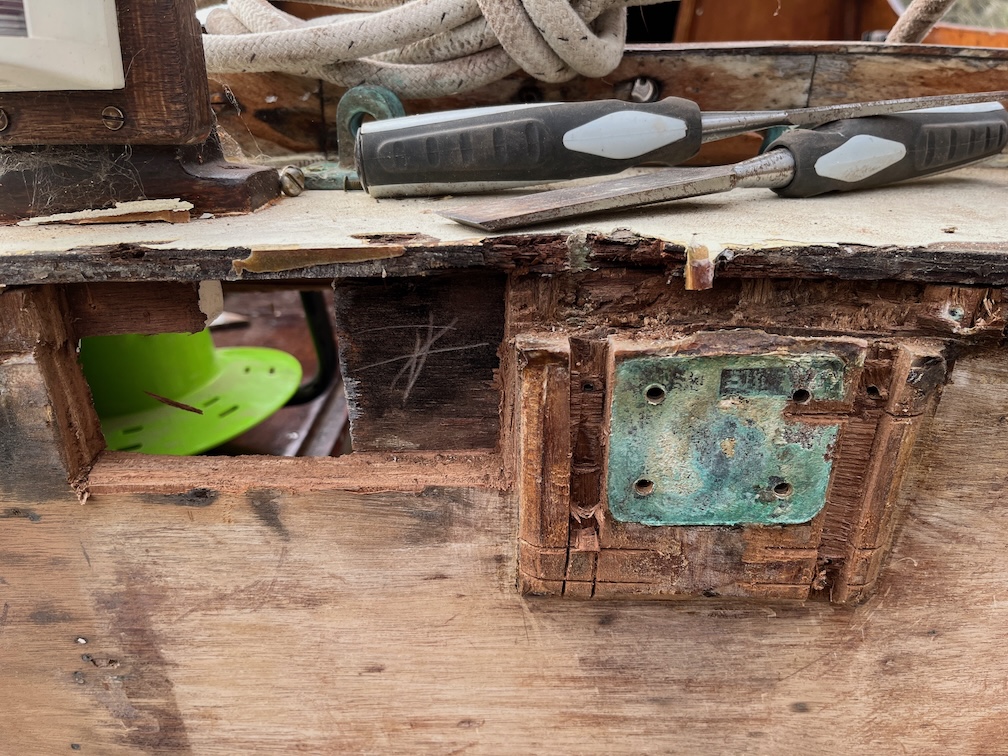
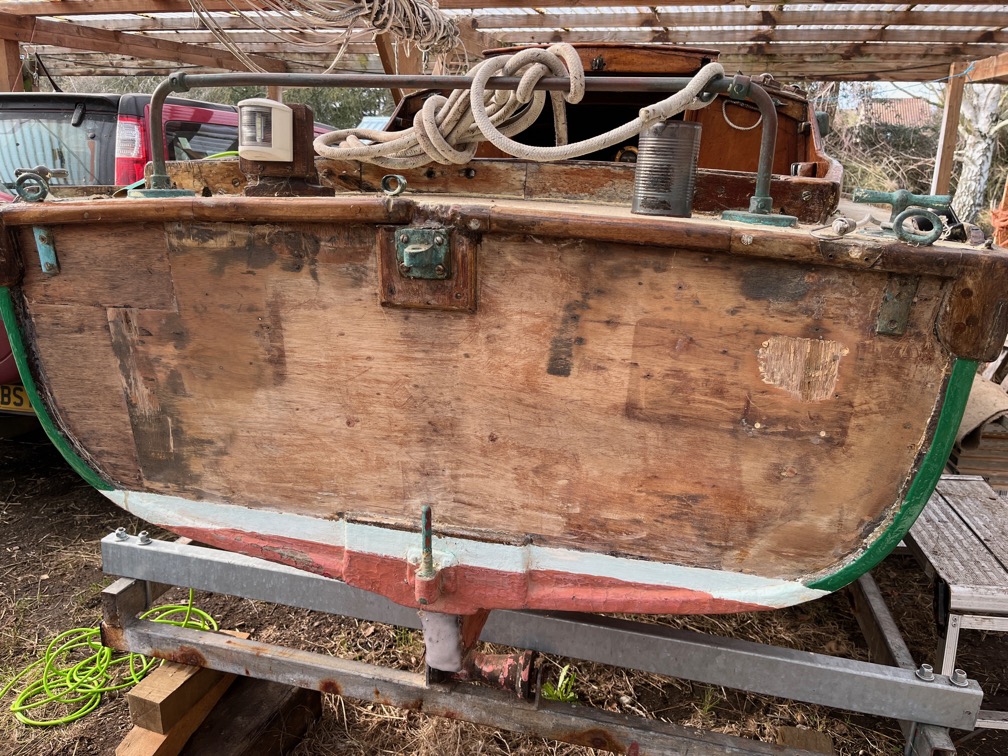
In this photo with the transom opened up, you can see where it was screwed through the deck and into the top of the transom. There is some sealant left in the wood where the screw holes was cut in half.
The problem was that despite the sealant, the two rudder lines pulled in such a way that the fitting was twisted slightly one way and then the other each time the rudder was hauled up or down. Eventually, this broke the watertight seal and allowed water, probably mainly rainwater, to seep into the wood resulting the damage you can see.
I will not be putting this fitting back. If you look in the phot prior to the one above, you can just see a groove in the rubbing strake where the uphaul has worn into the wood over the years.
What I will do instead is to nail a piece of copper over the rubbing strake where the two hauling line pass. That should stop both problems.
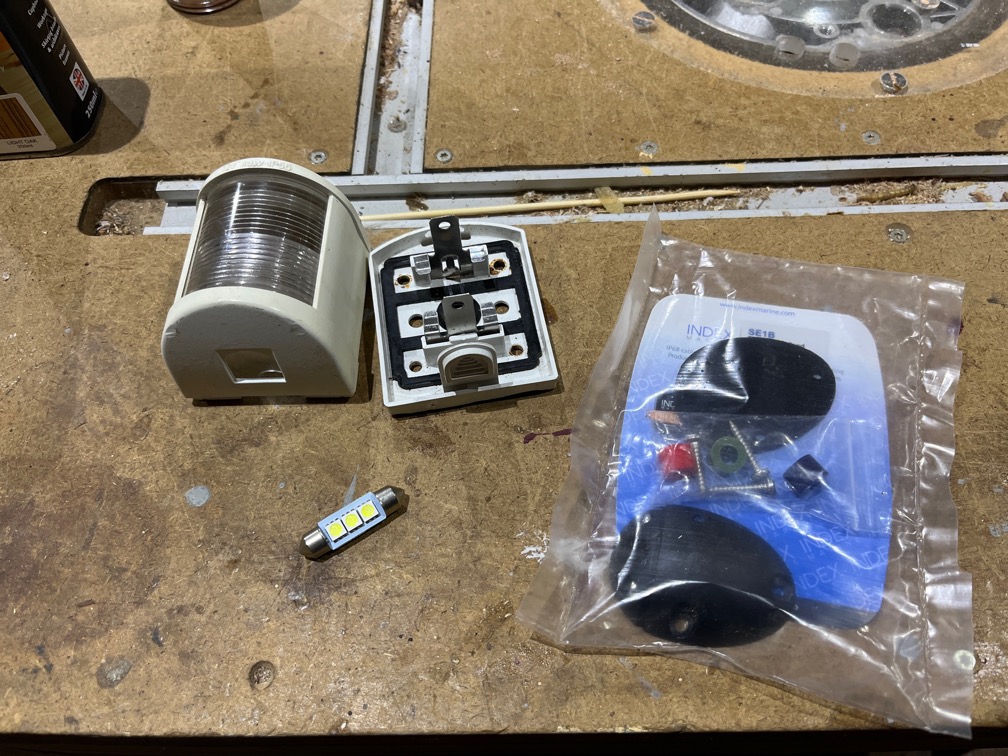
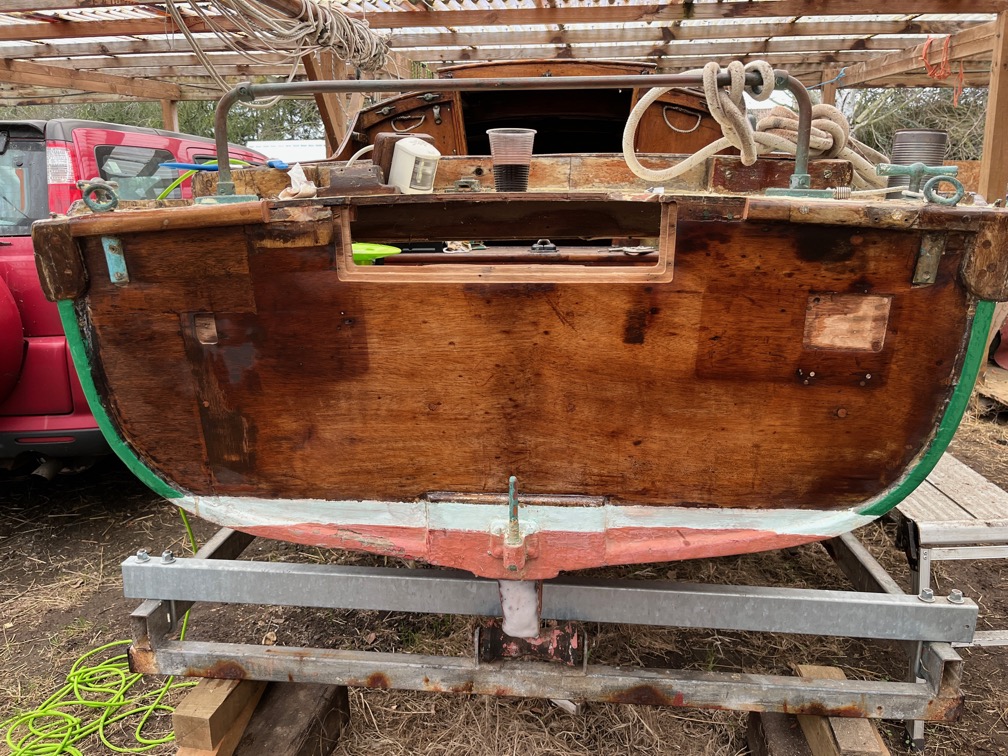
This is another thing that needs a little bit of attention, the aft navigation light. It was screwed to the support with steel (rusted) screws and the cable won’t go through either the hole in the back of the light, nor the hole in the deck, due to the crimp connectors. So, I shall fix both of these issues so that I can put in the deck gland.
Tomorrow !
After looking at the nav light I spent some time checking the CNC Router, cleaning it, oiling the linear bearings and so on. Nothing appears to be wrong, nothing is binding. All good news.
Time for a cup of tea.